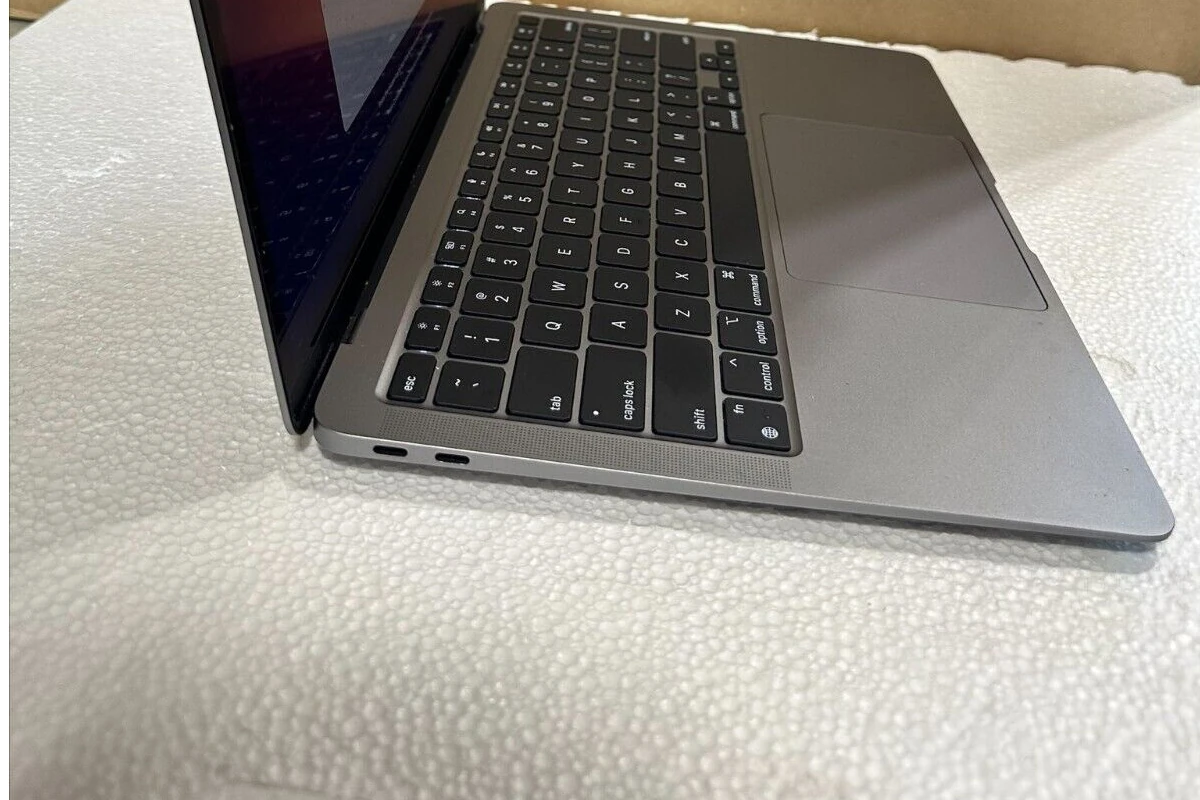
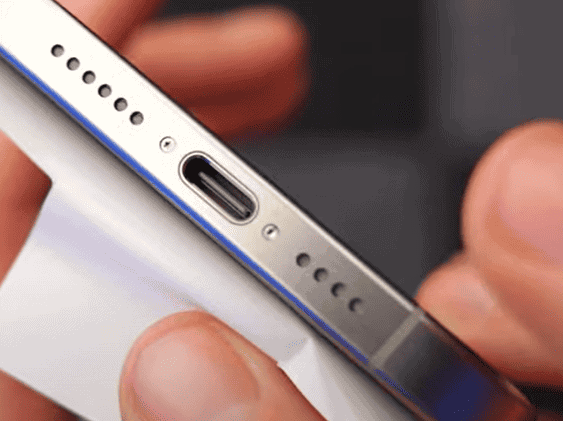
A USB-C port is a small, reversible connector found on many modern electronic devices. It allows for the transfer of data, audio, video, and power, making it a versatile and essential feature. If the port breaks or comes loose, it can become damaged or stop functioning correctly. You may experience issues such as your connection disconnecting periodically, slow data transfers, or a port that simply won’t recognize any cables. Fixing a USB-C port is challenging because it requires tearing down the device and soldering skills.
Fix A Broken USB-C Port: Methods
A broken USB-C port can be a major inconvenience, disrupting charging, data transfer, and connectivity. While some fixes can be done at home, others require professional repair.
DIY Fixes for Minor Issues:
- Clean the Port: Debris and lint can accumulate inside the port, causing connection problems. Use a can of compressed air or a toothpick to gently remove any obstructions.
- Inspect the Cable: Check your USB-C cable for any damage or fraying. A faulty cable can also cause charging or connection issues.
- Restart Your Device: Sometimes, a simple restart can resolve software glitches that affect the USB-C port functionality.
Professional Repair for Major Issues:
- Loose Port: If the port feels loose or wobbly, it might need to be re-soldered or replaced entirely.
- Bent Pins: If the pins inside the port are bent or damaged, they’ll likely need to be straightened or replaced by a professional.
- No Power or Connectivity: If the port is completely unresponsive, there could be an internal hardware issue that requires professional diagnosis and repair.
Safety Precautions:
- Power Off: Always turn off your device and unplug it from the power source before attempting any repairs.
- ESD Protection: Take precautions to avoid electrostatic discharge, which can damage sensitive electronic components.
- Professional Help: If you’re unsure about any repair step or if the problem persists, consult a qualified technician or contact the device manufacturer’s support team.
Remember, attempting repairs yourself can be risky, especially if you lack experience. It’s always best to consult a professional for major issues to avoid further damage to your device.
Fixing A Broken USB-C Port: Steps
| Step | Description | Considerations |
|---|---|---|
| Diagnose the Issue | * Debris: Check if dirt or lint is blocking the port. * Bent pins: Look for any misaligned pins inside the port. * Damage: Inspect for physical damage to the port itself. | Severity of the problem will influence the best fix. |
| Cleaning | Use compressed air or a soft brush to dislodge debris. For stubborn buildup, very lightly use a toothpick or needle. | Be extremely gentle to avoid further damage. |
| Straightening Pins | If pins are bent, carefully straighten them with a needle or fine tweezers. | This requires a steady hand. If in doubt, seek professional help. |
| Software Troubleshooting | Try a different cable, device, and power adapter to isolate the problem. | This helps rule out issues with your accessories. |
| Professional Repair | For severe damage or if DIY fixes fail, consider a repair shop specializing in electronics. | Professional repair may be the best solution for complex issues. |
Important Notes:
- Warranty: Check if your device is covered by a warranty before attempting repair.
- Safety: Unplug any chargers/cables before working on the port.
- Difficulty: Fixing a USB-C port can range from simple to complex depending on the damage.
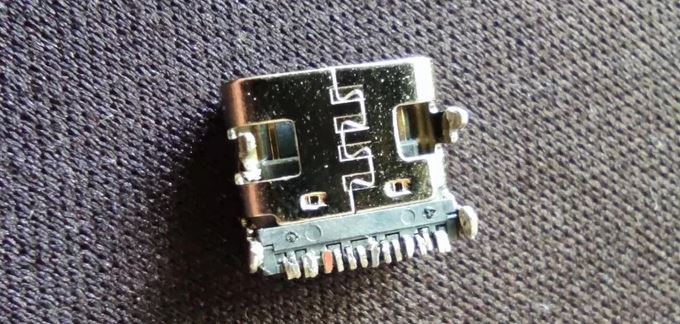
Troubleshooting a non-working or problematic USB-C port begins with simple diagnostics. Before considering repair or replacement, one should check for dust and debris that might be obstructing the connection. Using a can of compressed air to clean the port may resolve the issue. If physical damage is visible, the repair process may be more extensive. It’s essential to proceed with caution to avoid further damage to the device.
Key Takeaways
- A problematic USB-C port can usually be diagnosed and sometimes fixed at home.
- Keeping your USB-C port clean and using cables carefully can prevent damage.
- Simple tools like compressed air and a soft brush can help maintain the functionality of your USB-C port.
Diagnosing USB-C Port Issues
Fixing a USB-C port requires careful attention to possible issues affecting its performance. This section walks you through steps to identify and address various problems with the USB-C port on your device.
Identifying Physical Damage
Check for visible damage to the port. Signs include bent pins or scrapes that could hinder the USB-C port’s function. If you spot physical damage, this might be the root of the issue.
Cleaning and Maintenance
Over time, dust and debris can accumulate in the port. Use compressed air to clean the port gently. Afterward, a soft brush can remove any remaining particles without causing damage.
Software and Drivers Check
Software issues can disrupt USB-C operations. Visit the device manager in your system settings. Look for the universal serial bus controllers section and ensure that the drivers are up to date.
Power and Connectivity Troubleshooting
Problems with charging or data transfer might stem from power management settings. Check the control panel for battery settings and inspect your charger and power supply for any faults.
Resolving USB-C Device Recognition Problems
If your USB-C device isn’t recognized, disconnect it and then reconnect it. Sometimes, restarting your computer can help. Use the hardware troubleshooter for further diagnosis.
Advanced Repair Options
For persistent issues, professional assistance may be the best solution. Advanced solutions, like motherboard repairs or straightening bent pins, require specialized skills.
USB-C Port Usage and Management
Manage your USB-C ports by using quality cables and avoiding unnecessary strain on the ports. Use docking stations as needed, and remember to disconnect devices when not in use.
Prevention and Best Practices
To keep USB-C ports in good condition, attention to how they are used and maintained is key. Following specific steps can help prevent damage, extend the life of the port, and ensure consistent performance.
Minimizing Wear and Tear
A USB-C port can face wear from repeated use. To limit this, plug and unplug cables with care. It’s best to insert and remove the connector straight without wiggling. Using docking stations that remain connected to the device reduces the frequency of direct cable plugging and unplugging.
Ensuring Reliable Power Supply
The power supply should match the device’s requirements. Use chargers and cables that comply with your device’s specifications. Varied power outputs can stress the charging port and lead to malfunction. A consistent, reliable power source maintains the integrity of the USB-C connection.
Regular Cleaning and Care
Ports collect dust and debris which can cause connectivity issues. Power down the device and use compressed air to gently blow out particles from the port. A soft, dry brush can dislodge stubborn debris. Regular cleaning helps maintain a good connection and prevent blockages.
Optimizing Connectivity Solutions
Use high-quality cables and adapters that fit properly. A loose or ill-fitting connection can damage the port’s internal components. Ensure that any connected peripherals have compatible and up-to-date support software to avoid connectivity problems.
Selecting High-Quality Accessories
Good quality accessories reduce the risk of accidental damage. Look for cables and connectors with solid build quality and a warranty. A high-grade cable resists fraying and breakage which not only protects the port but also ensures a stable connection.
Frequently Asked Questions
This section answers commonly asked questions about USB-C port issues and repair, providing clear steps and considerations for those facing port malfunctions.
What are the common signs that a USB-C port needs repairing?
A USB-C port may need repairs if it fails to charge a device, has a loose connection, or fails to transfer data consistently. Visible damage or debris inside the port can also be a sign.
What steps are involved in fixing a USB-C charging port on a phone?
Repairing a phone’s USB-C port often starts with cleaning out any dirt or debris. If the issue persists, it may involve gently adjusting the port’s metal connector or replacing the port if it’s physically damaged.
What tools are needed for a DIY repair of a USB-C port on a laptop?
Tools for a DIY repair might include a set of precision screwdrivers, a plastic pry tool, tweezers, and possibly a soldering iron if a replacement port needs to be installed.
How can one determine the repair cost for a damaged USB-C port?
To estimate the cost of a repair, consider the cost of replacement parts and any needed tools. Professional repair costs will include labor, which varies by location and the complexity of the repair.
Are there preventive measures to minimize damage to USB-C ports over time?
To prevent damage, avoid forceful insertions, keep the port clean, use high-quality cables, and ensure the cable is correctly oriented when connecting it to the port.
What are the potential risks of attempting to repair a USB-C port without professional assistance?
DIY repairs can pose risks including further damage to the device, voiding warranties, and possible electric shock or short circuits if the device isn’t handled correctly or turned off during repair.

