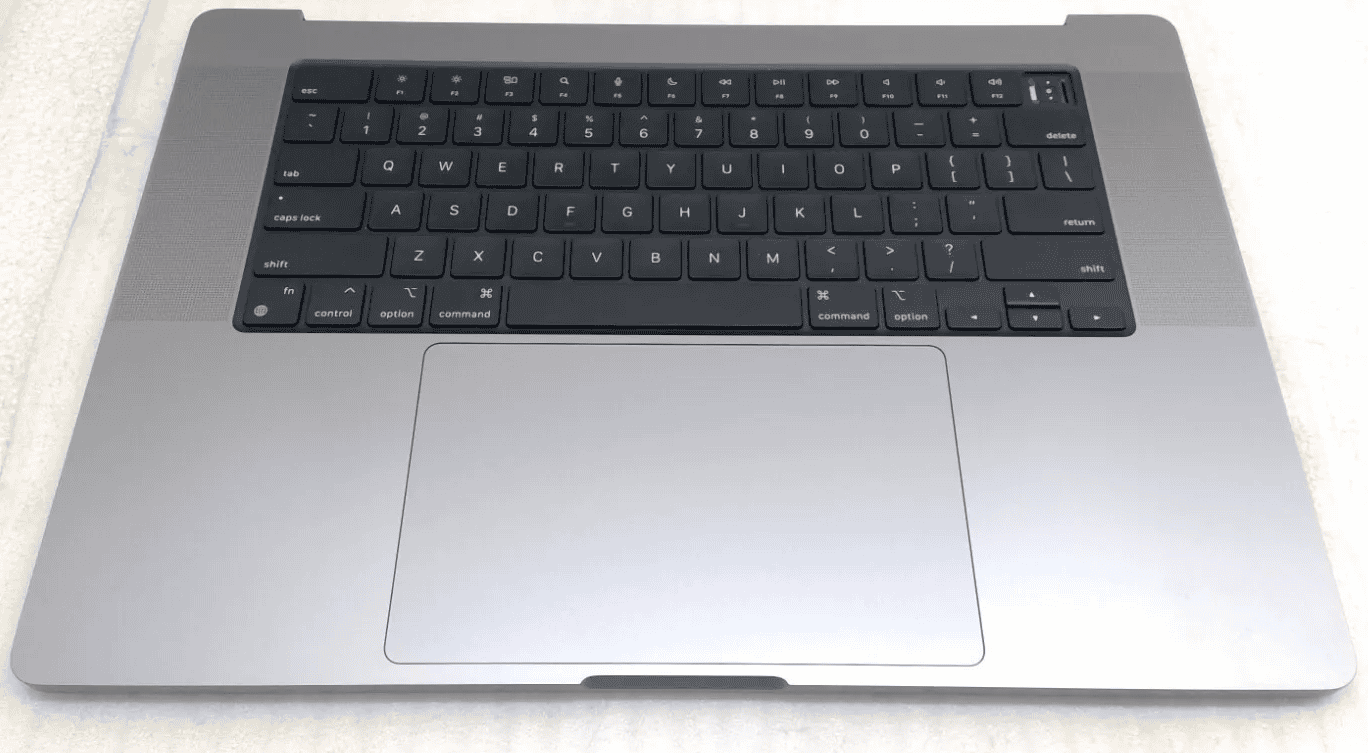
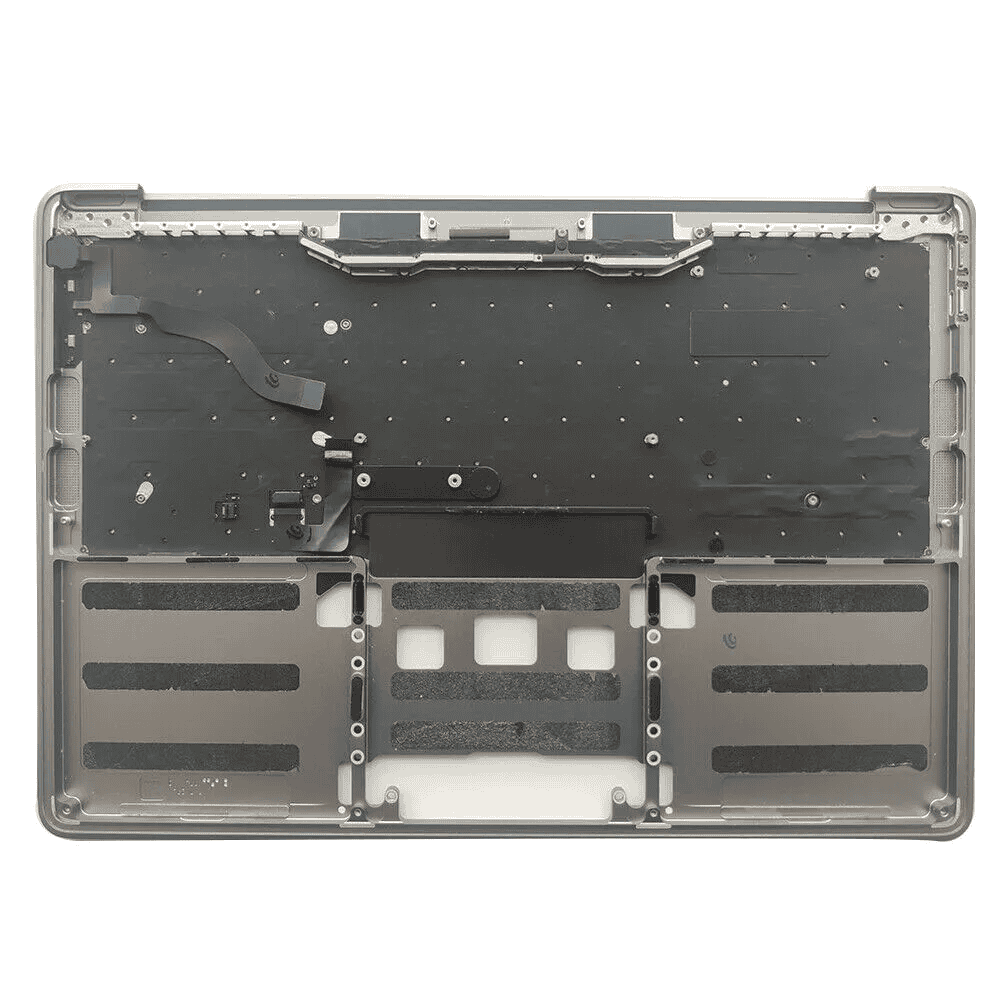
MacBook Pro keyboard issues can be frustrating. Apple offers a free service program for eligible models with problems like repeating letters, missing characters, or sticky keys. This program covers several MacBook Pro models released between 2015 and 2019.
If your MacBook Pro isn’t covered by the service program, you still have options. You can get your keyboard repaired or replaced at an Apple Store or authorized service provider. For those comfortable with DIY repairs, replacement keyboards are available from third-party suppliers.
Before deciding on a repair method, check your warranty status and AppleCare+ coverage. If your MacBook Pro is still under warranty, Apple will likely cover the repair at no cost. For out-of-warranty devices, weigh the cost of professional repair against the price of a DIY solution.
| Repair Option | Pros | Cons |
|---|---|---|
| Apple Service Program | Free for eligible models, professional repair | Limited to specific models and issues |
| Apple Store/Authorized Repair | Professional service, genuine parts | Can be expensive if out of warranty |
| DIY Replacement | Potentially cheaper, faster | Risk of damage, may void warranty |

MacBook Pro Keyboard Replacement: A Guide
Is a DIY Keyboard Replacement Right for You?
Replacing a MacBook Pro keyboard can be a complex repair. It often involves disassembling a significant portion of the laptop. Before you start, consider these points:
- Your Technical Skills: This repair requires some technical know-how and comfort with small electronics.
- Warranty Status: If your MacBook Pro is still under warranty, Apple or an authorized service provider should handle the repair. DIY repairs can void your warranty.
- Cost Comparison: Weigh the cost of parts and your time against the cost of professional repair.
If you’re not comfortable with the complexity, professional repair is always the safer option.

Tools You’ll Need
Here’s a list of tools you’ll likely need:
- Pentalobe Screwdrivers: These are special screwdrivers needed to open the MacBook Pro’s case. You’ll need the correct sizes for your model.
- Torx Screwdrivers: These are also required for internal screws. Again, the correct sizes are essential.
- Spudger or Plastic Pry Tool: These tools help you gently pry open parts without damaging them.
- Small Container or Magnetic Mat: To keep track of screws and prevent losing them.
- Replacement Keyboard: Purchase a compatible replacement keyboard for your specific MacBook Pro model.
- Heat Gun or Hair Dryer (Sometimes): May be needed to loosen adhesive.
- Tweezers: For handling small parts.
General Steps for Keyboard Replacement (Vary by Model)
These steps are a general overview. Specific steps vary significantly between MacBook Pro models (especially between older and newer models). Always consult a detailed guide specific to your model before proceeding. iFixit.com is an excellent resource.
- Power Off and Disconnect: Completely power off your MacBook Pro and disconnect the power adapter.
- Remove the Bottom Case: Use the appropriate pentalobe screwdriver to remove the screws on the bottom of the case.
- Disconnect the Battery: This is crucial to prevent electrical damage. Carefully disconnect the battery connector from the logic board.
- Remove Internal Components (as needed): Depending on the model, you may need to remove components like the logic board, fans, or speakers to access the keyboard. This is where model-specific guides are essential.
- Remove the Old Keyboard: This often involves removing screws and/or carefully peeling away adhesive. Using a heat gun or hair dryer on low setting can help soften the adhesive. Be very careful not to damage any underlying components.
- Install the New Keyboard: Carefully position the new keyboard and secure it with screws and/or adhesive.
- Reassemble the MacBook Pro: Reconnect all components you removed, including the battery. Then, reattach the bottom case.
- Test the New Keyboard: Power on your MacBook Pro and test all the keys to ensure they are working correctly.
Important Considerations by MacBook Pro Era
- Unibody Models (Pre-2016): These models generally have more accessible keyboards, but some disassembly is still required.
- Retina Models (2012-2015): These models require more disassembly and have more fragile components.
- Butterfly Keyboard Models (2016-2019): These keyboards are notoriously difficult to replace due to their design and integration with the top case. Often, the entire top case needs replacement.
- Magic Keyboard Models (2019 and later): These are generally more reliable than butterfly keyboards, but replacement still requires significant disassembly.
Troubleshooting After Replacement
- Keys Not Working: Double-check all connections and ensure the keyboard is properly seated.
- Trackpad Issues: If you experience trackpad problems after the repair, check the trackpad cable connection.
Professional Repair as an Alternative
If you are unsure about any of these steps, consider professional repair. Apple or authorized service providers can perform the repair, ensuring it’s done correctly and maintaining your warranty. Independent repair shops are also an option, but make sure they have experience with MacBook Pro repairs.
The evolution of MacBook Pro keyboards has seen changes in design and repairability. Older models were often simpler to repair, while newer models, especially those with the butterfly mechanism, presented more challenges. The current “Magic Keyboard” design is a step in a better direction for both usability and potential repair.
Understanding MacBook Pro Keyboard Issues
The availability of parts for MacBook Pro repairs can vary. It’s best to source replacement keyboards from reputable suppliers to ensure quality and compatibility. Using low-quality parts can lead to further problems down the line.
MacBook Pro keyboards have faced several challenges in recent years. Users reported various problems with key functionality and durability. Apple made changes to address these issues in newer models.
Common Keyboard Malfunctions
MacBook Pro users often encounter sticky keys, repeated keystrokes, and unresponsive keys. These issues can make typing frustrating and slow down your work. Dust and debris under the keys are common culprits.
Some users report keys popping off or breaking entirely. This requires professional repair or keyboard replacement. Apple’s Keyboard Service Program offers free repairs for eligible MacBook Pro models with keyboard issues.
Butterfly vs. Traditional Keyboard Designs
Apple introduced the butterfly keyboard mechanism in 2015 to create thinner laptops. This design aimed to improve stability and reduce key travel. However, it proved problematic for many users.
The butterfly keyboard was more prone to failure from dust and debris. It also offered less tactile feedback compared to traditional scissor mechanisms. Apple discontinued the butterfly keyboard in favor of a new Magic Keyboard in 2019.
| Keyboard Type | Pros | Cons |
|---|---|---|
| Butterfly | Thin profile, stable keys | Prone to failure, less tactile |
| Scissor/Magic | More reliable, better feel | Slightly thicker |
The Magic Keyboard returned to a scissor mechanism. It offers improved reliability and a more satisfying typing experience for most users. New MacBook Pro models now use this keyboard design.
Preparing for Keyboard Replacement
Replacing a MacBook Pro keyboard requires careful preparation and the right tools. Identifying your specific model is crucial for obtaining the correct parts and following the appropriate procedure.
Tools and Parts Required
To replace your MacBook Pro keyboard, you’ll need several specialized tools. These include a 000 Phillips screwdriver, precision tweezers, and a spudger. You may also want an anti-static wrist strap to protect sensitive components.
The main part you’ll need is the replacement keyboard itself. Ensure it’s compatible with your specific MacBook Pro model. You might also need new adhesive strips for reattaching the keyboard.
Here’s a table of essential tools and parts:
| Item | Purpose |
|---|---|
| 000 Phillips screwdriver | Removing screws |
| Precision tweezers | Handling small parts |
| Spudger | Prying components |
| Anti-static wrist strap | Protecting electronics |
| Replacement keyboard | Main part for replacement |
| Adhesive strips | Securing new keyboard |
MacBook Model Identification
Identifying your MacBook Pro model is essential for a successful keyboard replacement. Look for the model number on the bottom of your device. It starts with “A” followed by four digits.
For MacBook Pro 13″ and 15″ Retina models, the process differs slightly from older versions. These models typically have model numbers like A1425, A1502, or A1398.
MacBook Pro 13″ Unibody models have numbers like A1278. The replacement process for these can be more complex due to the unibody design.
Check Apple’s support page or use the “About This Mac” option in the Apple menu to confirm your exact model. This ensures you get the right keyboard and follow the correct replacement steps.
Step-by-Step Keyboard Replacement Guide
Replacing a MacBook Pro keyboard requires careful disassembly and reassembly. This guide covers the key steps to safely remove the old keyboard and install a new one.
Removing the MacBook Pro Lower Case
Start by shutting down your MacBook Pro and unplugging the power adapter. Flip the laptop over and remove the screws securing the lower case. Use a P5 pentalobe screwdriver for newer models or a Phillips screwdriver for older ones.
Gently lift the lower case, starting from the hinge area. Be careful not to force it, as there may be clips holding it in place. Once loose, set the lower case aside.
Disconnecting the Battery Connector
Locate the battery connector on the logic board. Use a plastic spudger tool to gently pry up the connector. This step is crucial for safety during the repair process.
After disconnecting the battery, press and hold the power button for 5 seconds to discharge any residual power in the system.
Replacing the Keyboard Assembly
Disconnect the keyboard and backlight cables from the logic board. Remove the screws securing the keyboard to the upper case. Carefully lift out the old keyboard.
Insert the new keyboard, ensuring it’s properly aligned. Secure it with the screws you removed earlier. Reconnect the keyboard and backlight cables to the logic board.
| Component | Action |
|---|---|
| Keyboard | Replace |
| Backlight | Reconnect |
| Screws | Reinsert |
Reassembling the MacBook Pro
Reattach the battery connector to the logic board. Double-check all cable connections are secure. Place the lower case back onto the MacBook Pro, aligning it carefully.
Insert and tighten all screws to secure the lower case. Be careful not to overtighten. Power on your MacBook Pro to test the new keyboard.
If issues persist, consider visiting an Apple repair center for professional assistance.
Post-Replacement Considerations
After replacing your MacBook Pro keyboard, you need to verify its functionality and understand the warranty implications. These steps ensure your device works correctly and you’re aware of your support options.
Keyboard Functionality Testing
Test each key on your new keyboard thoroughly. Press every key multiple times to check for proper response and consistency. Pay attention to commonly problematic keys like the spacebar and return key. Open a text editor to type various sentences, ensuring all characters appear correctly.
Check special functions like volume control, screen brightness, and media playback keys. Verify that keyboard backlighting works if your model has this feature. Test keyboard shortcuts for applications you frequently use.
If you notice any issues, contact Apple Support or visit an Apple Authorized Service Provider immediately. They can address problems while your device is still covered under the replacement warranty.
Warranty and Apple Support Policies
The Keyboard Service Program covers eligible MacBook Pro models for 4 years after the first retail sale. This program offers free repairs for keyboard issues. If you paid for a previous keyboard repair, you might be eligible for a refund.
Keep your repair documentation safe. It may be needed for future reference or additional support.
| Warranty Coverage | Details |
|---|---|
| Standard Warranty | 1 year from purchase |
| AppleCare+ | Up to 3 years |
| Keyboard Program | 4 years from first retail sale |
Remember, Apple’s warranty doesn’t cover accidental damage. Be careful with liquids and debris around your new keyboard to avoid future issues.
Frequently Asked Questions
MacBook Pro keyboard replacements involve several key aspects. The process time cost and availability of parts can vary depending on the specific model and situation.
What is the process for replacing a MacBook Pro keyboard?
Apple or an Apple Authorized Service Provider will examine your MacBook Pro keyboard. They may replace individual keys or the entire keyboard based on the problem. The technician will carefully remove the old keyboard and install the new one. They’ll test it to ensure proper function before returning your device.
How long does it take to perform a keyboard replacement on a MacBook Pro?
The time for a MacBook Pro keyboard replacement typically ranges from 3 to 5 business days. This can vary based on part availability and workload at the service center. Some repairs may take longer if additional issues are found during the process.
Are individual keys replaceable on the MacBook Pro, or is a full keyboard replacement needed?
In some cases individual keys can be replaced on MacBook Pro keyboards. This is often possible for older models or minor issues. However newer MacBook Pro models with butterfly or scissor mechanisms often require full keyboard replacement due to their design.
What is the cost range for MacBook Pro keyboard replacements?
MacBook Pro keyboard replacement costs can vary widely. Prices typically range from $100 to $700 or more. Factors affecting cost include:
- MacBook Pro model
- Warranty status
- Service provider (Apple vs. third-party)
- Extent of damage
Does Apple provide a keyboard replacement program for MacBook Pros?
Yes Apple offers a Keyboard Service Program for certain MacBook Pro models. This program covers eligible devices for 4 years after the first retail sale. It addresses issues like sticky keys or inconsistent responses. Check Apple’s website to see if your model qualifies for free service.
What are the options for obtaining parts for a MacBook Pro keyboard repair?
For MacBook Pro keyboard repairs you have several options:
- Official Apple parts through Apple Stores or Authorized Service Providers
- Third-party replacement keyboards from repair shops
- DIY repair kits from websites like iFixit
| Option | Pros | Cons |
|---|---|---|
| Apple Official | Guaranteed compatibility warranty coverage | Higher cost longer wait times |
| Third-party Repair | Often cheaper faster turnaround | Potential quality variations |
| DIY Repair | Lowest cost hands-on experience | Risk of damage warranty voiding |
Choose based on your comfort level budget and device warranty status.


