Properly ejecting an SD card from your Mac is essential to protect your data and hardware. To safely eject an SD card from a Mac, simply drag the card’s icon to the Trash, or right-click the icon and select “Eject.” Once the icon disappears from your desktop, you can physically remove the card from the slot.
Many Mac users don’t realize that simply pulling out an SD card without properly ejecting it first can lead to data corruption or loss. This is because your Mac might still be reading from or writing to the card, even if no visible activity is happening. Always wake your computer from sleep before ejecting an SD card to prevent potential issues.
If you frequently work with SD cards on your Mac, learning the proper ejection methods can save you from frustration and potential data loss. Whether you’re a photographer transferring images, a videographer moving footage, or just using extra storage, these simple steps will help keep your files safe and your SD card functioning properly.
Why Proper Ejection Matters
Before diving into the steps, it’s important to understand why properly ejecting an SD card from your Mac is crucial. Unlike simply pulling out a USB device, SD cards rely on macOS to manage file transfers and storage integrity. Removing a card improperly can result in corrupted files, data loss, or even damage to the card itself. Ejecting it the right way ensures that all read/write operations have stopped and that your data remains intact.
Methods to Safely Eject an SD Card from Your Mac
There are multiple ways to safely eject an SD card from a Mac, each suitable for different scenarios. Here’s how to do it properly:
1. Using Finder
The easiest and most common way to eject an SD card is through Finder:
- Open Finder by clicking the Finder icon in the Dock or pressing
Command + Spaceand typing “Finder.” - Locate your SD card under Locations in the left-hand sidebar.
- Click the Eject button (⏏) next to the SD card’s name.
- Wait for the card to disappear from Finder before physically removing it.
2. Using the Desktop Shortcut
If your SD card appears on the desktop, you can eject it directly from there:
- Locate the SD card icon on your desktop.
- Right-click (or
Control + Click) on the SD card. - Select Eject “[Your SD Card Name]” from the dropdown menu.
- Once the icon disappears, it’s safe to remove the card.
3. Using Disk Utility
If Finder isn’t responding or the SD card isn’t ejecting properly, Disk Utility offers an alternative:
- Open Disk Utility (Press
Command + Space, type “Disk Utility,” and hit Enter). - Find your SD card in the left-hand panel under External drives.
- Select it and click the Eject button in the toolbar.
- Once the card is no longer listed, remove it from the slot.
4. Using the Terminal (For Advanced Users)
If all else fails, you can eject your SD card using Terminal:
- Open Terminal (
Command + Space, type “Terminal,” and press Enter). - Type the following command to list connected storage devices:
diskutil list - Locate your SD card’s identifier (e.g.,
/dev/disk2). - Run the following command, replacing
diskXwith your card’s actual identifier:diskutil eject diskX - Once the command completes, remove the SD card safely.
What to Do If Your SD Card Won’t Eject
Sometimes, macOS may refuse to eject an SD card due to background processes or system errors. Here’s what you can do if your SD card remains stuck:
1. Close Any Open Files or Applications
Make sure no files from the SD card are in use. If any apps are accessing the card, macOS won’t allow you to eject it. Close all active apps, then try ejecting again.
2. Force Quit Finder
If Finder is preventing the ejection, restarting it might help:
- Press
Command + Option + Escapeto open the Force Quit Applications window. - Select Finder, then click Relaunch.
- Try ejecting the SD card again.
3. Log Out and Log Back In
Logging out of your user account can help stop any background processes that might be preventing ejection:
- Click the Apple menu and select Log Out [Your Username].
- Log back in and attempt to eject the SD card again.
4. Shut Down Your Mac
If nothing else works, shutting down your Mac ensures that all processes stop safely:
- Click the Apple menu and select Shut Down.
- Once the Mac is off, remove the SD card before turning it back on.
Preventing SD Card Ejection Issues in the Future
To avoid encountering ejection problems in the future, follow these best practices:
- Always eject properly before removing the SD card.
- Avoid abrupt removal while transferring files to prevent corruption.
- Use a high-quality SD card from a reputable brand to minimize compatibility issues.
- Keep your macOS updated to ensure optimal performance with external storage.
By following these steps, you can safely and efficiently manage SD cards on your Mac without risking data loss or hardware issues.
Key Takeaways
- Always eject an SD card through macOS before physically removing it to prevent data loss.
- Multiple ejection methods exist, including dragging to Trash, right-clicking, or using Finder’s eject button.
- Never remove an SD card while your Mac is sleeping or when files are being transferred.
Understanding the SD Card Ejecting Process
Properly ejecting an SD card from a Mac ensures data integrity and prevents potential hardware issues. The process involves both physical handling and software steps that work together to safely disconnect your media.
Types of SD Cards and Their Compatibility with Mac
Most modern Mac computers support three main types of SD cards: standard SD, SDHC (High Capacity), and SDXC (Extended Capacity). MacBook Pro, MacBook Air, and iMac models released after 2012 typically include an SDXC card slot that accepts all three formats.
SDXC cards can handle capacities up to 2TB, while SDHC cards max out at 32GB. Standard SD cards are limited to 2GB storage.
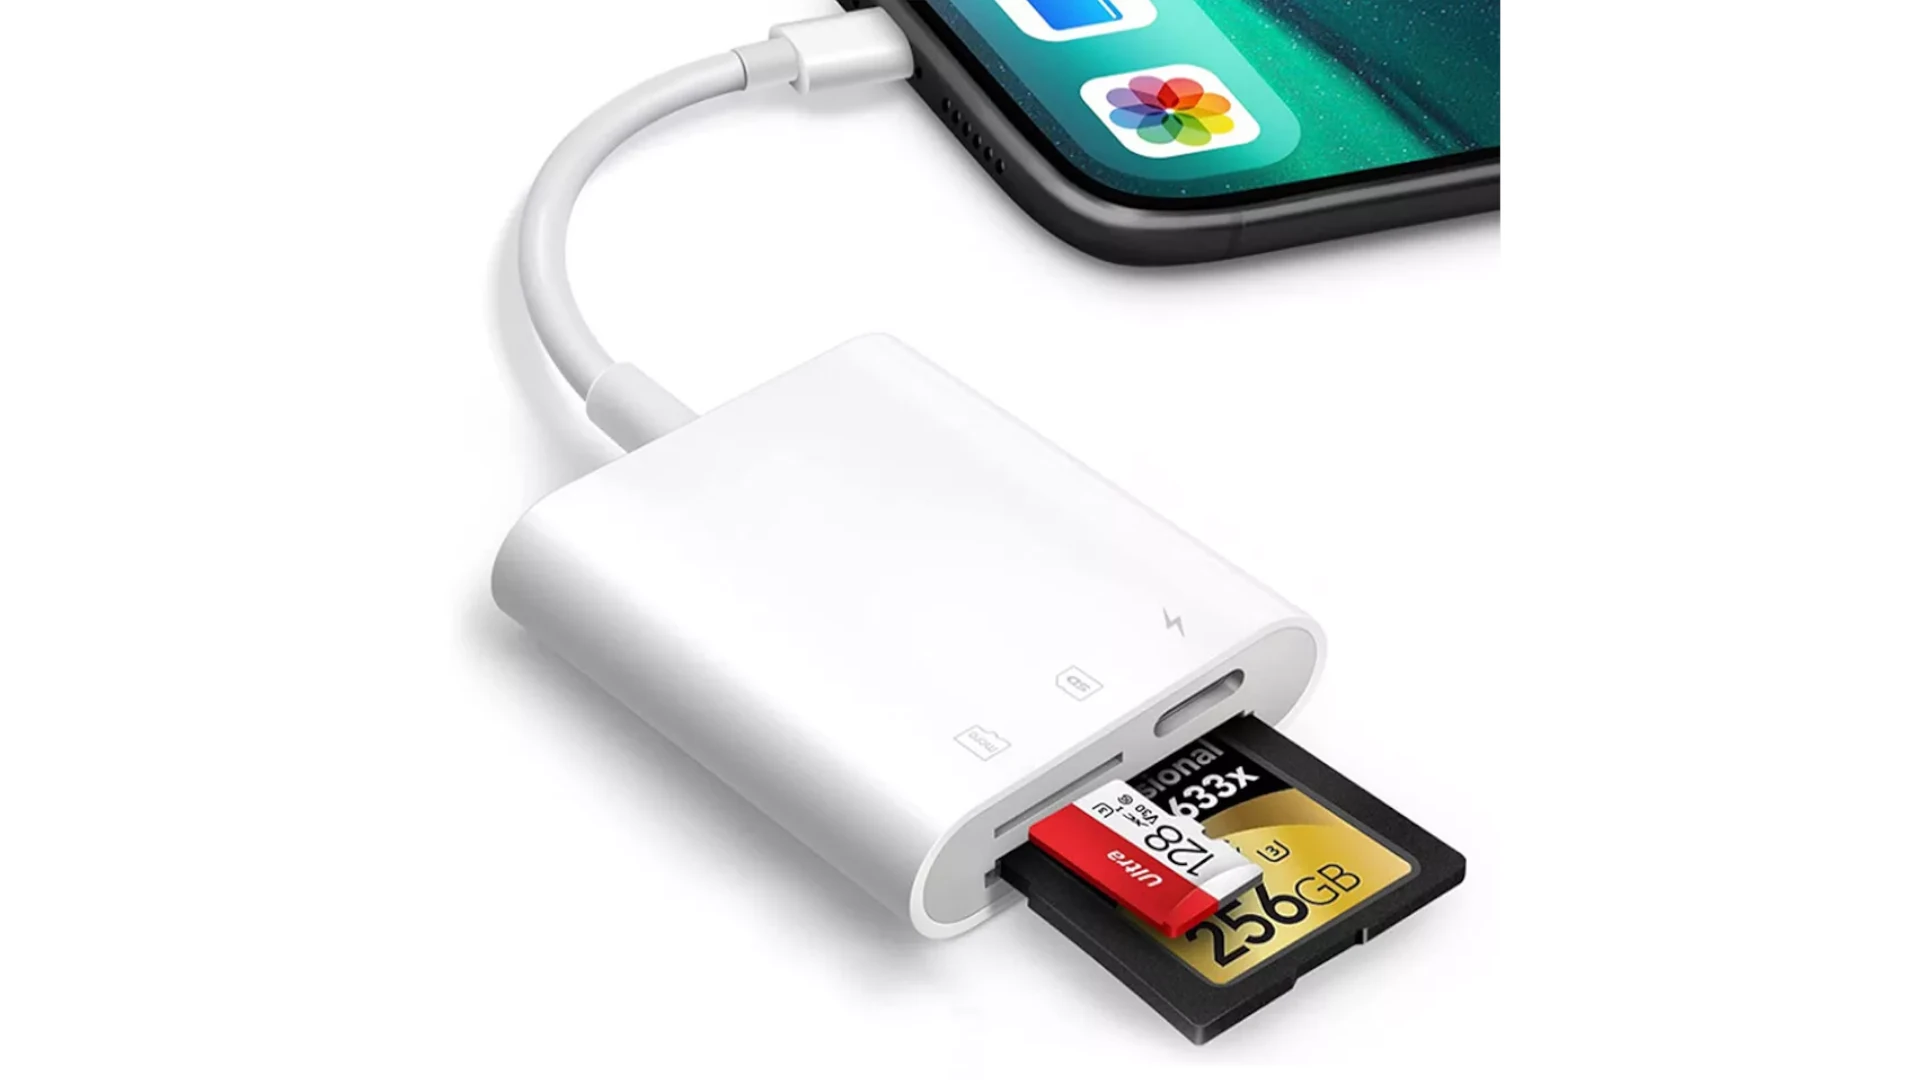
For older Mac models without built-in SD card slots, external USB card readers offer a simple solution. These adapters connect via USB-A or USB-C ports and support various card formats.
Mac computers format SD cards as exFAT by default, making them compatible with both macOS and Windows systems.
Locating the SD Card Slot on Your Mac
The SD card slot location varies depending on your Mac model. On MacBook Pro (pre-2016) and MacBook Air models, the slot is typically found on the right side of the machine.
For iMac computers, the SD card slot is usually positioned on the right edge of the display. The slot features a small indentation that allows users to insert the card with the metal contacts facing down.
Newer MacBook Pro models (post-2016) eliminated the built-in SD card slot, but Apple reintroduced it in the 14-inch and 16-inch MacBook Pro models released in 2021.
If your Mac lacks an SD card slot, external card readers connect through USB ports and provide the same functionality. These adapters are particularly useful for newer Macs with only USB-C/Thunderbolt ports.
Preparing to Eject the SD Card
Before physically removing an SD card from your Mac, you need to take a few preparatory steps to ensure data integrity. Proper ejection prevents data corruption and protects both your files and the SD card itself.
Checking for Active Data Transfers
When preparing to eject an SD card, first check for any ongoing file transfers. Look for progress bars or activity indicators in Finder windows that might show files moving to or from the card.
The macOS typically shows these transfers with blue progress bars in Finder windows. You can also look for the small spinning wheel next to the SD card icon on your desktop.
Wait patiently for all transfers to complete before attempting ejection. Interrupting active data transfers can corrupt files on your SD card or leave incomplete files that may not work properly.
For large transfers, the Mac might display an estimated time remaining. It’s worth waiting even if it seems slow, as rushed ejections lead to data loss.
Closing Relevant Applications
All applications using files from the SD card must be closed before ejection. Check for open documents, photos, or videos that might be accessing the SD card.
Look for applications like Preview, Photos, Adobe software, or video editors that might have files open from the card. Save any changes to these files before closing the applications.
Some applications might access the SD card in the background. Music players, video players, or backup software could be reading from the card without obvious indicators.
If you’re unsure which apps are using the SD card, you can check with Activity Monitor:
- Open Activity Monitor from Applications > Utilities
- In the Disk tab, look for processes accessing your SD card
- Close these applications properly through their menus
Remember that force-quitting applications while they’re using SD card files can lead to data corruption. Always save your work and close applications normally.
Ejecting the SD Card from Finder
Finder provides the most straightforward method for safely ejecting an SD card from your Mac. This process ensures your data remains intact and prevents potential corruption issues.
Locate the Eject Icon in Finder
To begin the ejection process, you’ll need to access Finder on your Mac. Open a new Finder window by clicking on the Finder icon in your dock or by pressing Command+N when Finder is active.
Look at the sidebar on the left side of the Finder window. Your SD card should appear under the “Locations” section. If you don’t see it there, you may need to adjust your Finder preferences.
To make external disks visible, go to Finder menu > Settings > Sidebar and ensure “External disks” is checked. Alternatively, you can make the SD card appear on your desktop by going to Finder menu > Settings > General and checking “External disks.”
Safely Eject the SD Card
Once you’ve located your SD card in the Finder sidebar, you have several options to eject it safely. The simplest method is to click the eject icon (▶|) next to the SD card name in the sidebar.
Another approach is to right-click (or Control+click) on the SD card in the sidebar and select “Eject” from the context menu that appears.
If you prefer using your desktop, you can also drag the SD card icon from your desktop to the Trash icon in your dock. Don’t worry – this won’t delete your data! When you drag storage devices to the Trash, it transforms into an Eject icon, indicating it will safely disconnect the device.
Wait for the SD card icon to disappear from both Finder and your desktop before physically removing it from your Mac. Removing the card while data is still being written can lead to corruption or data loss.
Using Disk Utility to Eject the SD Card
Disk Utility is a powerful built-in tool in macOS that can help eject SD cards when other methods fail. This approach is especially useful when an SD card becomes stubborn or shows as locked in the system.
To access Disk Utility, users can navigate to Applications > Utilities folder or simply use Spotlight search by pressing Command + Space and typing “Disk Utility.”
Once Disk Utility is open, the SD card will appear in the left sidebar under external devices. Users should select the SD card from the list of available drives.
After selecting the SD card, look for the “Eject” button in the top toolbar of Disk Utility. Clicking this button will safely disconnect the SD card from the Mac.
If the standard eject option doesn’t work, users can try right-clicking on the SD card in the sidebar and selecting “Eject” from the context menu that appears.
Sometimes SD cards show as locked in Disk Utility. In this case, the card should be physically removed after ejection and the small lock slider on the side of the card should be adjusted to the unlocked position.
For particularly problematic cards, Disk Utility offers a “First Aid” option that can check and repair file system issues before ejection. This might help when a card refuses to eject due to file system errors.
Mac users should always ensure all file transfers are complete before attempting to eject an SD card. Active file operations can prevent proper ejection and potentially cause data loss.
Alternative Methods for Ejecting the SD Card
Mac users have several options for safely removing SD cards beyond the standard methods. Each approach offers convenience in different scenarios, ensuring data integrity when disconnecting storage media.
Dragging the SD Card to the Trash Icon
One of the simplest methods to eject an SD card from a Mac is dragging the card’s icon to the Trash. When an SD card is selected, the Trash icon in the Dock automatically changes to an Eject symbol, indicating its changed function.
To use this method, locate the SD card icon on your desktop or in a Finder window. Click and hold the icon, then drag it to the Trash/Eject icon in the Dock. Release when the icon is highlighted.
This approach is particularly useful for visual learners who prefer direct manipulation over menu options. The method works with all types of removable media on Mac systems, not just SD cards.
Wait until the SD card icon disappears from your desktop before physically removing it from the slot. This confirms the ejection process is complete.
Using Shortcut Keys to Eject
Keyboard shortcuts provide a faster way to eject SD cards without using the mouse or trackpad. Mac offers several key combinations for this purpose.
The most common shortcut is Command + E. First select the SD card in Finder or on the desktop, then press this combination to initiate ejection.
Another option is pressing the Media Eject key (⏏) if your Mac keyboard has one. Some Mac keyboards feature this dedicated key in the upper right corner.
For a universal approach, try Command + Option + T to open the Activity Monitor, select the SD card from the disk activity tab, and click the eject button.
These shortcuts save time for users who frequently swap SD cards between devices. They’re especially helpful when working with multiple external storage devices simultaneously.
Force Ejecting when Regular Methods Fail
Sometimes an SD card won’t eject normally because files are in use or the system has encountered errors. In these situations, force ejection becomes necessary.
Start by closing all applications that might be accessing the SD card. If that doesn’t work, try the Terminal approach. Open Terminal from Applications > Utilities and type diskutil eject /Volumes/SDCARDNAME, replacing SDCARDNAME with your actual SD card name.
For persistent issues, use Disk Utility (found in Applications > Utilities). Select the SD card from the sidebar and click the “Eject” button in the toolbar.
As a last resort, use the force eject command in Terminal: diskutil unmountDisk force /dev/diskX (replace X with the disk number found using diskutil list). This method may risk data corruption, so only use it when absolutely necessary.
If you receive error messages stating the disk is in use, try identifying which applications are accessing the card through Activity Monitor before attempting force ejection.
Addressing Common Ejecting Issues
Even with the straightforward process of ejecting SD cards from a Mac, users sometimes encounter problems that prevent proper ejection. These issues might stem from software conflicts, hardware limitations, or improper removal attempts.
Reading Error Messages and Troubleshooting
When a Mac displays the message “Disk in use” or “The disk wasn’t ejected because one or more programs may be using it,” an application is still accessing files on the SD card. Users should close all applications that might be using the card’s files.
The Terminal can help identify which processes are preventing ejection. Users can open Terminal and type lsof | grep /Volumes/[SD CARD NAME] to see which applications are using the SD card. The command reveals the name of the program in the “Command” column.
One common culprit is the “mds” process (Spotlight indexing), which catalogs files on the SD card. Sometimes, simply waiting a few minutes allows indexing to complete.
Force ejecting should be a last resort. Users can try:
- Logging out and back into their Mac account
- Restarting the computer with the SD card inserted
- Using Disk Utility to unmount the volume manually
Contacting Apple Support for Assistance
If troubleshooting steps fail, Apple Support offers several contact options for resolving SD card ejection issues.
Users can visit support.apple.com to schedule a phone call, initiate a chat session, or book an appointment at an Apple Store Genius Bar. Before contacting support, users should note:
- The Mac model and macOS version
- When the ejection problem started
- Error messages received
- Troubleshooting steps already attempted
Apple Support technicians might recommend additional solutions like:
- Resetting the SMC (System Management Controller)
- Creating a new user account to test if the issue is profile-specific
- Running First Aid in Disk Utility on the SD card
For persistent hardware-related ejection problems with the built-in SD card slot, repairs might be necessary, especially if the slot shows physical damage or the card feels stuck.
Tips for Safe SD Card Use in Mac
Using SD cards with Mac computers requires some care to prevent data loss and hardware damage. Following proper handling techniques helps maintain both your SD card and Mac in optimal condition.
Properly Inserting and Removing the SD Card from the Slot
When inserting an SD card into a Mac, position the card with the metal contacts facing down and toward the computer. Insert it gently until you feel a slight click. Never force the card in if it meets resistance.
Always eject the SD card properly before physical removal. Click the eject button next to the card name in Finder’s sidebar, drag the card icon to the Trash in the Dock, or right-click the card icon on the desktop and select “Eject.”
Wait until the card icon disappears from your desktop before removing it. Pulling out an SD card while data is being transferred can corrupt files and potentially damage both the card and your Mac’s card reader.
Never remove an SD card while your Mac is sleeping. This common mistake can lead to data loss and file corruption.
Avoiding Physical Damage to the SD Card Slot and Card
Keep the SD card slot on your Mac free from dust and debris. Use compressed air to clean the slot gently when necessary, but avoid inserting any objects into the slot.
Store SD cards in protective cases when not in use. This prevents physical damage and keeps dust away from the contact points.
Avoid touching the metal contacts on your SD card. The oils from your fingers can gradually corrode the connections and affect performance.
Keep your SD cards away from magnets, extreme temperatures, and moisture. These environmental factors can damage the card’s internal components and lead to data loss.
When traveling with your MacBook and SD cards, use a dedicated storage solution rather than loose storage in bags or pockets.
Maintaining Your SD Card Health
Format new SD cards using your Mac before first use. This ensures optimal compatibility with macOS. To format, insert the card, open Disk Utility, select the SD card, and click “Erase.”
Don’t fill SD cards to maximum capacity. Leave about 10-15% free space to maintain performance and extend the card’s lifespan.
Use the “First Aid” feature in Disk Utility periodically to check for and repair file system errors on your SD card.
Regularly back up important data from your SD cards to your Mac or an external drive. SD cards have limited write cycles and will eventually fail.
Consider using high-quality, name-brand SD cards with your Mac. They typically offer better reliability, speed, and longevity than generic alternatives.
Update your macOS regularly to ensure your computer has the latest support for SD card file systems and hardware compatibility.
Managing External Storage Devices
Mac users often work with various external storage options beyond just SD cards. Properly managing these devices ensures data integrity and prevents potential file corruption or loss.
Handling SD Cards along with Other Storage Devices
When using multiple storage devices simultaneously on a Mac, proper management becomes essential. Always eject each device properly before physical removal. To eject an SD card along with other storage devices, you can use the Finder sidebar where all connected devices appear under “Locations.”
For batch ejections, hold the Command key while clicking multiple devices, then right-click and select “Eject.” This saves time when disconnecting several storage options at once.
Another option is using the eject icon next to each device name in the Finder sidebar. For SD cards specifically, remember they’re more delicate than other storage types and require gentle handling during insertion and removal.
Mac’s Disk Utility app can help manage all connected storage devices from one place. This tool allows users to repair, format, and monitor the health of SD cards and other external storage.
Compatibility with USB Flash Drives and External Hard Drives
Macs offer seamless compatibility with most external storage types, including USB flash drives and external hard drives. These devices typically mount automatically when connected, appearing on the desktop and in Finder’s sidebar.
The ejection process for USB drives and external hard drives follows the same principles as SD cards: never remove without proper ejection. Three quick methods for ejection include:
- Drag the device icon to the Trash (which changes to an eject symbol)
- Right-click the device and select “Eject”
- Click the eject button next to the device name in Finder
External hard drives may take longer to eject if they’re performing background operations. Wait until the device icon disappears before physically disconnecting.
For optimal performance, format new external hard drives as APFS or Mac OS Extended if they’ll be used exclusively with Macs. For cross-platform compatibility between Mac and Windows, choose exFAT format instead.
Frequently Asked Questions
Many Mac users have questions about the proper way to eject SD cards from their computers. Here are answers to some common queries about safely removing SD cards from different Mac models.
What steps are required to safely remove an SD card from a MacBook Air?
To safely remove an SD card from a MacBook Air, first ensure all files have finished transferring. Next, locate the SD card icon either on the desktop or in the Finder sidebar.
Right-click on the SD card icon and select “Eject,” or drag the icon to the Trash (which turns into an Eject symbol). Wait until the icon disappears completely from your screen before physically removing the card from the slot.
Can I eject an SD card from my MacBook Pro using a keyboard shortcut?
Yes, you can use keyboard shortcuts to eject an SD card from a MacBook Pro. The simplest method is to select the SD card in Finder or on the desktop and press Command + E.
Another option is to press the Eject key on your keyboard if your Mac has one. For MacBooks without a dedicated Eject key, press and hold the F12 key or use Command + Up Arrow to select the card, then Command + E to eject it.
What is the correct method to disconnect an SD card from a Mac computer?
The correct method to disconnect an SD card from any Mac computer is to properly eject it through the operating system first. This prevents data corruption and file damage.
Select the SD card in Finder or on the desktop, then choose File > Eject from the menu bar. Alternatively, click the eject icon next to the SD card in the Finder sidebar.
Always wait until the SD card icon completely disappears before physically removing it from the slot. This ensures all read/write operations have completed.
Where can I find the eject option for an SD card on a Mac interface?
The eject option for an SD card can be found in several places on the Mac interface. The most visible location is in the Finder sidebar, where you’ll see an eject icon next to the SD card name.
You can also find the eject option by right-clicking on the SD card icon on your desktop or in a Finder window. In the dropdown menu that appears, select “Eject.”
Another location is the File menu in Finder. Simply select the SD card and then click on File > Eject in the menu bar at the top of the screen.
Is it possible to remove an SD card from an iMac without an eject button?
Yes, it’s possible to remove an SD card from an iMac without using a physical eject button. All ejection on Macs happens through software controls rather than hardware buttons.
To eject an SD card from an iMac, simply drag the SD card icon to the Trash in the Dock, which will change to an Eject symbol. You can also right-click on the SD card icon and select “Eject.”
For older iMac models, the Control-click method (right-click) works consistently across all macOS versions to safely eject SD cards.
What precautions should I take when ejecting an SD card from a Mac to prevent data loss?
Always close all files and applications that are accessing the SD card before attempting to eject it. Open files can prevent proper ejection and lead to data corruption.
Never remove the SD card while the Mac is reading from or writing to it. Look for activity lights on external card readers or check for file transfer progress windows before ejection.
If you receive a message that the card is in use, identify which application is using files on the card and close it. Wait a few seconds after ejection before physically removing the card to ensure all processes have completed.