Capturing the perfect moment with an iPhone camera has become an essential part of modern photography. The iPhone camera app is designed to offer users a balance of simplicity and advanced features, making it possible for both novices and seasoned photographers to take stunning photos. Understanding how to navigate and adjust the camera settings is key to enhancing the quality of your photos. Whether you’re taking a quick snapshot or composing a more thoughtful photograph, the iPhone camera settings provide the tools needed to ensure your images stand out.
However, with the multitude of options available, users often overlook the powerful capabilities contained within their device’s camera settings. It’s not just about pointing and shooting; by mastering features like exposure adjustment, enabling the grid for better composition, and experimenting with modes like Night or Portrait, iPhone users can significantly improve the visual impact of their photography. Embracing these settings allows for more control over the lighting, focus, and overall aesthetic of your photos, transforming your phone photography experience.
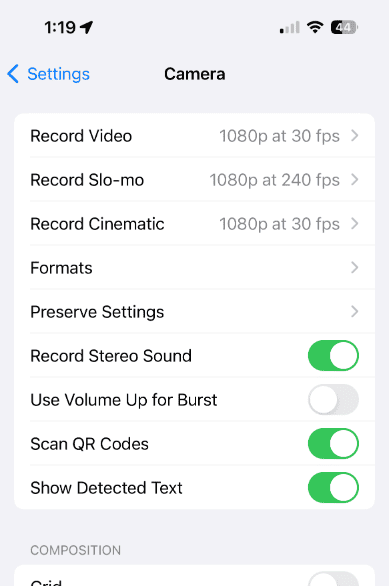
Master Your iPhone’s Camera Settings
Your iPhone has a powerful camera with many hidden settings. This guide will help you understand how to use these settings for the best photos.
⚙️ Adjusting Exposure and Focus
The iPhone sets the focus and exposure of your photos automatically. For more creative control, take charge of these settings:
- Tap the screen: This shows you the exposure and focus settings.
- Set the Focus: Tap an area of the screen to set your desired focus point.
- Adjust the Exposure: Slide your finger up or down to make the shot brighter or darker.
- Lock Focus and Exposure: Press and hold the desired focus area until “AE/AF Lock” appears. This is good for tricky lighting or moving subjects.
📸 Essential Camera Modes
Your iPhone camera offers several modes for different situations:
- Photo: The basic, everyday mode for still images.
- Portrait: This mode creates a blurred background, great for highlighting people or objects.
- Square: Takes photos in a square format, perfect for social media.
- Pano(rama): Capture wide shots by moving your iPhone slowly while maintaining a straight line.
🎨 Enhancing Your Photos
- Filters: Use these to add color effects to your photos. Choose from options like Vivid, Dramatic, or Mono.
- Live Photos: These short videos capture a few seconds before and after taking a still photo.
- HDR (High Dynamic Range): This is helpful with scenes containing high contrast. HDR combines multiple exposures to balance bright and dark areas.
⚙️ Additional Settings and Controls
| Setting | Description |
|---|---|
| Grid | This adds gridlines to help you compose photos using the “rule of thirds” |
| Formats | Choose between “Most Compatible” (JPEG) or “High Efficiency” (HEIF/HEVC) file formats |
| Flash | Use the flash settings for low-light situations |
| Timer | Use the timer function for delayed shots |
Take your iPhone photography skills to the next level with these settings!
iPhone Camera Concerns and Solutions
Troubleshooting iPhone Camera Black Screen Issues
A black screen on your iPhone camera can be frustrating, but there are several troubleshooting steps you can try:
- Restart your iPhone: A simple restart can often resolve temporary glitches.
- Check for obstructions: Make sure the camera lens is clean and free of any debris or cases that might be blocking it.
- Close other apps: If you have multiple apps running, close them as they could be interfering with the camera.
- Update iOS: Ensure your iPhone is running the latest version of iOS, as updates often include bug fixes.
- Reset settings: Go to Settings > General > Reset > Reset All Settings. This won’t erase your data but will reset camera preferences.
- Contact Apple Support: If none of the above solutions work, it’s best to contact Apple Support for further assistance.
iPhone 16 Camera Module Leaks: What We Know
Rumors and leaks about the iPhone 16 camera module have surfaced, suggesting potential improvements like larger sensors, enhanced low-light performance, and new zoom capabilities. However, it’s important to remember that these are just speculations until Apple officially announces the device.
Which Cell Phone Has the Best Camera?
The “best” camera phone is subjective and depends on individual preferences and needs. However, several contenders consistently rank high in reviews:
- iPhone 15 Pro Max: Boasts excellent image quality, impressive zoom capabilities, and advanced features like ProRes video recording.
- Samsung Galaxy S23 Ultra: Offers a versatile camera system with multiple lenses, high resolution, and great low-light performance.
- Google Pixel 7 Pro: Renowned for its computational photography prowess, producing stunning images with excellent detail and dynamic range.
Ultimately, the best camera phone is the one that best suits your individual needs and budget.
Understanding the TrueDepth Camera
The TrueDepth camera is a complex system found on newer iPhone models that uses infrared sensors, cameras, and a dot projector to create a detailed 3D map of your face. This technology enables features like Face ID for secure authentication and Animoji/Memoji for fun and expressive communication.
iPhone XR Camera Repair Guide
If your iPhone XR camera is malfunctioning, you have a few options:
- DIY Repair: If you’re tech-savvy, you can attempt to replace the camera module yourself, but this requires specific tools and expertise.
- Third-Party Repair Shops: Many reputable repair shops can fix your iPhone camera at a lower cost than Apple.
- Apple Repair Service: While more expensive, Apple’s repair service ensures genuine parts and expert technicians.
Before choosing a repair option, consider the cost, warranty coverage, and the reputation of the repair provider.
Key Takeaways
- Mastering iPhone camera settings enhances photo quality.
- Adjusting exposure and composition aids in capturing better images.
- Understanding camera modes and features expands creative control.
Understanding Your iPhone Camera
This section equips readers with the knowledge to make the most out of their iPhone cameras, from basic functions to advanced settings.
Exploring Camera Modes
The iPhone offers a variety of camera modes for different scenarios. Photo mode remains the default, ideal for quick snapshots. Portrait mode adjusts the focus to emphasize the subject with a blurred background, while Night mode enhances low-light photography. Macro mode allows for detailed close-ups, and for motion capture, users have options like Slo-mo and Time-lapse. Burst mode is suitable for action shots, and Panorama offers wide landscape captures.
Mastering Camera Settings
Effective manipulation of camera settings elevates photography. Exposure and focus can be manually adjusted by tapping the screen. The HDR setting brings out more detail in highlights and shadows. Users should be aware of the Preserve Settings option to maintain their preferred configurations.
Navigating the iPhone Camera App
The iPhone Camera app is user-friendly, with controls for zoom, brightness, and flash accessible on the main screen. Swiping between modes is seamless, and Live Photos can be enabled with a simple tap. Composition tools like the grid assist with aligning shots according to the rule of thirds.
Utilizing Advanced Features
Advanced users can take advantage of features like ProRAW for more editing leeway. Portrait Lighting and Photographic Styles adjust the mood and tone of images directly within the app. Cinematic mode on newer models like the iPhone 13 adjusts the depth of field for video with a film-like quality.
Customizing Your Photographic Experience
Personalizing the camera experience involves setting Photographic Styles and choosing filters. The aspect ratio can be changed to 4:3, 16:9, or Square depending on the subject matter. Within the settings, features like lens correction and the option to view outside the frame can also be toggled.
Tips for Professional-Looking Shots
For professional-grade photos, consider the following: use natural light when possible, employ the zoom function sparingly to preserve image quality, and utilize Portrait mode to bring out the main subject. Familiarize yourself with iPhone lenses and their strengths, from wide-angle to telephoto.
Camera Hardware Insights
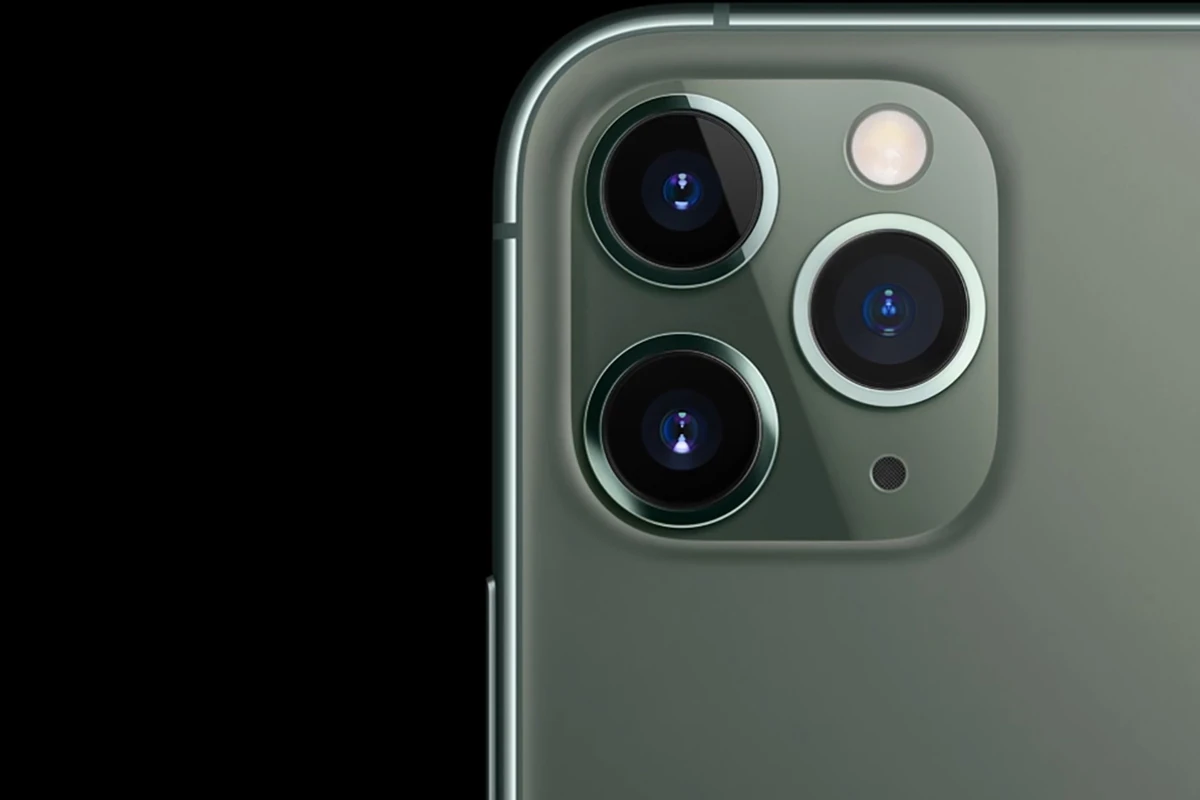
Understanding the iPhone’s camera hardware is crucial. The iPhone 13, for example, boasts a dual or triple-lens system that significantly improves depth of field and low-light performance. The front camera also supports Portrait mode and Portrait Lighting, adding versatility in capturing selfies with professional effects.
Capturing and Enhancing Your Photos
The iPhone’s camera app equips users with settings and tools for taking vibrant photos and editing them with ease. Here’s how to leverage these features for superior image capturing and post-shot adjustments.
Taking Amazing Photos
To take outstanding photos, start by optimizing your iPhone camera settings. Composition can be enhanced by enabling the grid setting to align shots using the Rule of Thirds. For sharp focus and optimal exposure, tap the subject on your screen and adjust the exposure slider as needed. Experiment with various photo modes like Portrait mode for depth of field, and use Burst mode by holding down the shutter button to capture action shots. Flip to the front camera with a swipe for spontaneous selfies.
Editing Like a Pro
The iPhone camera app offers a rich set of editing tools. Adjust brightness levels and apply filters to enhance mood. Smart HDR can be toggled for high-dynamic-range imaging, and Photographic Styles personalize shots with predefined color and contrast settings. For users who desire control over their edits, Apple ProRAW format supports extensive adjustments without losing image quality.
Sharing and Managing Your Creations
After capturing and editing photos, manage them directly within the Photos app. Create albums for organization, and utilize the share sheet to distribute images via email, messages, or social media. iCloud Photo Library can store photos and keep them synced across all devices.
Getting the Most From Your Selfies
Selfies stand out with the right settings: Portrait mode brings forward faces with background blur, and Portrait Lighting adjusts for studio-quality effects. Don’t forget to use the timer function for hands-free shots. The front camera also supports Night mode, ensuring clarity even in low light.
Exploring Video Capabilities
Turn your iPhone into a powerful video camera. Record video in stunning 4k resolution, and apply Slo-mo for dramatic effect. Cinematic mode tracks movement and shifts focus smoothly, much like professional-grade cameras. Video settings are adjustable, including frame rate and resolution, from the Settings app under the Camera section.
Frequently Asked Questions
To capture the full potential of iPhone photography, adjusting camera settings to their optimum values is essential. This section addresses common inquiries about camera settings on the iPhone, guiding users toward taking better photos.
How can I adjust my iPhone camera settings for optimal photo quality?
For the best photo quality, set your iPhone’s camera resolution at the highest available megapixels and ensure HDR is on. Also, adjust exposure by tapping the screen and dragging the sun icon, and use the manual focus by holding down on the desired area until the AE/AF Lock is set.
What are the essential camera functions available on an iPhone?
iPhones generally offer functions such as zoom, burst mode, live photos, panoramas, and portrait mode. Adjustable settings include exposure, focus, HDR, filters, and the use of grid lines for framing.
How do I reset my iPhone camera settings to their default values?
To reset camera settings, navigate to the Settings app, tap ‘Camera’, and select ‘Reset Settings’. This will restore all settings to factory defaults.
What settings should I use on my iPhone camera to achieve professional-looking photographs?
Professional-looking photos can be achieved by using correct focus and exposure settings, enabling the grid for composed shots, and making good use of portrait mode for depth-of-field effects. Experiment with third-party apps for more control.
Are there any specific camera settings recommended for newer iPhone models like the iPhone 14?
On newer models such as the iPhone 14, utilize the Photonic Engine and ProRAW features for detailed images, and tap into higher resolution settings where available. Use Pro mode for more creative control.
How can I troubleshoot issues with my iPhone camera settings not working correctly?
Restart your iPhone first. If issues persist, check for iOS updates or reset your camera settings. Consult Apple Support if problems are not resolved by these steps.

