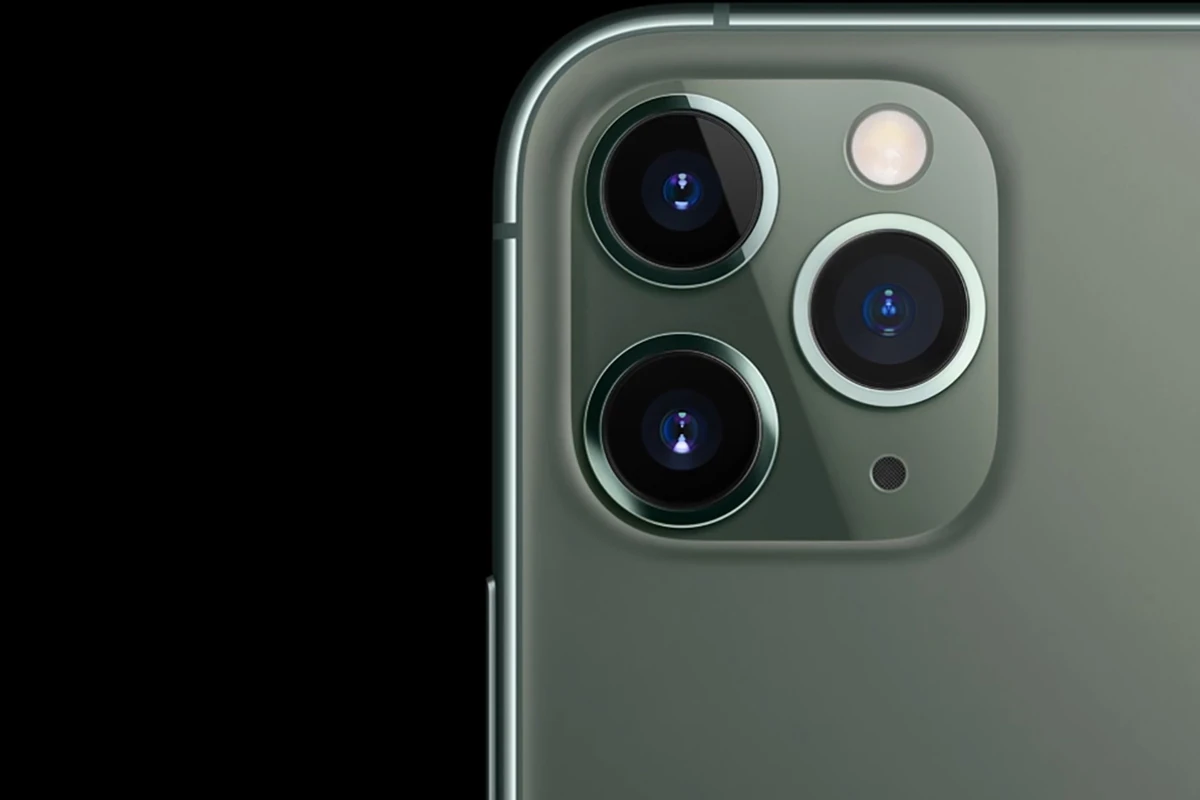
If your iPhone camera isn’t working, you might see a black screen, blurry photos, or the camera app might not open. You can often fix these issues quickly. First, try restarting your iPhone or force closing the camera app. If that doesn’t help, check for software updates. A simple iOS update can sometimes fix camera problems.
If you still have issues, it may be a hardware problem. Check for any damage or dirt on the camera lens. Clean it gently with a soft, lint-free cloth. If problems continue, contact Apple support for more help.
Dealing with camera issues on your iPhone can be frustrating, but there are often easy solutions. This guide offers quick fixes for common camera problems, from checking for obstructions to updating your iOS. We’ll help you figure out the problem and get your camera working again. Whether it’s a software glitch or a setting adjustment, we have you covered. With these tips, you’ll be back to taking photos in no time.
| Common iPhone Camera Issues | Possible Solutions |
|---|---|
| Black screen | Restart iPhone, force close app |
| Blurry photos | Clean lens, check for case interference |
| App not opening | Update iOS, reset iPhone settings |
| Flash not working | Toggle flash settings, update iOS |
Troubleshooting Your iPhone Camera
Having trouble with your iPhone camera? Don’t worry; many common problems have simple solutions. Let’s explore some quick fixes for common iPhone camera issues.
1. Check for Obstructions
Ensure your camera lens is clean and free of any obstructions. Gently wipe the lens with a soft, lint-free cloth. Also, make sure your phone case isn’t blocking the lens or flash.
2. Close Camera App and Restart
Sometimes, a simple restart can resolve temporary software glitches. Double-click the home button or swipe up from the bottom of the screen and pause to see all open apps. Swipe up on the Camera app to close it. Then, restart your iPhone.
3. Check Camera App Permissions
Make sure the Camera app has the necessary permissions to function correctly. Go to Settings > Privacy > Camera and ensure the toggle switch next to Camera is enabled for the apps you want to use it with.
4. Switch Between Camera Modes
Try switching between the front and rear cameras, as well as different camera modes (photo, video, slow-motion, etc.). This can help identify if the issue is specific to a particular camera or mode.
5. Free Up Storage Space
If your iPhone’s storage is full, it can affect camera performance. Delete unnecessary files, photos, or videos to free up space. You can also offload unused apps or store content in iCloud.
6. Update iOS
Ensure your iPhone is running the latest version of iOS. Software updates often include bug fixes and performance improvements that can resolve camera issues. Go to Settings > General > Software Update to check for updates.
7. Reset All Settings
If other solutions fail, try resetting all settings on your iPhone. This will restore all settings to their default values without deleting your data. Go to Settings > General > Transfer or Reset iPhone > Reset > Reset All Settings.
8. Hardware Issue
If none of the above solutions work, there might be a hardware problem with your iPhone’s camera. In this case, contact Apple Support or visit an Apple Store for assistance.
Additional Tips
- Force restart your iPhone: Quickly press and release the Volume Up button, then quickly press and release the Volume Down button. Finally, press and hold the Side button until the Apple logo appears.
- Restore your iPhone to factory settings: This should be a last resort, as it will erase all data on your iPhone. Make sure to back up your data before restoring.
| Troubleshooting Step | Description |
|---|---|
| Check for obstructions | Ensure the camera lens is clean and unobstructed. |
| Close and restart the Camera app | Close the Camera app and restart your iPhone. |
| Check camera app permissions | Ensure the Camera app has necessary permissions. |
| Switch between camera modes | Switch between different camera modes to identify issues. |
| Free up storage space | Delete unnecessary files to free up storage. |
| Update iOS | Update your iPhone to the latest iOS version. |
| Reset all settings | Restore all settings to their default values. |
| Hardware issue | Contact Apple Support for assistance with potential hardware problems. |
Taking Your iPhone Photography to the Next Level
While troubleshooting camera issues is important, mastering some basic photography techniques can significantly enhance your iPhone photography.
Understanding Composition
Composition refers to how you arrange elements within your photo. Utilize the rule of thirds, leading lines, and symmetry to create visually appealing images.
Utilizing Natural Light
Natural light is your best friend. Avoid harsh shadows by shooting during the golden hour (shortly after sunrise or before sunset) or on overcast days.
Exploring Different Perspectives
Don’t be afraid to experiment with different angles and perspectives. Shoot from above, below, or get up close to your subject for unique compositions.
Mastering Focus and Exposure
Tap on the screen to set focus and adjust exposure. Use the exposure slider to brighten or darken the image as needed.
Utilizing Portrait Mode
For stunning portraits, use Portrait mode to create a shallow depth of field effect, blurring the background and making your subject stand out.
Editing Your Photos
Don’t underestimate the power of editing. Use editing tools to enhance colors, adjust brightness and contrast, and crop your photos for better composition.
By combining these techniques with your newfound troubleshooting knowledge, you can capture and create amazing photos with your iPhone camera.
Basic Troubleshooting Steps
When your iPhone camera stops working, try these simple fixes first. They often solve common issues quickly without needing technical expertise.
Check for Physical Obstructions
Start by examining your iPhone for anything blocking the camera. Remove your phone case if you use one. Some cases can partially cover the lens or flash. Check that your fingers aren’t accidentally covering the camera when you hold your phone.
Look closely at the camera lens for any debris or dirt. Even tiny specks can affect image quality. Inspect the flash LED too. Make sure it’s clean and uncovered.
If you notice any physical damage to the camera area, like cracks or scratches, this may be causing the problem. In this case, you’ll likely need professional repair.
Clean the Camera Lens and Flash
Gently clean your iPhone’s camera lens and flash with a soft, lint-free cloth. A microfiber cloth works best. Don’t use paper towels or rough materials that might scratch the lens.
For stubborn smudges, lightly dampen the cloth with water. Avoid using cleaning products as they may damage the lens coating.
Clean in a circular motion, starting from the center of the lens and moving outward. Be thorough but gentle. Clean the flash LED the same way.
After cleaning, check if image quality improves. Take a few test photos to see if the issue is resolved.
Restart Your iPhone
Restarting your iPhone can fix many camera issues. It clears temporary glitches in the operating system.
To restart:
- For iPhones with Face ID: Press and hold the side button and either volume button until the power off slider appears.
- For iPhones with a Home button: Press and hold the side or top button until you see the slider.
- Drag the slider to turn off your device.
- Wait 30 seconds, then press and hold the side or top button to turn it back on.
After restarting, open the Camera app and test if it’s working correctly.
Force Quit the Camera App
If restarting doesn’t help, try force quitting the Camera app. This can resolve issues caused by the app itself.
To force quit:
- On iPhones with Face ID: Swipe up from the bottom of the screen and pause in the middle.
- On iPhones with a Home button: Double-click the Home button.
- Swipe left or right to find the Camera app.
- Swipe up on the Camera app’s preview to close it.
After force quitting, reopen the Camera app and check if it’s working properly. Take a few test photos to confirm.
| Troubleshooting Step | What It Fixes | Time Required |
|---|---|---|
| Check Obstructions | Physical blockages | 1 minute |
| Clean Lens/Flash | Smudges, dirt | 2-3 minutes |
| Restart iPhone | Software glitches | 1-2 minutes |
| Force Quit App | App-specific issues | 30 seconds |
Addressing Software Related Issues
Software problems often cause iPhone camera malfunctions. These issues can usually be resolved through simple updates and troubleshooting steps.
Update iOS and Apps
Keeping your iPhone’s operating system and apps up-to-date is crucial for optimal camera performance. Outdated iOS software can lead to camera glitches and crashes.
To update iOS:
- Go to Settings > General > Software Update
- If an update is available, tap “Download and Install”
- Follow the on-screen instructions
For app updates:
- Open the App Store
- Tap your profile icon
- Scroll down to see pending updates
- Tap “Update All” or update individual apps
After updating, restart your iPhone to ensure changes take effect. This process often resolves many camera-related software issues.
Reset All Settings
If updates don’t fix the problem, resetting your iPhone’s settings can help. This action won’t delete your data but will revert all settings to default.
To reset settings:
- Go to Settings > General > Transfer or Reset iPhone
- Tap “Reset”
- Choose “Reset All Settings”
- Enter your passcode if prompted
- Confirm the reset
Resetting settings can fix various software glitches affecting the camera. After the reset, reconfigure your preferences and test the camera.
Troubleshoot Third-Party Camera Apps
Third-party camera apps can sometimes conflict with the native camera function. If you’re experiencing issues with a specific app, try these steps:
- Force close the app
- Restart your iPhone
- Reinstall the app
If problems persist, check for app updates or contact the developer for support. Some apps may have known bugs or compatibility issues with certain iOS versions.
To identify if the issue is app-specific:
- Try using the native Camera app
- Test multiple third-party camera apps
This comparison helps determine if the problem lies with a specific app or the iPhone’s camera system itself.
| App Type | Troubleshooting Steps |
|---|---|
| Native Camera | Update iOS, Reset Settings |
| Third-Party Apps | Update App, Reinstall, Contact Developer |
By systematically addressing software-related issues, you can often restore your iPhone camera’s functionality without needing professional repair services.
Advanced Fixes for Persistent Issues
If simple troubleshooting steps haven’t resolved your iPhone camera issues, more advanced solutions may be necessary. These methods can address deeper software problems or identify potential hardware failures.
Use iTunes or Finder for Recovery
Connect your iPhone to a computer with iTunes (Windows) or Finder (Mac). Select your device when it appears. Click “Restore iPhone” to reinstall iOS. This process erases all data, so back up your device first.
If the camera still doesn’t work after restore, try updating to the latest iOS version. Go to “Check for Update” in iTunes or Finder. Install any available updates.
Sometimes, restoring from a backup can reintroduce software bugs. Set up your iPhone as new to rule this out. Skip signing into iCloud when prompted during setup.
| Restore Method | Pros | Cons |
|---|---|---|
| From Backup | Keeps data | May reintroduce bugs |
| As New Device | Fresh start | Loses personal data |
Enter DFU Mode and Restore
DFU (Device Firmware Update) mode is a last resort for software issues. It’s more thorough than a standard restore. To enter DFU mode on most iPhones:
- Connect your iPhone to a computer
- Press and quickly release the Volume Up button
- Press and quickly release the Volume Down button
- Press and hold the Side button until the screen goes black
- Hold the Side button and Volume Down button for 5 seconds
- Release the Side button but keep holding Volume Down
iTunes or Finder will detect a device in recovery mode. Choose “Restore” to completely reinstall iOS.
If camera problems persist after a DFU restore, hardware repair may be needed. Contact Apple Support or visit an Apple Store for further diagnosis.
Seeking Professional Assistance
When your iPhone camera stops working, professional help can resolve hardware issues or complex software problems. Apple offers support options and repair services to get your device back in working order.
Contact Apple Support
Apple Support provides several ways to get help with your iPhone camera problems. You can start by visiting the Apple Support website or using the Apple Support app on your device. These platforms let you chat with a representative or schedule an appointment.
Phone support is available in many countries. Call Apple’s helpline to speak with a technician who can guide you through troubleshooting steps. If needed, they’ll help set up an in-person appointment.
For quicker assistance, try Apple’s online support communities. Other users may have faced similar issues and can offer helpful advice.
Hardware Repair Options
If your iPhone camera needs physical repair, Apple offers different solutions. You can visit an Apple Store or an Apple Authorized Service Provider for in-person service. Make an appointment beforehand to reduce wait times.
Mail-in repair is another option. Apple will send you a box to ship your device to their repair center. They’ll fix the camera and return your iPhone, usually within a week.
| Repair Option | Estimated Time | Best For |
|---|---|---|
| Apple Store | Same day – 3 days | Quick fixes, diagnosing issues |
| Authorized Provider | 1-5 days | Local service, potentially faster than mail-in |
| Mail-in Repair | 5-9 days | Remote locations, busy schedules |
Consider AppleCare+ if your warranty has expired. It can significantly reduce repair costs for camera issues and other hardware problems.
Frequently Asked Questions
iPhone camera issues can be frustrating. Here are solutions to common problems you might face with your device’s camera.
How can I fix a black screen issue on my iPhone camera?
Restart your iPhone to fix a black screen problem. If that doesn’t work, try force closing the Camera app and reopening it. Clean the camera lens to remove any dirt or smudges that may be blocking the view.
What steps should I take if my iPhone camera becomes unresponsive?
Close all open apps and restart your iPhone. If the issue persists, check for iOS updates and install them if available. Reset your iPhone’s settings as a last resort.
Why has my iPhone camera suddenly stopped working?
Software glitches often cause sudden camera failures. Update your iOS to the latest version. Check if your storage is full, as this can prevent the camera from working. Remove unnecessary apps and files to free up space.
What should I do when the back camera on my iPhone is not functioning?
Switch between front and rear cameras to see if both are affected. If only the back camera isn’t working, it may be a hardware issue. Contact Apple Support or visit an Apple Store for professional assistance.
How do I address iPhone camera issues following an iOS update?
Wait a few hours after the update, as the system may need time to settle. If problems persist, reset all settings on your iPhone. This won’t delete your data but will restore system settings to default.
Why are both my iPhone camera and flashlight not working?
This issue often indicates a more serious problem. Check if your iPhone is in DFU mode or recovery mode. If not, try a hard reset. If the problem continues, contact Apple Support as it may be a hardware malfunction.
| Issue | Quick Fix |
|---|---|
| Black Screen | Restart iPhone |
| Unresponsive Camera | Close apps and reboot |
| Sudden Failure | Update iOS |
| Back Camera Not Working | Switch camera views |
| Post-Update Issues | Reset all settings |
| Camera and Flashlight Failure | Hard reset or contact Apple |


