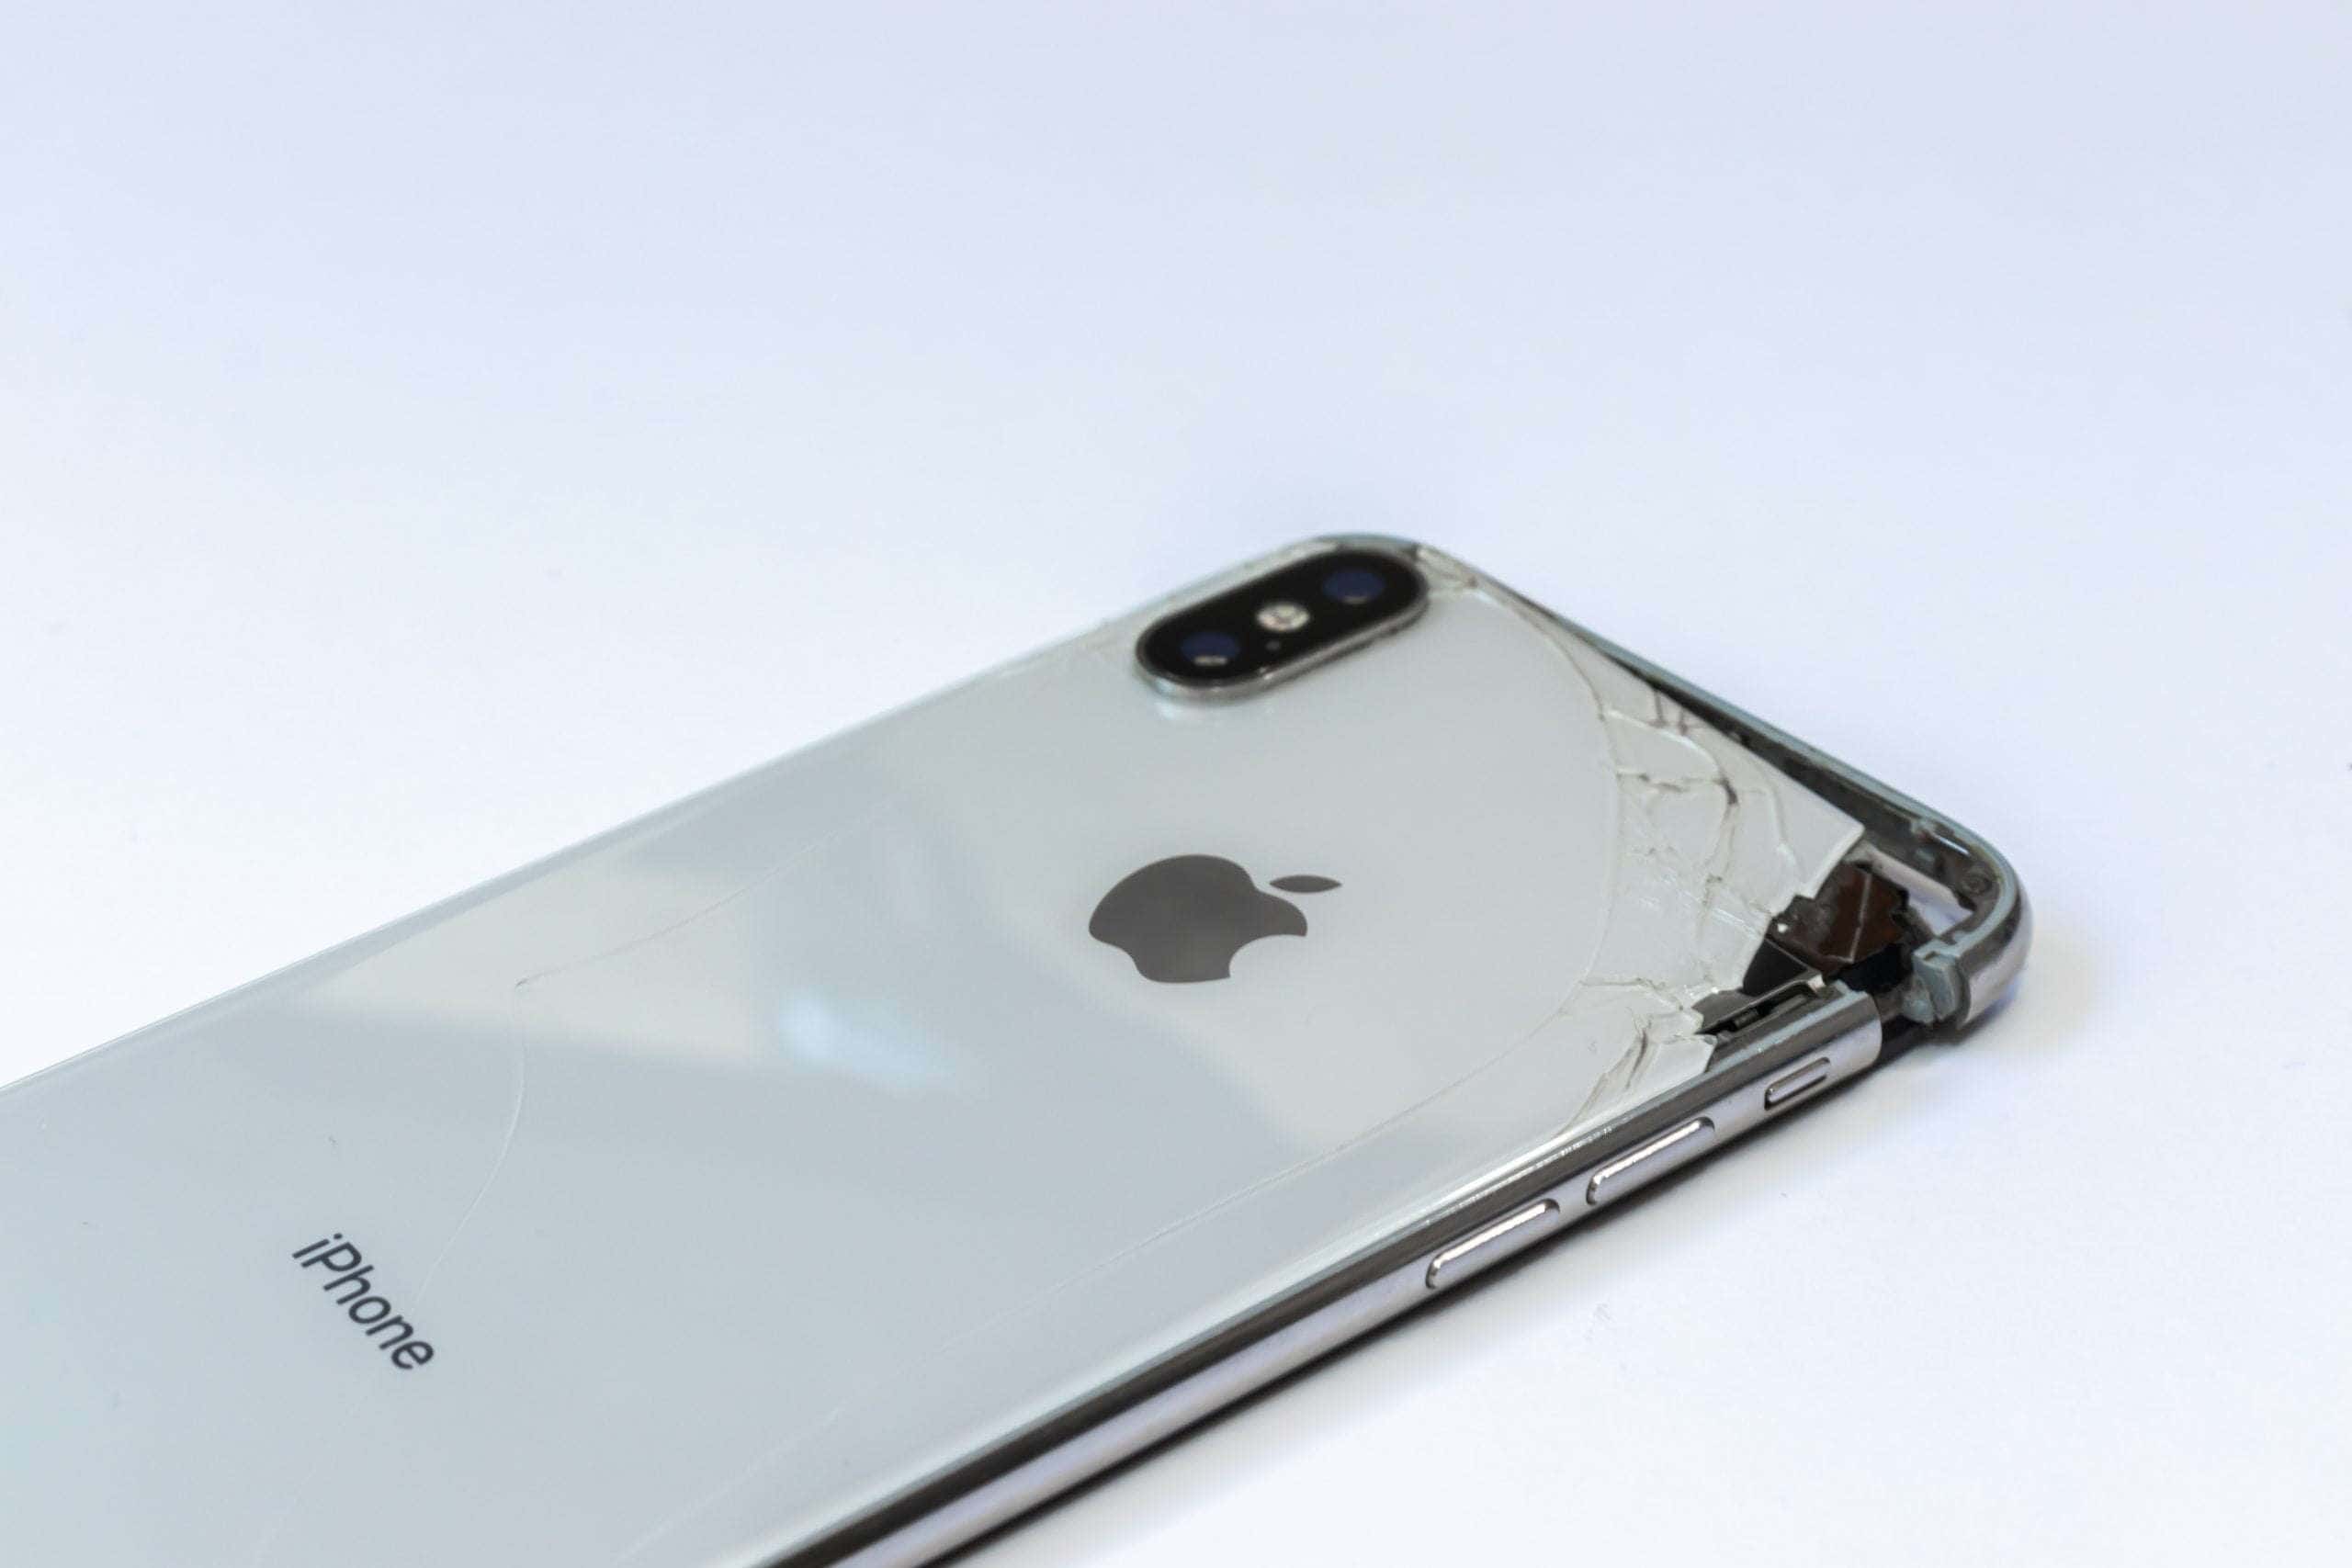
Replacing a cracked back glass on your iPhone can be a difficult task, but with the right tools and careful execution, it’s definitely doable. We don’t recommend it for people who haven’t done any cell phone repairs before (there are a lot of things that can go wrong) but if you’re willing to take the risk feel free to proceed. If you want to reduce the risk consider using a new assembly / swappable back glass (if you have a compatible model) versus stripping the glass and re-applying.
DIY iPhone Rear Glass Repair: A Comprehensive Guide
Assessing the Damage
Before you start, assess the extent of the damage. Minor cracks might be temporarily fixed with adhesive tape or a case, but extensive shattering will require a full replacement.
Tools and Materials Needed
- Heat gun or hair dryer: To loosen the adhesive holding the back glass.
- Suction cup: To lift and remove the shattered glass.
- Plastic prying tools: To gently pry open the phone and disconnect components.
- Precision screwdrivers: To remove screws holding internal components.
- Replacement back glass: Ensure it’s compatible with your iPhone model.
- Adhesive strips: To secure the new back glass.
- Isopropyl alcohol: To clean residue and prepare surfaces.
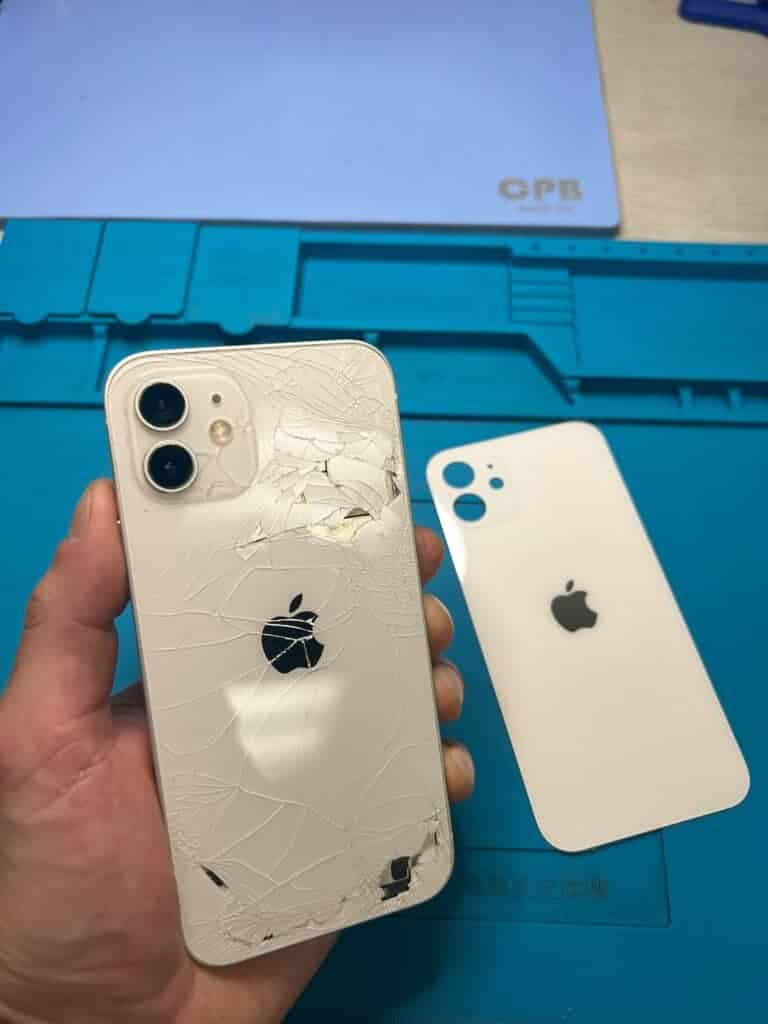
Repair Steps
- Heat and remove: Carefully heat the back glass edges with a heat gun or hair dryer to soften the adhesive. Use a suction cup to lift and remove the shattered glass.
- Disconnect components: Gently pry open the phone and disconnect any components attached to the back glass, like the camera module or wireless charging coil.
- Remove screws: Unscrew and remove any remaining screws holding the back glass frame.
- Clean surfaces: Clean the frame and surrounding areas with isopropyl alcohol to remove adhesive residue.
- Apply new adhesive: Apply new adhesive strips to the frame, ensuring proper alignment.
- Attach new back glass: Carefully position the new back glass onto the frame, pressing firmly to secure it.
- Reconnect components: Reattach any disconnected components and screws.
Important Considerations
- Difficulty: This repair is complex and requires technical skill. Proceed with caution if you’re not experienced with phone repairs.
- Risk of damage: Mishandling components or using excessive force can cause further damage to your iPhone.
- Alternatives: Consider professional repair services or Apple’s official repair program if you’re unsure about DIY repair.
Table: Pros and Cons of DIY Repair
| Pros | Cons |
|---|---|
| Potentially cheaper than professional repair | Requires technical skill and specific tools |
| Sense of accomplishment from fixing your own device | Risk of causing further damage to your iPhone |
| Can be done at your own pace and convenience | May void warranty or AppleCare+ coverage |
| Learn valuable skills | Replacement parts may not be of the same quality as original parts |
Options To Repair Cracked Back Glass (iPhone)
| Option | Pros | Cons |
|---|---|---|
| Apple Repair | Professional job, warranty on repair, readily available parts | Most expensive option, may require sending phone away |
| Authorized Apple Service Provider | Similar quality to Apple repair, potentially lower cost, may require appointment | Still more expensive than other options |
| Third-party repair shop | Can be more affordable, faster turnaround time | Quality and warranty may vary, risk of using uncertified parts |
| DIY repair | Most affordable option but very difficult | Requires technical skill, high risk of damaging phone permanently, tools and replacement parts needed |
Back Glass Repair Methods For A DIYer
| Methods | Pros | Cons | Tips |
|---|---|---|---|
| Using a laser machine | – Potentially the cleanest and most precise repair method | – Requires expensive equipment and expertise, not readily available to most DIYers | – This method is typically used by professional repair shops. Attempting it yourself is highly discouraged unless you have the proper training and equipment. |
| Using heat and a pry tool | – More affordable than using a laser machine | – High risk of damaging the phone’s internal components, requires steady hands and good technique | – Only use this method if you are comfortable with delicate repairs and have watched multiple tutorials. Heat the back glass evenly to avoid shattering it further, and use specialized pry tools to avoid scratching the phone’s frame. |
| Swapping the back housing / glass assembly | – Replaces the entire back glass panel, resulting in a like-new appearance | – Requires careful disassembly of the phone and possibly some soldering skills, replacement parts can be expensive | – This is the easiest way to go about it if all things go right. Attempt this only if you’re comfortable taking apart your phone and putting it back together. |
| Covering the back glass with tape or a case | – Quick, easy, and affordable solution | – Doesn’t fix the crack underneath, might not look aesthetically pleasing | – This is a temporary solution at best. Consider using a screen protector designed for the back of the phone for added protection. |
| Using a custom skin or decal | – Adds a decorative touch while covering the crack | – Might not adhere well to the cracked surface, can be expensive for high-quality skins | – Choose a skin specifically designed for the iPhone and made from a durable material. Apply it carefully following the manufacturer’s instructions. |
Important reminder:
DIY repairs carry a high risk of permanently damaging your phone. If you are not comfortable with any of these methods, it is always best to take your iPhone to a professional repair shop. They have the experience and tools necessary to fix the crack safely and effectively.
Key Takeaways
- Understanding the Fragility: The back glass of iPhones, especially from iPhone 8 onwards, is known for its fragility.
- Repair Options: Various methods exist for back glass repair, including using a laser machine or heat and pry tools.
- Cost Considerations: Apple has reduced the cost of back glass repairs for certain models with AppleCare+.
- Technical Challenges: The addition of MagSafe in iPhone 12 series has increased the complexity of repairs.
The Fragility of iPhone’s Back Glass

The back glass of iPhones, introduced to support wireless charging, has added both aesthetic appeal and fragility. This glass is prone to cracking, posing a challenge for users and repair technicians alike.
iPhones with Back Glass:
- iPhone 16 Series (2024)*
- iPhone 15 Series (2023)
- iPhone 14 Series (2022)
- iPhone 13 Series (2021)
- iPhone 12 Series (2020)
- iPhone 11 Series (2019)
- iPhone X / Xr / Xs (2017)
- iPhone 8 Series (2017)
*iPhone 16 expected to continue back glass usage as design changes will be minimal.
Methods of Repair
Method: Using Heat and Pry Tool
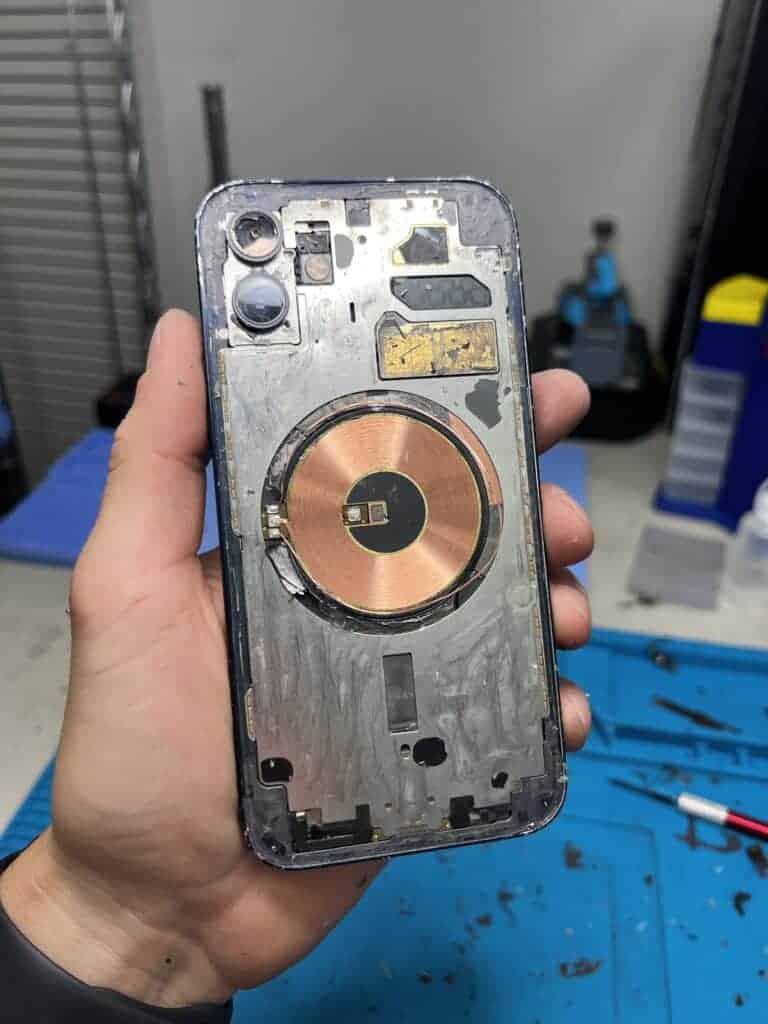
The Heat and Pry Tool method is a widely used technique for repairing the back glass of an iPhone. This approach involves applying heat to soften the adhesive that holds the back glass in place and then carefully prying the glass away from the frame. It’s a popular choice for its relative simplicity and cost-effectiveness.
Steps in the Heat and Pry Tool Method
- Preparation: Gather the necessary tools, including a heat gun or hairdryer, a set of pry tools (like plastic spudgers or thin metal blades), and protective gloves.
- Heating the Back Glass: Apply heat evenly across the surface of the back glass. The goal is to soften the adhesive without overheating any internal components. Move the heat source in a constant motion to avoid concentrating heat in one area.
- Finding an Entry Point: Once the adhesive is softened, identify a starting point for prying. This is usually along the edges where the glass meets the frame.
- Prying the Glass: Carefully insert the pry tool under the edge of the glass. Gently lift the glass away from the frame, working slowly around the perimeter. Patience is key to avoid cracking the glass further or damaging the frame.
- Removing the Glass: Continue to apply heat as needed while you work the pry tool around the entire edge of the glass. Once the adhesive is sufficiently loosened, the back glass should lift away.
- Cleaning the Frame: After removing the glass, clean any residual adhesive from the frame. This can be done using isopropyl alcohol and a soft cloth or a plastic scraper.
- Applying New Adhesive: Apply a new adhesive strip or liquid adhesive to the frame, ensuring even coverage for a secure fit.
- Attaching the New Glass: Carefully align the new back glass onto the frame and press down firmly to ensure a good bond. Wipe away any excess adhesive.
- Curing: Allow sufficient time for the adhesive to cure and set, ensuring the back glass is securely attached.
Advantages
- Cost-Effective: Requires minimal tools and no expensive equipment.
- Accessibility: Can be performed by individuals with basic repair skills.
- Immediate Results: Offers a quick solution to back glass damage
Method: Back Housing / Assembly Swap
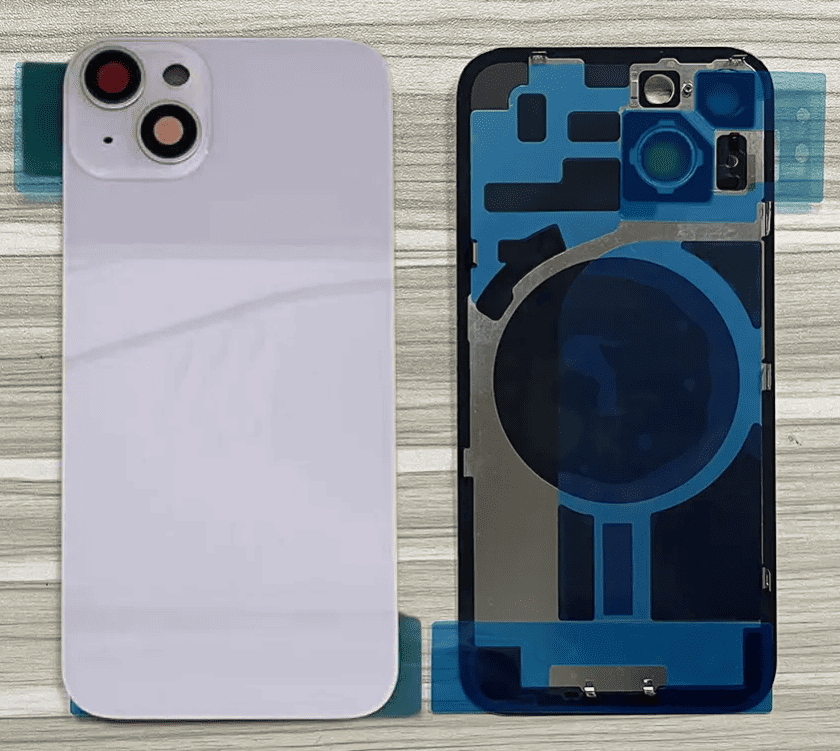
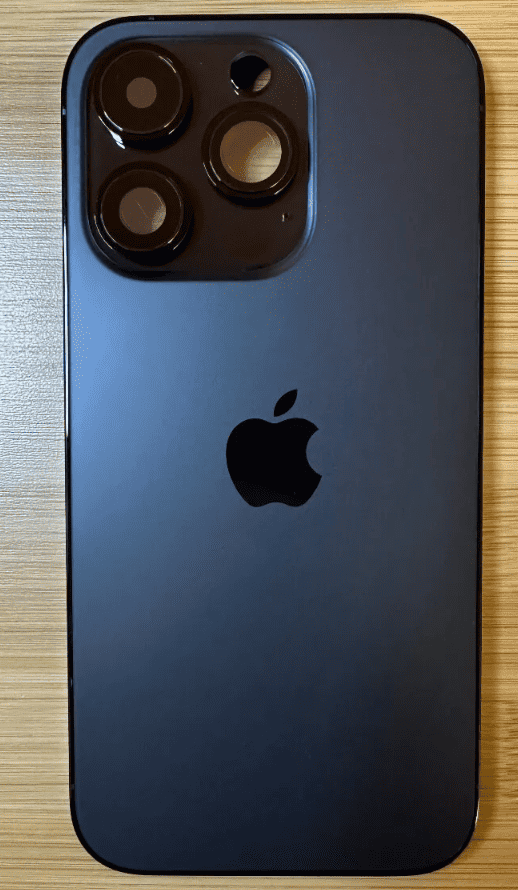
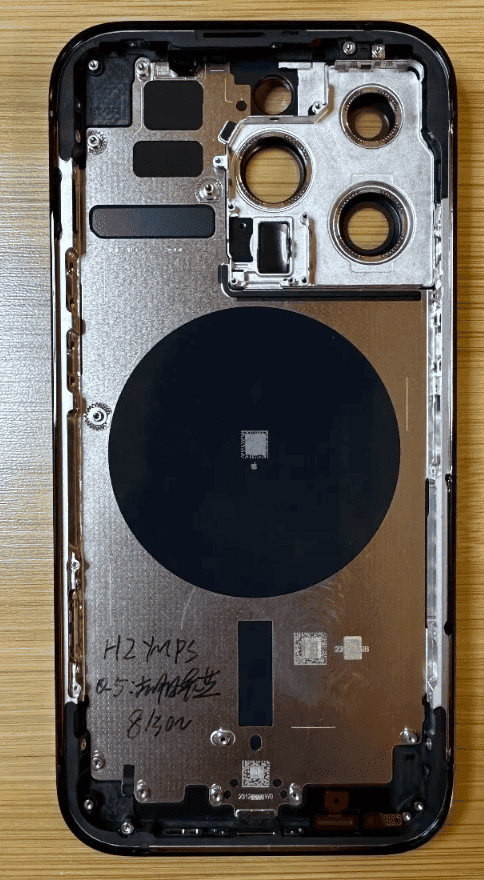
A back housing/assembly swap is a recommended method for DIYers because if everything goes well you could be very successful with this method. This approach involves replacing the entire back assembly of the phone, including the glass, frame, and any attached components. It’s a viable alternative when the back glass damage is extensive or when other repair methods are impractical.
Process of Back Housing Swap
- Assessment: First, evaluate the extent of the damage to determine if an assembly swap is necessary. This method is often chosen for severe cracks or when multiple components are affected.
- Disassembling the iPhone: Carefully disassemble the iPhone. This step involves removing the screen, battery, motherboard, and other internal components to access the back assembly.
- Removing the Damaged Assembly: Once the internals are safely removed, detach the damaged back assembly. This includes the broken back glass and any attached elements like the wireless charging coil.
- Installing the New Assembly: Replace the damaged assembly with a new one. Ensure that the replacement part is compatible with the iPhone model and includes all necessary components.
- Reassembling the Phone: Carefully reassemble the phone, ensuring all components are securely in place and connected correctly.
- Testing: After reassembly, test the phone thoroughly. Check the camera, wireless charging, and other functionalities to ensure everything works as expected.
Advantages of Assembly Swap
- Comprehensive Solution: Replaces all potentially damaged components, not just the glass.
- Aesthetic Restoration: Restores the iPhone to a like-new appearance.
- Time-Efficient: Can be quicker than intricate glass-only repairs, especially for severe damage.
Method: Using a Laser Machine
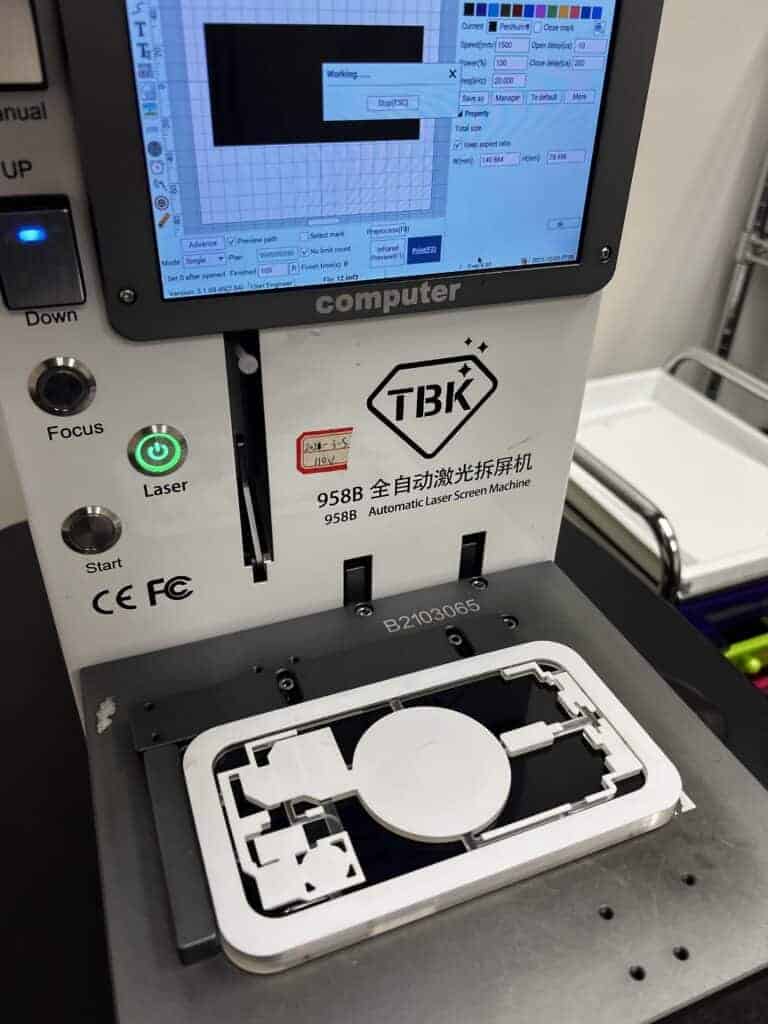
This method is mentioned but not entirely practical unless you have access to the machine. Laser machines are considered the most accurate way to strip a back glass and prepare the phone for replacement, but unless you’re trained on how to use one the results could be disastrous. We only recommend using a laser machine if you have used one before.
- Cost: Machine cost around $2,000.
- Process: Burns the glue bonding the glass without damaging other components.
Cost Considerations
Apple has reduced the repair cost for back glass on iPhone 12 and 13 models to $29, provided the user has AppleCare+. Without AppleCare+, the cost could go up to $599.
Challenges with Magsafe
The introduction of MagSafe in the iPhone 12 series (and later) increased the complexity of back glass repairs. The magnets glued to the glass require careful handling and specific techniques for successful repair.
Practical Scenarios
Imagine dropping your iPhone and finding a spider-web of cracks across its elegant back glass. This guide provides a lifeline, offering detailed steps and cost-effective methods to restore your iPhone’s pristine look.
Real-World Applications
Repair shops can leverage these methods to offer efficient and cost-effective services. iPhone users gain the knowledge to understand the repair process, helping them make informed decisions.
Latest Technological Advancements
The use of laser machines in back glass repair is a testament to technological advancement in the field of mobile repair. This high-precision method, though costly, offers a safe and efficient way to handle delicate repairs.
User Experiences
Many users have expressed relief at Apple’s reduced repair costs under AppleCare+. The complexity of repairs, especially for the iPhone 12 series, has also been a topic of discussion in various tech forums
FAQs
Can I repair the back glass of my iPhone at home?
Yes, with the right tools and instructions, it’s possible to repair the back glass at home. However, it requires precision and patience. This is a repair that can easily damage other components on your
Is it cheaper to repair or replace an iPhone with a broken back glass?
This depends on the model and the extent of the damage. With Apple’s reduced repair costs under AppleCare+, repairing is often more cost-effective.
How long does it take to repair the back glass of an iPhone?
The time can vary depending on the method used, but typically it takes a few hours to complete the process.
Can I use third-party services for back glass repair?
Yes, third-party repair services can fix your iPhone’s back glass, but ensure they use genuine parts and have a good reputation.
Does repairing the back glass myself void the warranty?
Performing repairs yourself can void the warranty. It’s recommended to check with Apple or authorized service providers before proceeding.
What back glass repair method do you recommend for a first-timer?
It’s so easy to make a mistake when removing the old back glass and putting on the new one that we recommend going with the assembly swap method. The biggest mistake people make with the other methods is related to the heat application burning the logic board – with an assembly swap you minimize that risk.

