When an iPhone runs into problems, sometimes it must enter recovery mode. This special state can help fix issues that prevent the iPhone from starting up properly. Recovery mode can aid in updating the iOS or restoring the device to factory settings. It’s a troubleshooting method advised for iPhones that are stuck on the Apple logo or experience software malfunctions.
Entering recovery mode differs depending on the model of iPhone. Modern iPhones require a sequence of button presses to invoke this mode. For example, on an iPhone 8 or newer, the user presses the volume up, volume down, and then holds the side button to enter recovery mode. On older models, the process involves holding the home button along with the lock button.
Once in recovery mode, the user can choose to update their iPhone’s software or perform a restore. Choosing an update will attempt to reinstall the iOS without erasing data. If the update doesn’t solve the issue, a restore may be necessary. This will erase all data on the iPhone but is often effective in resolving more significant problems.

Troubleshooting an iPhone Stuck in Recovery Mode
Identifying Recovery Mode
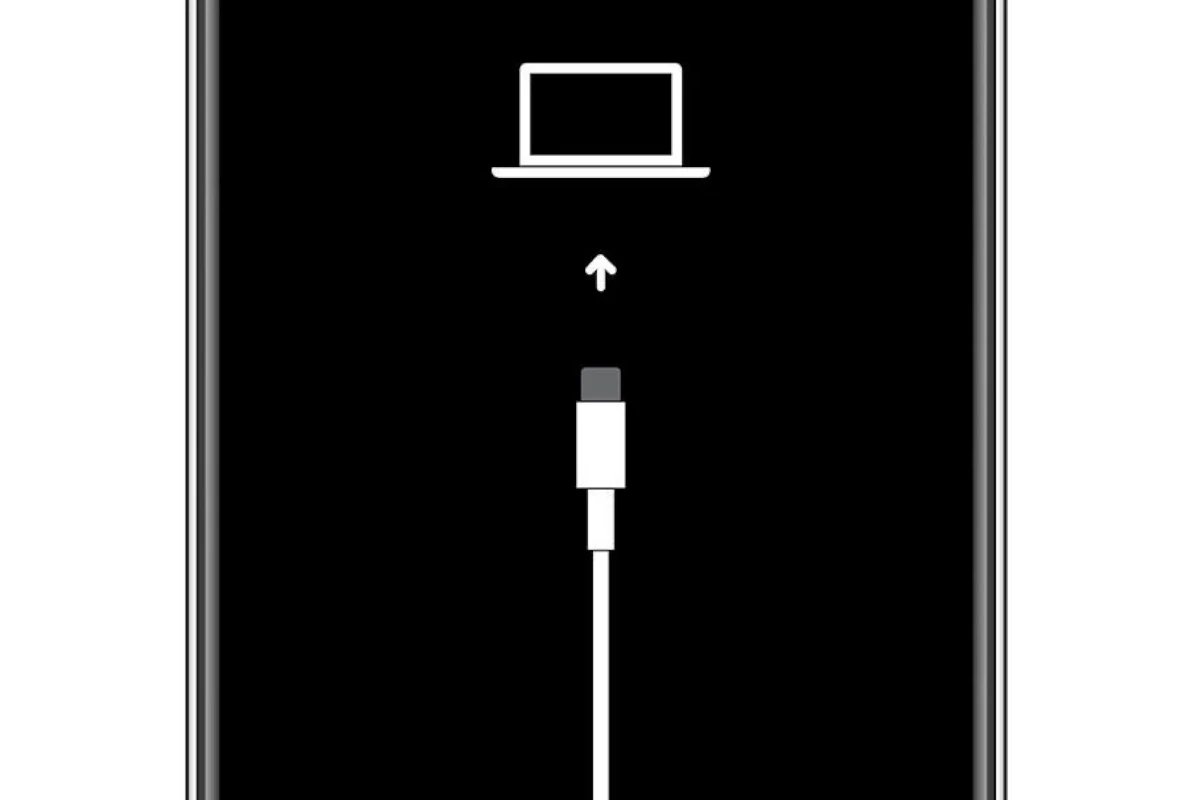
Your iPhone is in recovery mode if you see a screen with an iTunes logo and a Lightning cable. This mode is a failsafe that allows you to restore or update your iPhone when it’s having software issues. However, it’s not meant to be a permanent state.
Steps to Exit Recovery Mode
- Disconnect: Unplug your iPhone from your computer or any accessories.
- Force Restart:
- iPhone 8 or later: Press and quickly release the Volume Up button. Press and quickly release the Volume Down button. Then, press and hold the Side button until you see the Apple logo.
- iPhone 7 or 7 Plus: Press and hold both the Side and Volume Down buttons until you see the Apple logo.
- iPhone 6s or earlier: Press and hold both the Home and the Top (or Side) buttons until you see the Apple logo.
- Check for Updates: Once your iPhone restarts, check for any available iOS updates. Go to Settings > General > Software Update. Updating your software may resolve the issue that caused your iPhone to enter recovery mode.
If Your iPhone Stays in Recovery Mode
If the above steps don’t work, you’ll need to use a computer to restore your iPhone.
- Connect to Computer: Plug your iPhone into a Mac or PC with iTunes (or Finder on macOS Catalina or later).
- Locate Your iPhone: Your iPhone should appear in iTunes or Finder.
- Restore: You’ll be given the option to restore your iPhone. This will erase all data on your device and install the latest iOS version.
Important Note:
Restoring your iPhone will erase all data. Make sure you have a recent backup before proceeding. If you don’t have a backup, you can try using a third-party recovery tool to recover data from your iPhone in recovery mode, but this is not guaranteed.
Key Takeaways
- Recovery mode helps fix iPhone startup problems.
- Various iPhone models have unique methods to enter recovery mode.
- Recovery mode can update or restore iOS software.
Entering Recovery Mode
When an iOS device does not respond, entering recovery mode can allow you to update or restore the device using a Mac or PC.
For iPhone 8 or Newer Models
To enter recovery mode on an iPhone 8 or newer, including the iPhone X and iPhone 13, follow these steps. First, quickly press and release the volume up button, then the volume down button. Next, press and hold the side button. Keep holding the side button until the recovery mode screen shows up.
For iPhone 7 or 7 Plus
For iPhone 7 or iPhone 7 Plus, the process to enter recovery mode is slightly different. Press and hold both the side button and the volume down button at the same time. Release both buttons when the recovery mode screen appears.
For Models With a Mechanical Home Button
If you have an iPhone with a mechanical home button, such as older models before the iPhone 7, here’s what to do. Press and hold the home button and the top (or side) power button simultaneously. Hold these buttons until you see the recovery mode screen, then you can release them.
In all cases, once the recovery mode screen appears, you can then connect your iPhone to a computer using a cable. Use Finder or iTunes to update or restore your iPhone. If you choose to restore, be aware that it will erase all data on the device. Please contact Apple Support for further assistance if needed.
Using Recovery Mode to Update or Restore
Recovery mode is a powerful tool that can help if an iPhone is unresponsive or experiencing severe software issues. It allows users to update the device’s iOS or restore it to factory settings.
Restoring iOS with Finder or iTunes
When you need to update or restore your iPhone’s iOS using a Mac with macOS Catalina or later, open Finder. For a Mac with macOS Mojave or earlier, or on a Windows PC, use iTunes. Connect your iPhone to your computer and locate the device. You may need to put your iPhone into recovery mode manually. To do this, press the correct button combination for your iPhone model until you see the recovery mode screen. Once in recovery mode, choose ‘Update’ to reinstall iOS without erasing data, or ‘Restore’ to erase all content and settings. If you have a backup on iCloud or your computer, you can restore it after the update or restore process.
Resolving Common Recovery Mode Issues
If you encounter issues during the recovery mode process, such as the download taking too long or the device exiting the recovery mode screen, do not disconnect your iPhone from the computer. Instead, allow the download to finish and if necessary, repeat the process. If your device remains unresponsive or continues to experience problems, contact Apple Support or visit a Genius Bar for assistance. Remember, using recovery mode to update or restore your iOS may resolve many common problems, including devices that are stuck in a boot loop or have become disabled due to a forgotten passcode.