Setting up an iPad for your child can feel overwhelming with all the options and safety concerns to consider. Creating a safe digital environment for your child starts with properly setting up their iPad with age-appropriate content controls and screen time limits. You can easily manage what they see and do while still giving them the freedom to learn and have fun with this powerful device.
Apple has made the process simpler with Family Sharing features that let parents monitor and control their child’s iPad experience. You can create a child Apple ID, set content restrictions, and manage app purchases without constantly looking over their shoulder. This balance of freedom and protection helps children develop healthy tech habits while staying safe online.
Step-by-Step Guide to Setting Up an iPad for Your Child
1. Create a Child Apple ID via Family Sharing
- Go to Settings > Family > Add Member > Create Child Account.
- Enter your child’s name and birth date.
- Follow the prompts to set up the account and connect it to your Family Sharing group.
2. Use Quick Start for Faster Setup
- Make sure both your device and the new iPad are updated to the latest iOS/iPadOS version.
- Place your iPhone near the new iPad and follow the Quick Start instructions to transfer settings and apps, including parental controls.
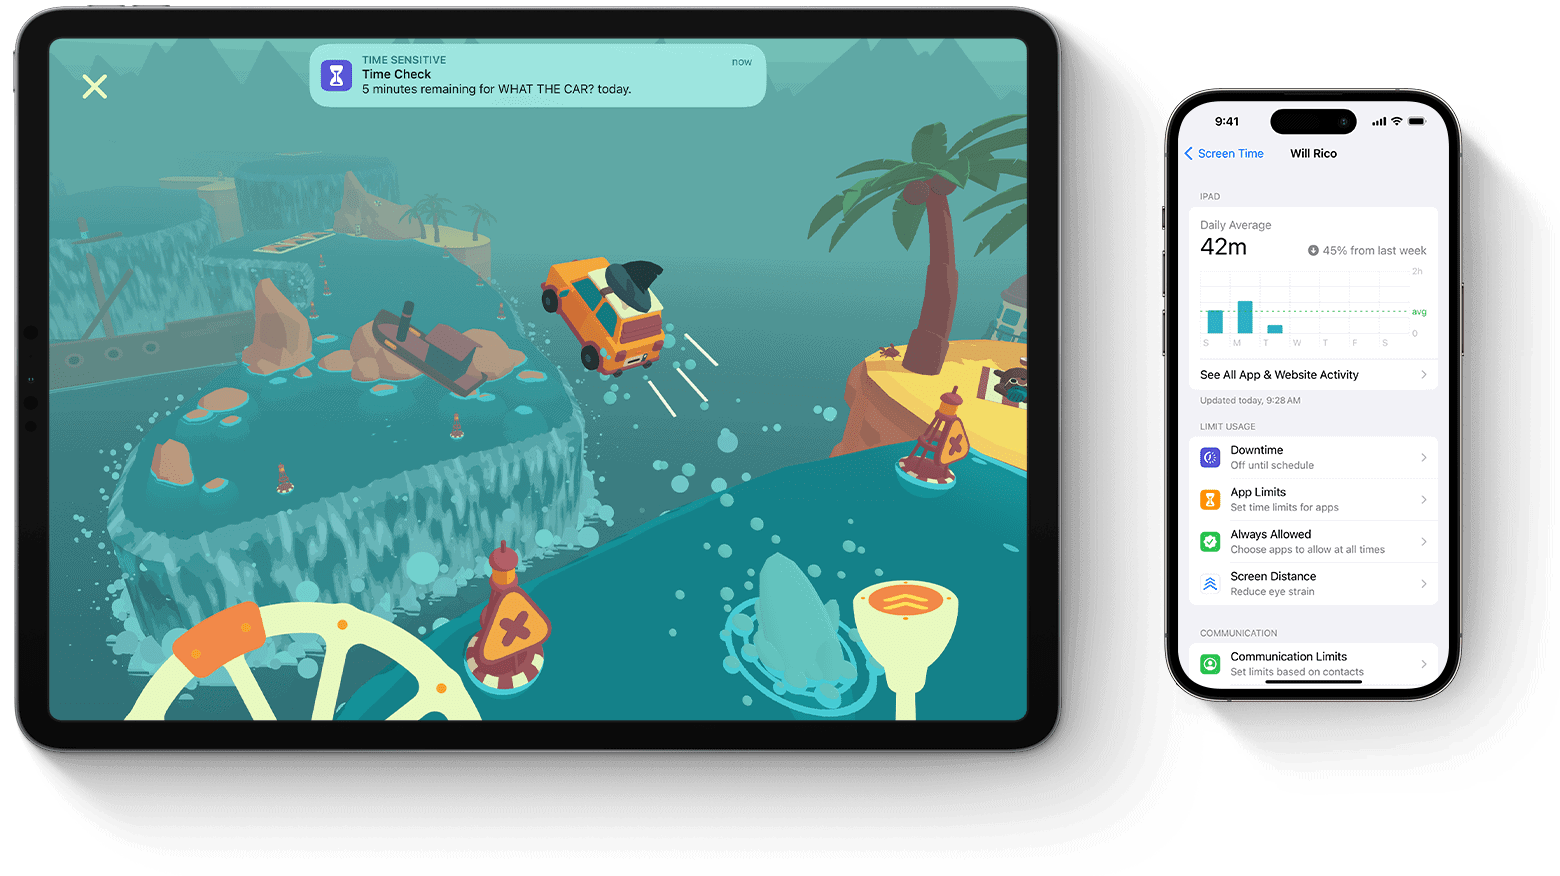
3. Set Up Screen Time and Parental Controls

- Navigate to Settings > Screen Time > This is My Child’s iPad.
- Create a Screen Time passcode that only you know.
- Set up:
- Downtime – Blocks access to all but essential apps during certain hours.
- App Limits – Restrict how long certain app categories can be used daily.
- Communication Limits – Choose who your child can contact during screen time and downtime.
- Content & Privacy Restrictions – Block explicit content, restrict web access, and prevent changes to settings.
4. Manage App Store and Purchase Permissions
- Enable Ask to Buy in your Family Sharing settings so you can approve purchases.
- In Settings > Screen Time > Content & Privacy Restrictions > iTunes & App Store Purchases:
- Disallow app installations or deletions.
- Block in-app purchases.
- Require a password for every purchase.
5. Restrict Web Content and App Access
- Under Content & Privacy Restrictions > Web Content, choose:
- Allowed Websites Only to restrict browsing to approved sites.
- Disable apps you don’t want your child to use (like Safari, FaceTime, or AirDrop).
- Prevent account changes and system setting edits.
Insights from Recent Research on Children and Screen Time
- Emotional Regulation: Using screens like iPads to calm toddlers may lead to more frequent tantrums as they grow, affecting emotional development.
- Cognitive and Language Development: Too much screen time before the age of five can slow language acquisition and reduce attention and problem-solving skills.
- Physical Health: Increased use of tablets is linked to rising cases of nearsightedness in children and can negatively impact fine motor development due to less physical play.
Best Practices for Healthy iPad Use
- Co-Engagement: Sit with your child and interact with them during screen use to promote learning and safety.
- Prioritize Educational Content: Choose age-appropriate apps, games, and videos that foster creativity, literacy, or STEM learning.
- Establish Boundaries: Set firm daily screen time limits and schedule breaks to avoid digital fatigue.
- Lead by Example: Your device habits influence theirs. Show balanced screen usage.
- Encourage Offline Activities: Support time spent reading, playing outside, doing crafts, or other screen-free hobbies.
Key Takeaways
- Set up Family Sharing and create a child Apple ID to manage content and purchases on your child’s iPad
- Enable Screen Time limits and content restrictions to control when and what your child can access
- Use parental controls to block inappropriate content and protect your child’s privacy while they use the iPad
Preparing Your Child’s iPad
Setting up an iPad for your child requires some important steps to create a safe and controlled digital environment. The right setup helps balance screen time with appropriate content access.
Creating an Apple ID for Your Child
To get started, you’ll need to create a dedicated Apple ID for your child. This account will be linked to your family group while giving them their own identity.
For children under 13, you must create this account through Family Sharing. Go to Settings > [your name] > Family Sharing on your device. Tap Add Member, then select Create an Account for a Child and follow the prompts.
You’ll need to:
- Enter your child’s birthdate
- Review and agree to the parent privacy disclosure
- Verify your payment method (for security)
- Set up your child’s name and email address
When creating the password, choose something memorable but secure. Write it down in a safe place since recovering child account passwords requires extra verification steps.
Setting Up Family Sharing
Family Sharing connects up to six family members, letting everyone share purchases while maintaining their own accounts. It’s essential for managing your child’s iPad.
To set up Family Sharing:
- Go to Settings > [your name]
- Tap Set Up Family Sharing if not already configured
- Follow the instructions to add family members
Once enabled, you can share:
- App Store purchases
- Apple Music subscriptions
- iCloud storage plans (200GB or 2TB)
- Location information
- Family calendar and reminders
The family organizer (usually a parent) controls purchases. When your child tries to buy something, you’ll receive a notification asking for approval. This prevents unexpected charges while teaching responsible digital habits.
Understanding iOS Features for Child Safety
iOS offers several powerful tools to protect children and help parents manage screen time responsibly.
Screen Time lets you set daily time limits for apps and schedule “downtime” when only approved apps work. Find it in Settings > Screen Time. You can block specific apps, limit communications, and prevent explicit content.
Content & Privacy Restrictions help filter inappropriate content. You can:
- Block mature websites
- Restrict movies and TV shows by rating
- Prevent in-app purchases
- Disable built-in apps like Camera or FaceTime
Quick Start setup makes transferring these settings easy if you’re upgrading from another device. Just hold the new iPad near the old one and follow the on-screen instructions.
Consider enabling Find My iPad to track the device’s location. This feature is particularly helpful if the iPad gets lost or misplaced.
Managing Content and Privacy
Setting the right content limits and privacy settings is essential for your child’s safe iPad experience. Proper setup helps guard against inappropriate content while giving your child age-appropriate freedom.
Using Content Restrictions
Content restrictions let you control what your child can access on their iPad. To set them up, go to Settings, then Screen Time, and tap Content & Privacy Restrictions. You’ll need to enter your Screen Time passcode.
From here, you can limit:
- Apps and features: Decide which apps your child can use
- Content ratings: Filter content based on age ratings
- Web content: Block adult websites or only allow specific sites
- iTunes & App Store purchases: Prevent unwanted buying
Parents can also set content ratings for music, movies, TV shows, books, and apps. This helps filter out age-inappropriate material. For example, limiting movies to PG or PG-13 ratings.
To manage content types, tap Content Restrictions after entering your passcode. Then select each category and choose appropriate age ratings.
Securing Privacy Settings
Privacy settings control how apps access your child’s personal information. These settings are crucial for protecting their data and online identity.
To secure privacy, go to Settings > Screen Time > Content & Privacy Restrictions. Then tap “Privacy” to see all options.
Key privacy controls include:
- Location Services: Limit which apps know your child’s location
- Contacts: Control which apps can access contact information
- Photos: Restrict apps from accessing photos and videos
- Microphone and Camera: Prevent unauthorized recordings
Many parents choose to block changes to privacy settings so children can’t modify them. This provides an extra layer of security.
To lock these settings, tap “Allow Changes To” and select “Don’t Allow” for the privacy features you want to secure.
Enabling Communication Limits
Communication limits let you control who your child can contact and when. This feature helps protect them from unwanted messages or calls.
To set up these limits, go to Settings > Screen Time > Communication Limits. You can set different rules for screen time and downtime periods.
Parents can choose to:
- Limit contacts: Restrict communication to only approved contacts
- Set group chat rules: Control who can add your child to group conversations
- Manage downtime limits: Determine who can reach your child during set “off” hours
For younger children, many parents allow communication with only family members. As children grow older, they might expand the list to include close friends.
These limits work across multiple apps like Messages, FaceTime, and Phone. They also apply to contacts shared through iCloud, making them very effective for safety.
Controlling Purchases and Downloads
Managing what your child can purchase or download on their iPad helps prevent unwanted surprises on your credit card. These controls also let you guide what content is appropriate for your child.
Restricting In-App Purchases
In-app purchases can quickly add up if left uncontrolled on a child’s iPad. You can block these entirely through the Screen Time settings.
- Open Settings on the iPad
- Tap Screen Time > Content & Privacy Restrictions
- Enter your Screen Time passcode if prompted
- Tap iTunes & App Store Purchases
- Select In-app Purchases and set to “Don’t Allow”
This setting prevents unwanted purchases that might occur while your child is using apps. Remember that some educational apps use in-app purchases for extra content, so you may need to manually approve these if they’re beneficial.
You can also set other purchase restrictions in this same menu, including preventing app installation or deletion.
Setting Up ‘Ask to Buy’
Ask to Buy requires your approval before your child can download anything, even free content. This feature gives you complete oversight of all new apps.
To enable Ask to Buy:
- Go to Settings > Family on your device
- Tap on your child’s name
- Select “Ask To Buy” and turn it on
- Follow any on-screen prompts to complete setup
When your child tries to download something, you’ll receive a notification on your device. You can tap your family member’s name after going to Settings > Family to manage these settings at any time.
Ask to Buy works for all content types including apps, music, movies, and books. This feature automatically turns off when children turn 18.
Monitoring iTunes and App Store Access
Controlling what content your child can see or access in the App Store helps maintain age-appropriate boundaries.
You can set content restrictions by:
- Opening Settings > Screen Time > Content & Privacy Restrictions
- Tapping Content Restrictions
- Setting age ratings for apps, movies, TV shows, and more
For iTunes specifically, you can:
- Limit explicit content in music and podcasts
- Block specific apps entirely
- Set ratings limits for movies and TV shows
If your child needs to approve a purchase but you don’t see the notification, check your Apple ID settings. Sometimes notifications get sent to the wrong device if multiple family members use the same Apple ID.
These settings create a safer digital environment while still giving your child appropriate independence.
Implementing Screen Time and Usage
Apple’s Screen Time feature helps parents monitor and control how their children use iPads. The tools let you set limits, schedule breaks, and track which apps get the most attention.
Setting Up Screen Time
To start using Screen Time for your child, you need to set it up properly. If your child is part of your Family Sharing group, you can manage their Screen Time settings directly from your own device.
First, open Settings and tap Screen Time. If you’re setting up Screen Time for the first time, tap “Turn On Screen Time” and then “This is My Child’s iPad.”
For children already in your Family Sharing group, go to Settings > Screen Time. Look under the Family section and select your child’s name.
You’ll need to create a Screen Time passcode that’s different from the device unlock code. This passcode protects your settings from being changed by your child.
The setup process will walk you through content and privacy restrictions. You can choose which types of content are appropriate based on age ratings.
Configuring Downtime Schedules
Downtime helps create tech-free periods for homework, dinner, or bedtime. During these scheduled times, only apps you approve and phone calls will be available.
To set up Downtime, go to Settings > Screen Time > [your child’s name] > Downtime. Toggle it on, then set a start and end time.
You can create different schedules for different days. Tap “Customize Days” to set specific times for weekdays and weekends.
When Downtime is active, your child will see a clock icon next to apps that aren’t allowed. If they try to open these apps, they’ll get a reminder that they’ve reached their limit.
Parents can grant extra time through the “One More Minute” option or by entering the Screen Time passcode to approve more time for specific apps.
Creating App Usage Limits
App Limits let you set time restrictions for specific app categories or individual apps. This helps children learn to manage their digital habits.
To create limits:
- Go to Settings > Screen Time > [your child’s name] > App Limits
- Tap “Add Limit”
- Select app categories (like Social, Games, Entertainment) or specific apps
- Set the daily time allowance
- Choose which days the limit applies to
You can set different time limits for different categories. For example, you might allow more time for educational apps than games or social media.
When your child nears their time limit, they’ll receive a notification. Once the limit is reached, a Time Limit screen appears. Parents can grant more time by entering the Screen Time passcode if needed.
Managing Device Usage With Screen Time Passcode
The Screen Time passcode is your key to maintaining parental controls on your child’s iPad. Without it, children could simply turn off restrictions themselves.
When setting up the passcode, choose a code that’s easy for you to remember but hard for your child to guess. Avoid birthdays or simple patterns.
The passcode protects several important settings:
- Content & Privacy Restrictions: Control app installations, purchases, and content ratings
- Always Allowed Apps: Select apps available even during Downtime
- Communication Limits: Control who your child can communicate with
If you forget your Screen Time passcode, you’ll need to reset the device. This is why it’s important to choose a memorable code and consider writing it down in a secure place.
Screen Time also provides weekly reports showing how much time was spent on different apps. Review these reports with your child to discuss healthy digital habits together.
Safeguarding with Security and Location Services
Protecting your child’s iPad involves setting up important security features and location tracking. These tools help keep both your child and their device safe while maintaining privacy and data security.
Using ‘Find My iPhone’
The Find My iPhone feature is essential for tracking your child’s iPad if it gets lost or stolen. To activate this feature, go to Settings > [your child’s name] > Find My.
Make sure “Find My iPad” is toggled on. This allows you to:
- Locate the device on a map
- Play a sound to find a misplaced iPad
- Put it in Lost Mode to lock it remotely
- Erase all data if necessary
Teach your child about this feature so they understand you can see their device’s location. This creates accountability while also providing peace of mind for parents when children are away from home.
Activating iCloud Drive and Backup
Setting up iCloud Drive and Backup ensures your child’s important data is always protected. Go to Settings > [your child’s name] > iCloud to enable these features.
Turn on iCloud Backup to automatically save:
- App data
- Device settings
- Photos and videos
- Messages
- Home screen organization
Set backups to run nightly when the iPad is charging and connected to Wi-Fi. This prevents data loss if the device is damaged or lost.
With iCloud Drive, your child can safely store documents and access them across multiple Apple devices, making homework and projects easier to manage without risking important files.
Managing Location Tracking and Data Protection
Balance safety with privacy by carefully managing location services on your child’s iPad. Go to Settings > Privacy & Security > Location Services to customize which apps can access location data.
For young children, consider these settings:
- Allow location access only for essential apps like Maps
- Use “While Using” instead of “Always” for most apps
- Enable “Share My Location” with family members
For data protection, set up a strong passcode that’s different from your own. Enable Face ID or Touch ID for an extra layer of security while keeping access simple for your child.
Review privacy settings regularly as your child grows and their needs change. This helps maintain appropriate boundaries while still keeping them safe in the digital world.
Accessing Support and Resources
Setting up an iPad for a child can sometimes be challenging. Apple offers many helpful resources to guide parents through this process, from expert advice to official support channels.
Getting Help from Verified Experts
Parents can find help from verified experts in several places. Apple’s Genius Bar offers in-person help at Apple Stores, where staff can walk through the entire setup process. Appointments can be booked online.
Online forums like Apple Support Communities have many parents sharing their experiences. These forums are moderated and often have Apple-certified professionals providing advice.
Third-party certified Apple consultants can provide personalized setup help. They’re especially helpful for families with multiple devices or complex parental control needs.
Many schools also have tech coordinators who can help with educational setups and app recommendations. These experts understand both the technical and educational aspects of iPad use.
Utilizing Apple’s Tech Support
Apple provides several direct support options for parents. The Apple Support website has detailed guides about parental controls and child device management. These guides include step-by-step instructions with screenshots.
The Apple Support app can be downloaded to any device. It connects parents directly to support agents via chat or phone. Support staff can help troubleshoot any issues with Family Sharing or Screen Time setup.
Parents can also call Apple Support directly. For complex issues, they offer screen sharing sessions where technicians can guide parents through settings remotely.
The Quick Start guides are especially helpful for initial setup. They walk through the process of setting up a new device specifically for a child.
Frequently Asked Questions
Setting up an iPad for a child involves several important steps including creating accounts, setting limits, and ensuring safety. Parents have many questions about the right approach to take.
What are the steps to create an Apple ID for a child under 13?
Creating an Apple ID for a young child requires a parent to set it up. The process starts by going to your iPhone or iPad Settings.
Tap on your name at the top, then select “Family” and choose “Add Family Member.” Select “Create Child Account” and follow the instructions.
You’ll need to enter your child’s name, birthday, and agree to the parent privacy disclosure. Apple will verify your payment method for this process.
Once verified, create a username and password for your child’s Apple ID. This account will be automatically added to your Family Sharing group.
How can I set up an iPad for a child without using Family Sharing?
You can set up an iPad without Family Sharing by creating local restrictions. Open Settings on the iPad and tap “Screen Time.”
Turn on Screen Time and select “This is My Child’s iPad” when prompted. This lets you set content and privacy restrictions right away.
You can create a passcode your child can remember for unlocking the device. Make sure it’s different from your own passcode.
Set app limits, downtime schedules, and content restrictions without needing to create a separate Apple ID or use Family Sharing.
What safety precautions should be considered when configuring an iPad for a child’s use?
Enable content filtering to block inappropriate websites and apps. Go to Settings > Screen Time > Content & Privacy Restrictions to set these up.
Turn on “Ask to Buy” if you have Family Sharing, which requires your approval for downloads. This prevents unexpected purchases and app installations.
Consider disabling location sharing in the Privacy settings. This helps protect your child’s physical location from being shared with apps or services.
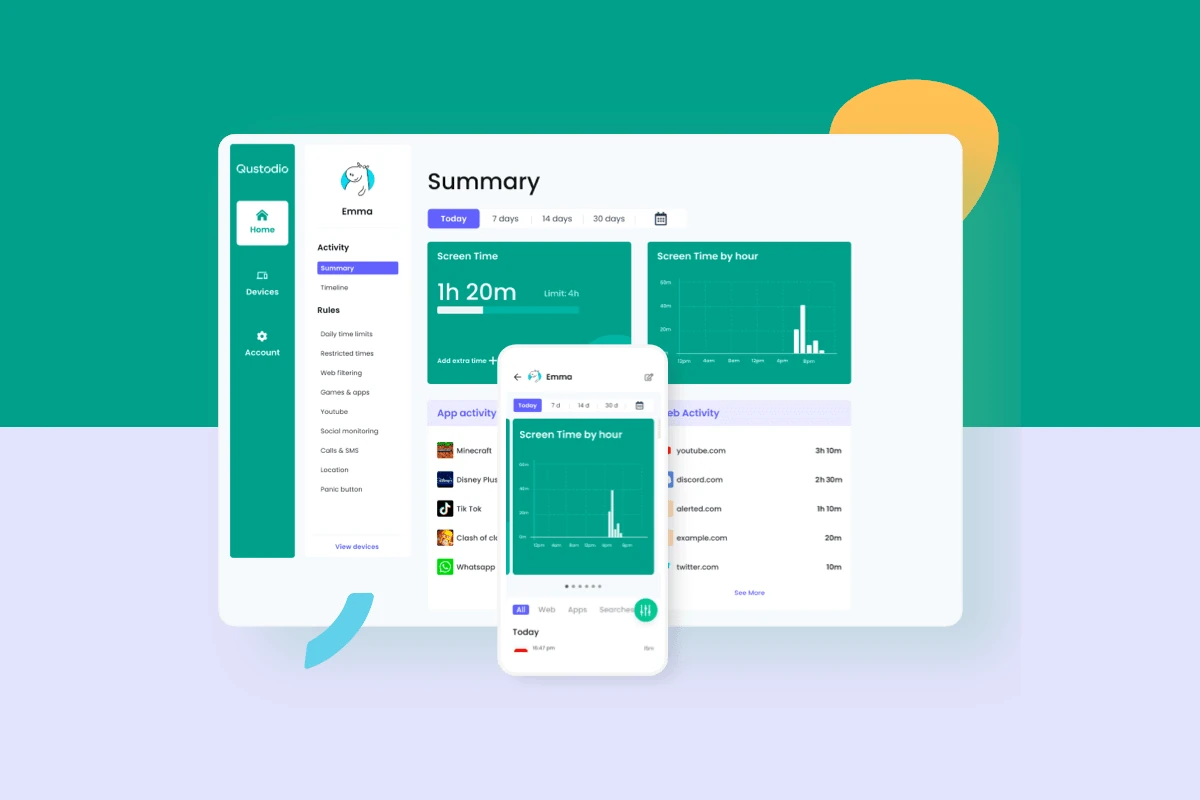
Install a trusted parental control app for added protection. These apps can help monitor usage and provide more detailed content filtering options.
How can I share an iPad with my child while ensuring appropriate content access?
Use separate user profiles on the iPad. This feature lets each person have their own apps, settings, and restrictions.
Go to Settings and select “Screen Time” to set up different profiles. Create one for yourself and one for your child.
When setting up your child’s profile, enable content restrictions appropriate for their age. This blocks mature content while keeping it available on your profile.
Use a different passcode for your profile to prevent your child from accessing your unrestricted content. Switch between profiles as needed.
What is the process to switch to a child profile on an iPad?
To switch profiles, first make sure both profiles are set up through Screen Time in Settings. This creates separate environments for each user.
When switching users, go to Settings and tap on Screen Time. Select “Change Screen Time Passcode” and enter the passcode for the desired profile.
For newer iPad models, you can use Face ID to quickly switch between profiles. Set up Face ID for each user during the profile creation process.
Remember that switching profiles doesn’t fully log out of accounts, so some data may still be accessible across profiles.
How can I manage and enforce restrictions on an Apple child account?
Use the Screen Time settings to set specific app limits. You can restrict certain apps or categories like games or social media.
Set up “Downtime” periods when the iPad can’t be used. This is helpful for bedtime, homework, or family time.
Create Content & Privacy Restrictions to block mature content and prevent changes to privacy settings. This keeps your restrictions from being turned off.
Monitor your child’s usage through the Screen Time reports. These show which apps are used most and help you adjust limits as needed.
Use the “Always Allowed” list for educational apps that should remain accessible even during downtime or after app limits are reached.