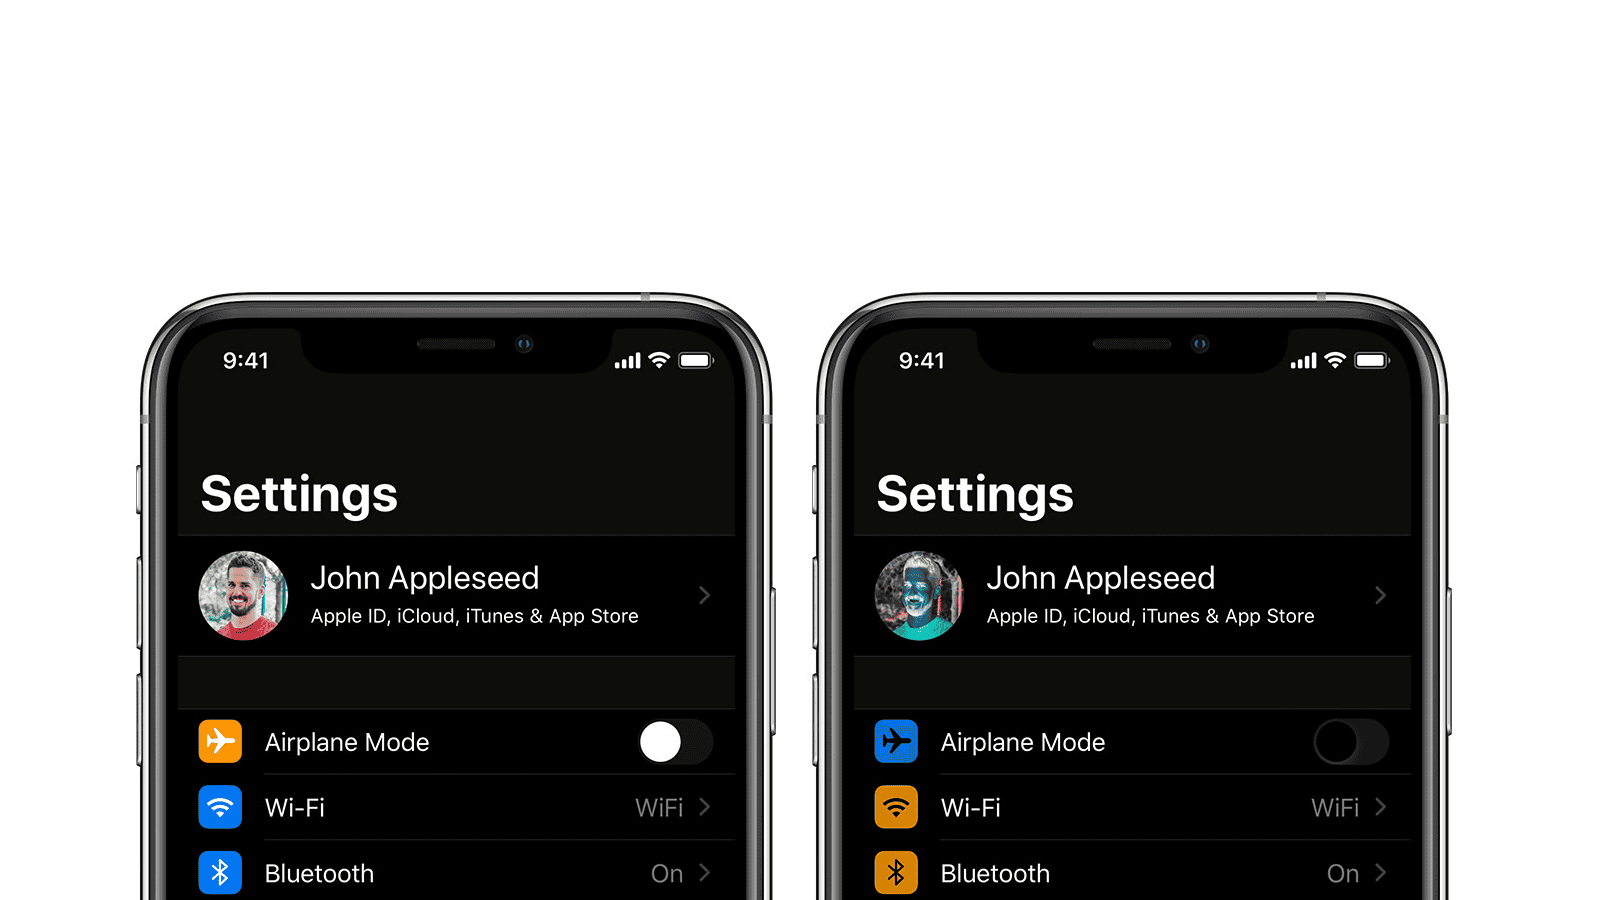
If you accidentally enable inverted colors on your iPhone camera, the display can appear with the colors reversed. This feature can be helpful for people with visual impairments, but it may cause confusion for others. If you want to revert to the standard display, you can easily disable inverted colors in the iPhone’s settings. Simply navigate to the settings menu and find the camera settings to make the necessary adjustments.
You can also change the setting to prevent the front camera from showing a mirror image. Making these simple changes will ensure that your camera reflects your preferred settings, improving your overall iPhone photography experience.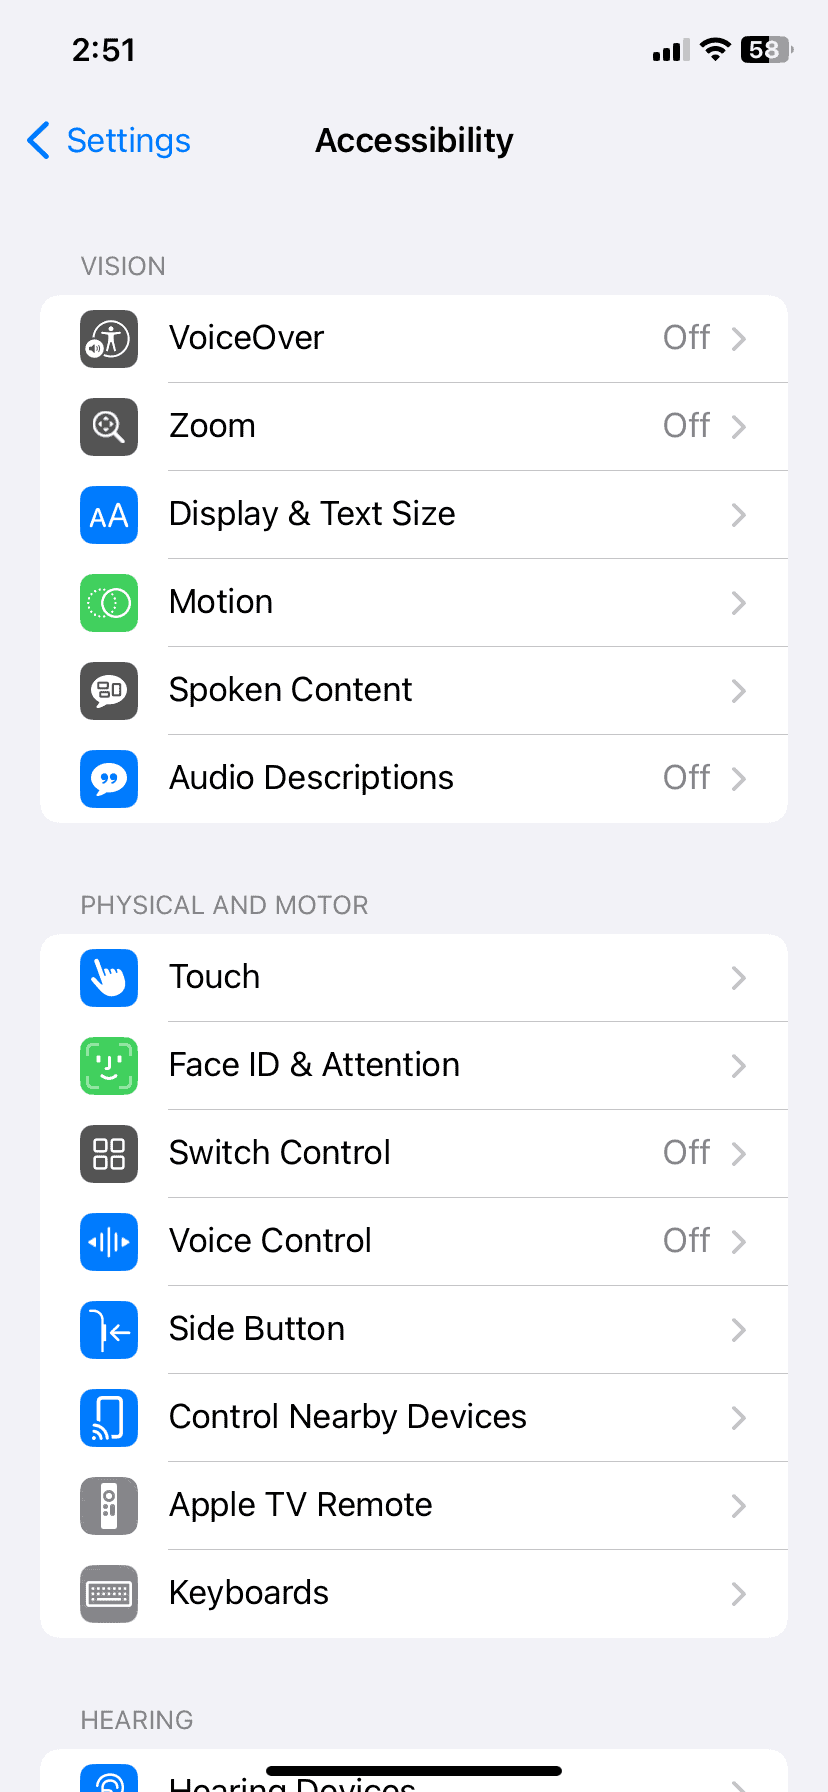
How to Fix an Inverted iPhone Camera
Sometimes, the camera on your iPhone might display or capture images that are inverted. This can be disorienting, and thankfully there are a couple of ways to fix the issue. Here’s what you can do:
Check Your Accessibility Settings
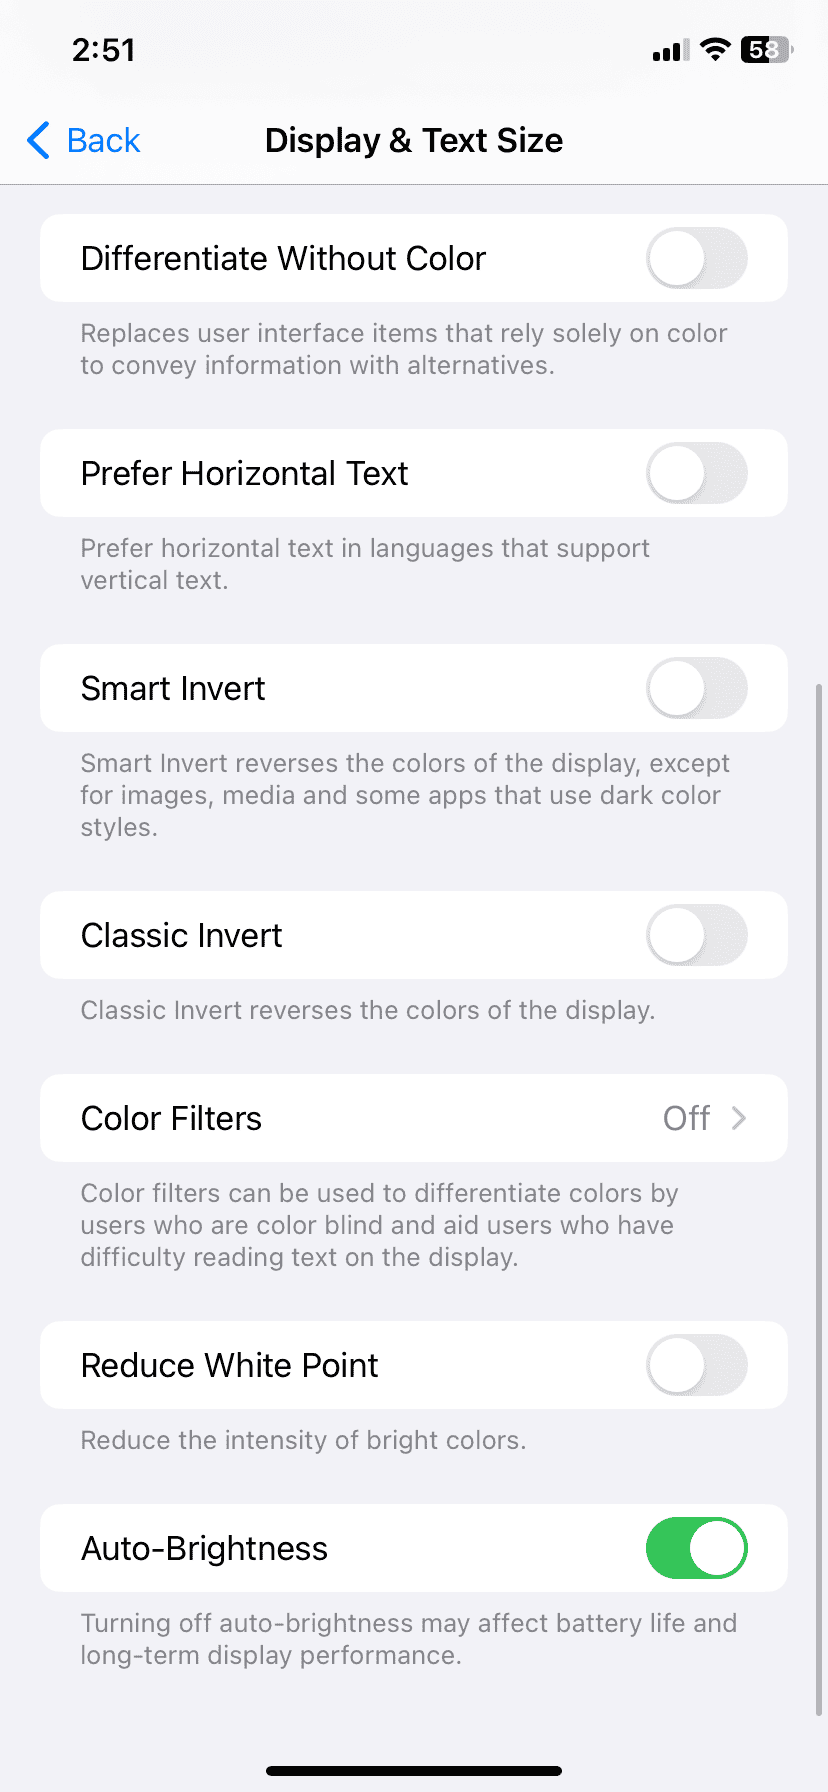
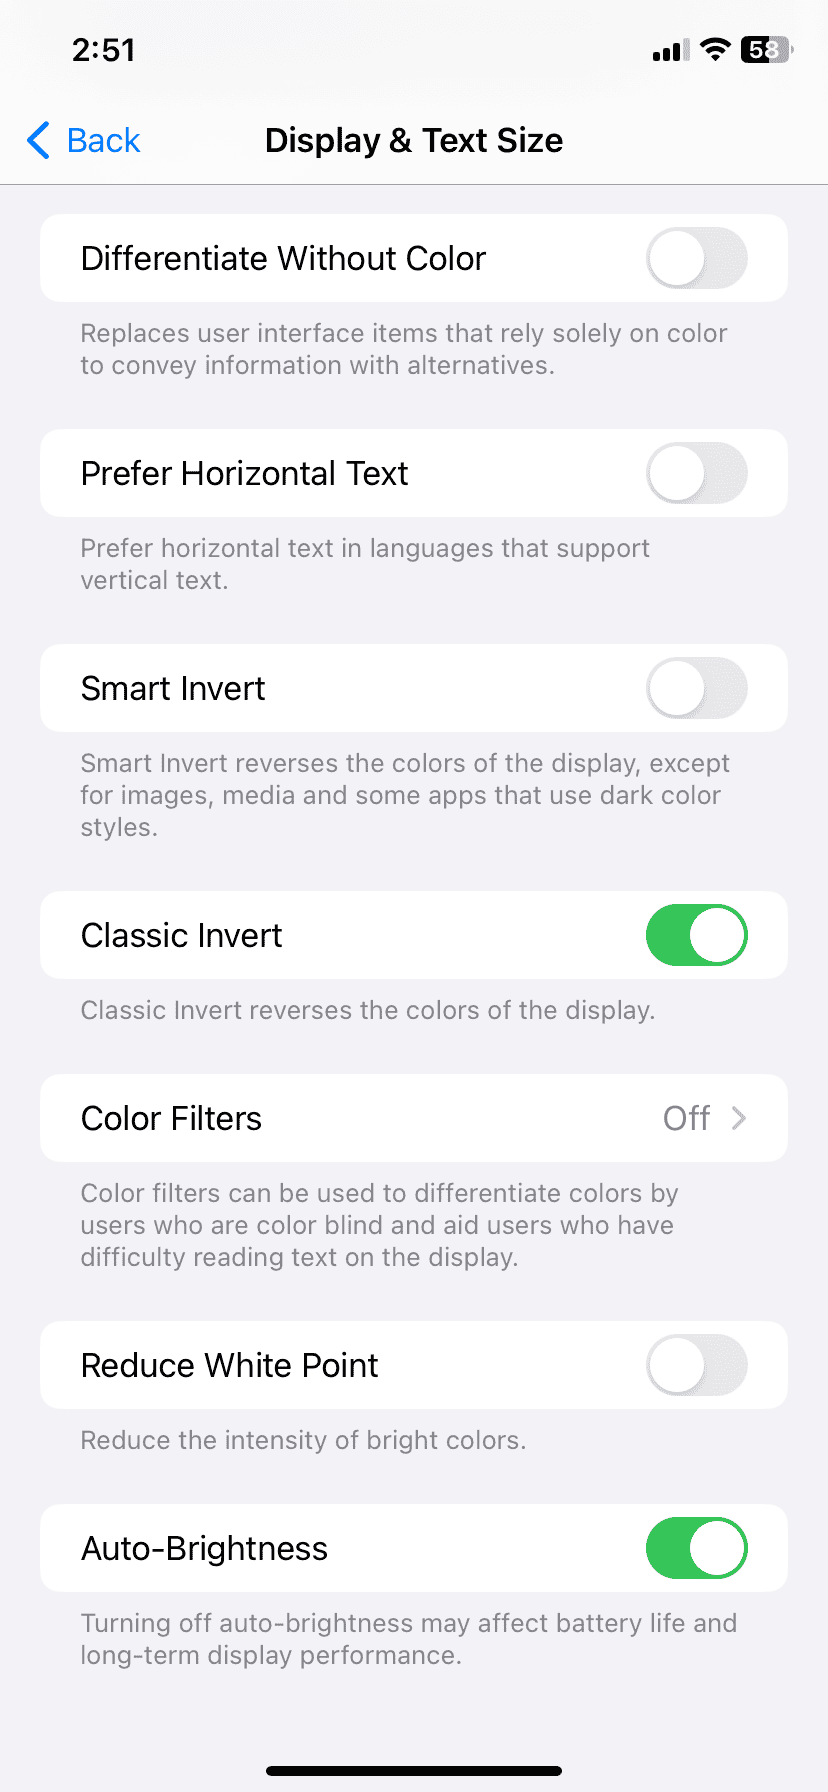
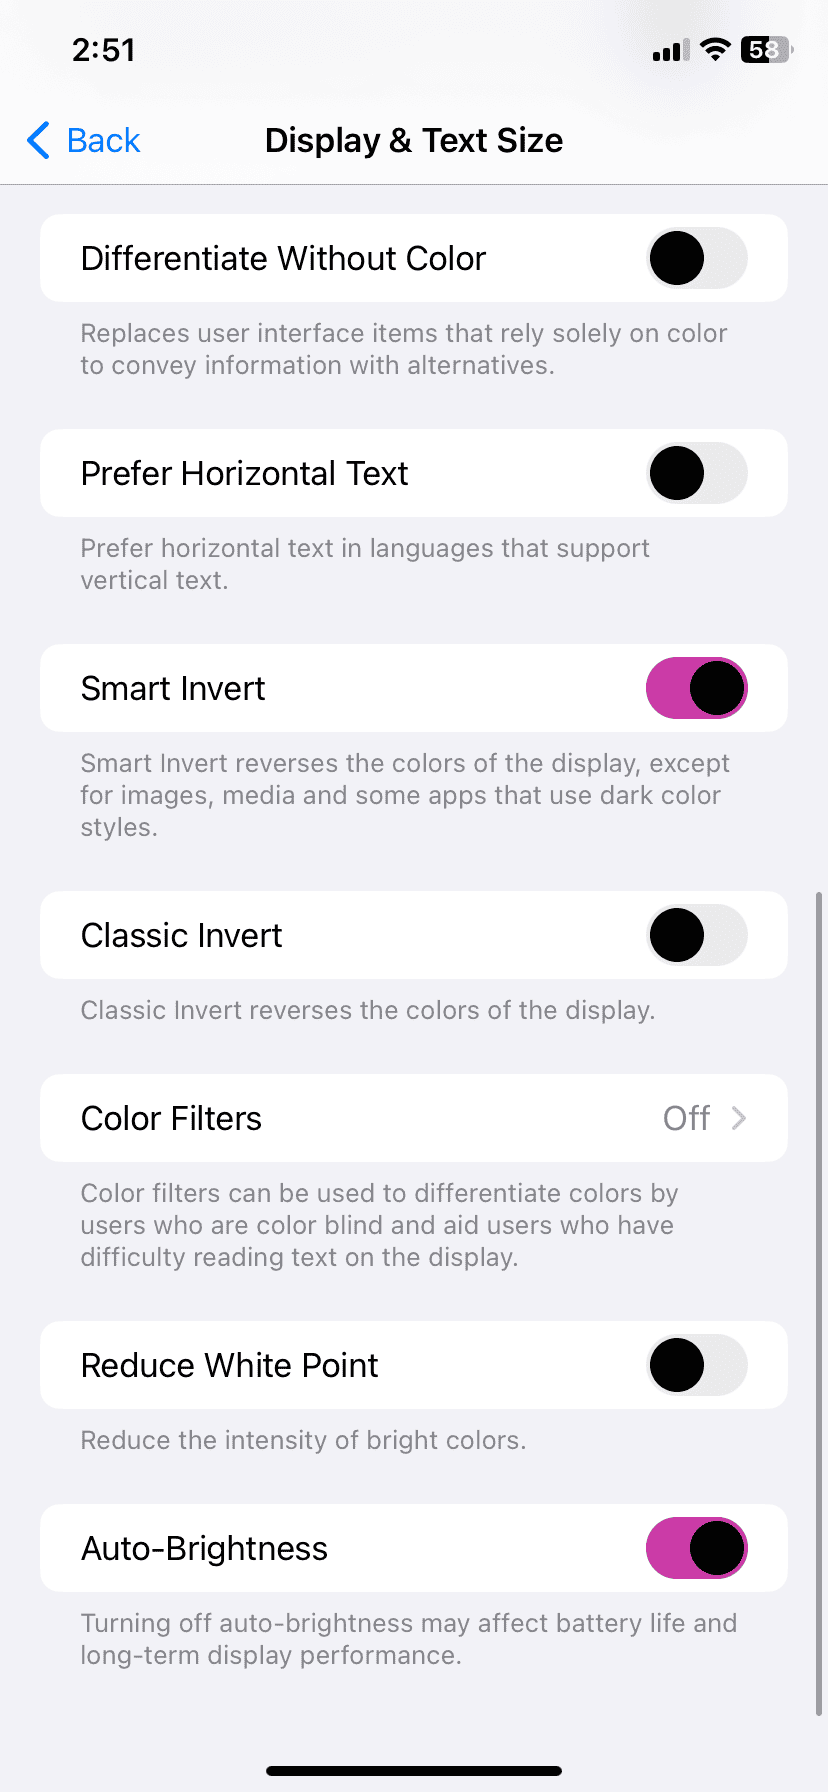
Apple’s iPhones have accessibility settings that allow you to customize your experience. One of these settings inverts the colors on your screen. Here’s how to turn off the color inversion setting:
- Open the Settings app on your iPhone.
- Go to Accessibility.
- Tap on Display & Text Size.
- Look for either Classic Invert or Smart Invert and make sure the toggle next to it is turned off.

Turn Off Mirroring for the Front-Facing Camera
Your front-facing camera might be mirroring your image. Here’s how to turn that feature off:
- Go to the Settings app on your iPhone.
- Tap on Camera.
- Toggle off the switch next to Mirror Front Camera or Mirror Front Photos.
Troubleshooting Tips
If the issue persists, try the following steps:
- Force Quit the Camera App: Double-click the Home button or swipe up from the bottom of the screen and hold to access the app switcher. Swipe up on the Camera app to close it.
- Restart Your iPhone: Turn your phone off and then on again.
Table of iPhone Models and Where to Find Camera Mirroring Settings:
| iPhone Model | Settings Location |
|---|---|
| iPhone X and later | Settings > Camera > Mirror Front Camera |
| iPhone 8 and earlier | Settings > Camera > Mirror Front Photos |
Let me know if you’d like help with any other iPhone settings.
Key Takeaways
- Turning off inverted colors is a simple adjustment within the iPhone’s settings.
- Users can also modify the front camera settings to prevent mirror images.
- Correcting these settings enables better control over the iPhone’s camera functions.
Understanding Inverted Camera Settings on iPhone
Adjusting the iPhone camera settings properly can help users capture selfies that reflect what they see in the viewfinder. Misunderstandings about these settings can affect the photos’ outcomes.
Exploring the ‘Mirror Front Camera’ Setting
The ‘Mirror Front Camera’ setting is found within the camera options. It controls whether the iPhone camera flips selfies after taking them. When this setting is on, photos appear as they do in the viewfinder. When turned off, the final image is a mirror image of the preview, sometimes causing confusion for users who expect a direct reflection of what they captured.
Navigating to Camera Options in the Settings App
To reach these settings, open the Settings app on your iPhone. Scroll down and tap ‘Camera’ to find options including ‘Mirror Front Camera.’ Users can toggle this option to modify how the camera captures images.
Impact of iOS Versions on Camera Functionality
Different versions of iOS can bring changes to the camera’s software. As of iOS 14 and later, users have the option to adjust the mirroring effect. It’s important for users to check what iOS version their iPhone operates on for a clearer understanding of available camera settings.
Alternatives to Inverting Camera Images
If users prefer to flip a photo after taking it, they can use the Photos app or third-party apps which offer editing tools. These tools can alter the photo to the desired orientation without changing how the camera captures the image.
Differences Between iPhone Models
iPhone models may come with different camera hardware influencing the available settings. Users of iPhone 13, for example, might find additional features in the camera app that were not available on earlier models. Settings adjustments may also vary slightly between models.
Best Practices for Capturing and Enhancing Selfies
Taking the perfect selfie involves more than just a smile. With the right techniques and tools, anyone can transform their selfies from good to great.
Tips for Taking Better Selfies
Good lighting is key. Natural light sources in front of you work best to illuminate your features. Avoid harsh lights above or behind you to prevent shadows on your face. Hold your phone at eye level or slightly above to find the most flattering angle. Make sure to use the front camera and look at the lens, not the screen, when you snap your shot. This makes your eyes connect with the viewer. Before taking a selfie, check the viewfinder to ensure the background suits your shot.
Editing is where the magic happens after you’ve taken your selfie. Both iPhone and Android devices offer built-in editing tools within the photos app. You can adjust brightness, contrast, and saturation to make your selfie pop. For selfies that seem mirrored, or flipped, you can use the mirror front camera setting. In the camera app, find the setting and toggle it to change how the selfie is saved. Apps from the App Store also offer advanced features like blemish removal and filters that complement your natural look without going overboard.
Utilizing Editing Tools
When editing a selfie, you can use tools to enhance the photo. Adjust the contrast, brightness, and saturation to make your photo clearer and more vibrant. Also, use the crop tool to center your face and remove background noise. Select filters that enhance your features without changing them too much. Remember that less editing is often better. For more advanced editing, use third-party apps from the App Store or Google Play Store. These apps offer many options for perfecting your image. You can also use these apps to correct the flipped image effect that can occur in selfie mode by using the ‘mirror’ or ‘flip’ function.
When sharing your selfies on platforms like Instagram, consider that different devices may display photos differently. What looks good on one screen may not look the same on another due to variations in screen resolutions and calibrations. To maintain quality across platforms, save your selfies in high resolution. When sharing across devices, such as from iPhone to Android, use common file types like JPEG or PNG for easy compatibility. Following these tips, your selfies should look as intended whether viewed on a phone, tablet, or computer.
FAQs
These are the common questions and answers for adjusting the camera settings on an iPhone to prevent inverted images.
How can I disable the mirror effect on my iPhone camera?
Disabling the mirror effect is simple. Open the Settings app, tap on Camera, and turn off the ‘Mirror Front Camera’ option.
What are the steps to stop my iPhone camera from flipping photos?
To stop your iPhone camera from flipping photos, launch the Photos app, select the image, tap Edit, and use the Flip tool to adjust the photo orientation.
Where do I find the setting to turn off the camera inversion on my iPhone?
The setting to turn off camera inversion is located in the Settings app under ‘Camera’. Here you can disable the ‘Mirror Front Camera’.
Is there a way to change the selfie camera settings to avoid mirrored images on my iPhone?
Yes, you can change the selfie camera settings to avoid mirrored images by switching off ‘Mirror Front Camera’ in the Camera settings within the Settings app.
Can I prevent my iPhone camera from taking inverted images?
Preventing inverted images is achievable by accessing the Camera settings in the Settings app and toggling off the ‘Mirror Front Camera’.
How to switch off the mirror feature for the front-facing camera on an iPhone?
Switch off the mirror feature for the front-facing camera by going to Settings, tapping on Camera, and then disabling the ‘Mirror Front Camera’ setting.

