Setting up your Apple HomePod can transform your home into a smart audio haven. The sleek speaker not only fills rooms with rich sound but also serves as a hub for controlling your smart home devices. To set up a HomePod, you’ll need an iPhone or iPad with the latest iOS or iPadOS, Bluetooth turned on, and a stable Wi-Fi connection.
The setup process is simple and takes just a few minutes. When you plug in your new HomePod, it will light up and make a sound. Hold your unlocked iPhone or iPad near the HomePod, and a setup card will pop up on your screen. From there, your device guides you through the remaining steps, including connecting to Wi-Fi and signing into your Apple account.
If you run into any issues during setup, like seeing a “Setup Failed” message, don’t worry. Most problems can be fixed by making sure your phone and HomePod are close to each other, checking your Wi-Fi connection, or resetting your HomePod and trying again.
How To Set Up Apple HomePod
Setting up your Apple HomePod is quick and simple, whether you’re using a HomePod mini or the original HomePod. Once it’s ready, you can enjoy high-quality audio, control smart home devices, and use Siri hands-free. Here’s a step-by-step guide to get you started.
1. Unbox and Plug In Your HomePod
- Place your HomePod on a stable surface, away from walls or obstructions for the best sound quality.
- Plug it into a power outlet using the included power cable.
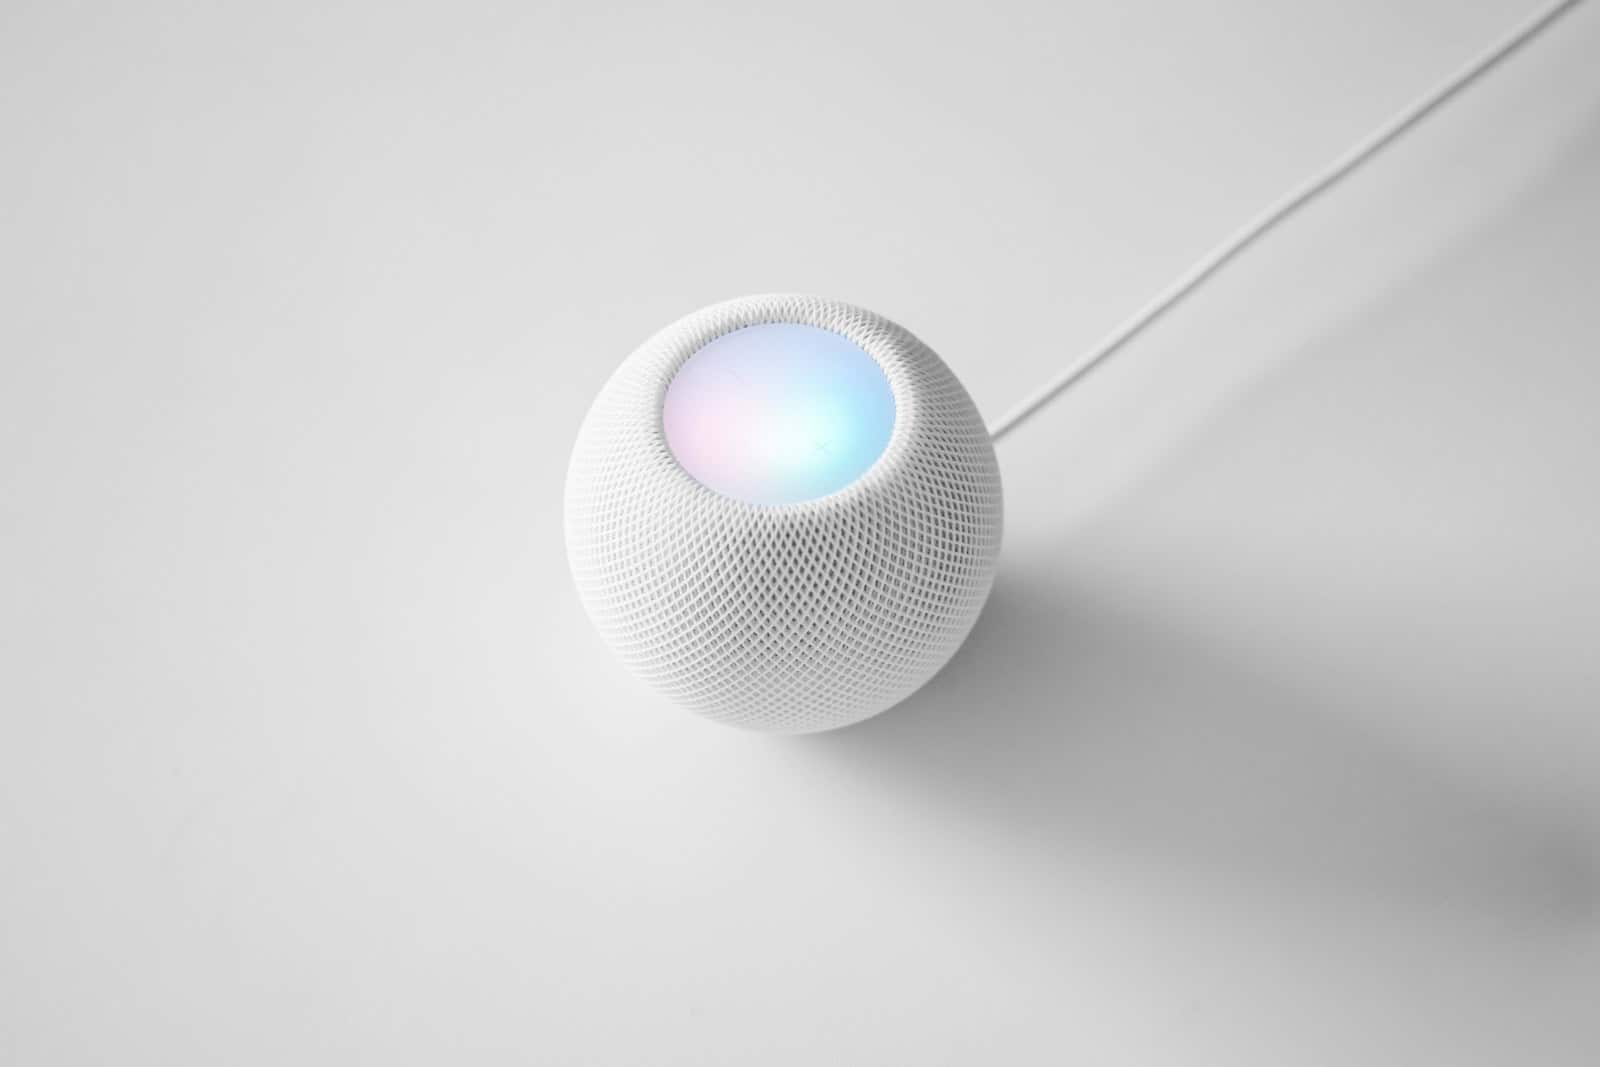
- Wait for the white pulsing light to appear on the top of the HomePod, indicating it’s ready to set up.
2. Bring Your iPhone or iPad Near the HomePod
- Make sure your iPhone or iPad is updated to the latest version of iOS or iPadOS.
- Turn on Bluetooth, Wi-Fi, and Location Services.
- Hold your device close to the HomePod until the setup animation appears on the screen.
3. Start the Setup Process
- Tap Set Up on your iPhone or iPad.
- Choose the room where your HomePod is located (this helps with smart home organization in the Home app).
- Decide whether you want to enable Personal Requests, which lets Siri recognize your voice and access your messages, reminders, and more.
- Accept the terms and conditions.
4. Sign In With Your Apple ID
- Confirm the Apple ID you want to use with HomePod.
- HomePod automatically uses the iCloud account, Apple Music subscription, and Wi-Fi settings from your iPhone or iPad.
5. Wait for HomePod to Complete Setup
- The HomePod will finish configuring itself and connect to your Wi-Fi network.
- You’ll hear a chime and Siri will greet you, confirming setup is complete.
6. Customize Settings in the Home App
- Open the Home app on your iPhone or iPad.
- Tap and hold the HomePod icon to access settings.
- From here, you can:
- Adjust volume limits
- Change Siri settings
- Enable or disable Personal Requests
- Update software
- Add automations if you have smart home devices
7. Start Using Your HomePod
You can now:
- Ask Siri to play music, set timers, or answer questions.
- Control smart home devices like lights and thermostats.
- Send messages or make phone calls.
- Enjoy multi-room audio if you have more than one HomePod or other AirPlay 2-compatible speakers.
Your HomePod is now ready to enhance your listening experience and smart home control.
Key Takeaways
- You need an iPhone or iPad with Bluetooth on and a Wi-Fi connection to set up your HomePod.
- The setup happens automatically when you hold your unlocked Apple device near your plugged-in HomePod.
- If setup fails, try moving your devices closer together or check your Wi-Fi settings for compatibility issues.
Understanding the Apple HomePod
The Apple HomePod combines premium sound quality with smart assistant capabilities in a sleek package. It works seamlessly with Apple devices and offers various features to enhance your home audio experience.
Features and Capabilities
The HomePod comes with powerful sound technology that fills your room with rich, balanced audio. It uses spatial awareness to adjust sound based on its location in the room.
Siri integration allows you to control the HomePod with simple voice commands. You can ask Siri to play music, set alarms, check the weather, or control smart home devices. Just say “Hey Siri” followed by your request.
The HomePod supports AirPlay, making it easy to stream audio from your iPhone, iPad, or Mac. This feature lets you play anything from your Apple devices through the speaker with a few taps.
Smart home control is another key feature. The HomePod works as a hub for HomeKit-compatible devices, allowing you to manage lights, thermostats, and other smart home gadgets with voice commands.
HomePod vs. HomePod Mini
The standard HomePod is larger and delivers more powerful sound with deeper bass compared to the HomePod Mini. It contains more advanced speakers and microphones for superior audio quality in larger spaces.
The HomePod Mini is more affordable and compact, making it perfect for smaller rooms or bedrooms. Despite its smaller size, it still delivers surprisingly good sound quality for its price point.
Both models support the same core features including Siri, AirPlay, and smart home control. They can be placed around your home to create a whole-house audio system.
For optimal surround sound with either model, Apple recommends placing HomePod speakers about 4 feet apart from each other. The HomePod Mini can be used in pairs for stereo sound, just like its larger counterpart.
Preparing for Setup
Before setting up your HomePod, you need to ensure your devices and environment are ready. A little preparation will make the setup process smooth and trouble-free.
Compatibility Check
To use an Apple HomePod, you need a compatible Apple device. The HomePod works with iPhone 6s or later running the latest iOS. iPad and iPod Touch devices can also be used for setup if they run recent software versions.
Make sure your iOS device has the latest update installed. You can check this by going to Settings > General > Software Update on your iPhone or iPad.
Your HomePod will only work with Apple devices. Android phones and other non-Apple products won’t be able to set up or control the HomePod.
Some HomePod features may vary based on your device model and iOS version. Newer HomePod models might need more recent iOS versions for full functionality.
Required Apple Services
An active Apple ID is essential for HomePod setup. This account links your HomePod to your Apple ecosystem and personal preferences.
Make sure Two-Factor Authentication is enabled on your Apple ID for better security. You can check this in Settings > (your name) > Password & Security on your iOS device.
iCloud must be active on your setup device. This allows your HomePod to access your music library, reminders, and other personal content.
Apple Music subscription isn’t strictly required, but it unlocks the full music experience. Without it, you can still play your purchased iTunes music or stream via AirPlay.
Home app should be installed on your setup device. This comes pre-installed on iOS, but check that you haven’t deleted it.
Creating an Optimal Environment
Place your HomePod on a solid, flat surface. Avoid putting it near walls or in corners for the best sound quality.
A stable Wi-Fi network is crucial. Your HomePod and iOS device must be on the same Wi-Fi network for setup and ongoing use. Check that your network is working properly before beginning.
Keep your HomePod away from sources of electronic interference. This includes microwaves, baby monitors, and some cordless phones.
Make sure there’s a power outlet nearby. The HomePod comes with a built-in power cable that can’t be removed or replaced easily.
Room acoustics matter for sound quality. The HomePod uses its built-in microphones to adjust sound based on room characteristics, but starting with good placement helps.
Initiating HomePod Setup
Setting up your HomePod requires a few simple steps to get started. You’ll need to find the right spot for your device and connect it properly to ensure optimal performance.
Positioning Your HomePod
Find a flat, stable surface for your HomePod or HomePod mini. The device works best when placed away from walls and in a central location in the room. This helps its 360-degree sound reach all areas effectively.
Avoid placing it near sources of moisture, direct sunlight, or excessive heat. A good rule is to keep it at least 6 inches away from walls to prevent sound reflection issues.
For stereo pairs, place two HomePods about 4-10 feet apart. This creates the best stereo separation and sound experience. Remember that HomePods can sense their location in a room and adjust sound accordingly.
The top surface contains touch controls, so ensure it remains accessible for volume and playback controls.
Powering and Connecting HomePod
Plug your HomePod into a power outlet using the included power cable. You’ll hear a startup chime and see a white light appear on the top surface when it’s ready for setup.
Make sure your iPhone or iPad is:
- Updated to the latest iOS
- Connected to your home Wi-Fi network
- Signed into iCloud with your Apple ID
- Bluetooth turned on
Hold your unlocked device near the HomePod. A setup card should automatically appear on your screen. If it doesn’t show up, try moving your iPhone closer.
Tap “Set Up” when prompted. The setup wizard will guide you through connecting to your Wi-Fi network and setting up services like Apple Music.
If you encounter a “Setup Failed” message, check that both devices are on the same Wi-Fi network and try again.
Configuring HomePod with Your Devices
Connecting your HomePod to your Apple devices opens up a world of smart home possibilities. The setup process is straightforward when you know the right steps to follow.
Using the Home App
The Home app is the control center for managing your HomePod settings. To get started, open the Home app on your iPhone or iPad and tap on your HomePod device.
Tap the settings button (gear icon) to access various configuration options. Here you can:
- Change the room assignment
- Adjust Siri settings
- Modify sound and audio settings
- Update HomePod software
If you’re having trouble during setup, check that your iPhone is connected to the same Wi-Fi network as your HomePod. Your HomePod uses the Wi-Fi network that your iPhone or iPad is connected to during the setup process.
Sometimes your HomePod might get stuck on configuring. If this happens, try disconnecting all your devices—including your HomePod, Apple TV, router, and modem. Wait 30 seconds, then plug in your modem first and wait for it to fully restart before plugging in the other devices.
Integration with Apple TV and Other Apple Devices
HomePod works seamlessly with other Apple devices. When paired with an Apple TV or Apple TV 4K, HomePod can serve as your home theater sound system.
To set this up:
- Make sure both devices are on the same Wi-Fi network
- Go to Settings on your Apple TV
- Select Video and Audio
- Choose your HomePod as the audio output
You can also use AirPlay to stream audio from your Mac, iPhone, or iPad directly to your HomePod. Just tap the AirPlay icon in your media app and select your HomePod from the list of available devices.
Voice commands through Siri allow you to control your smart home devices, play music, or even control your Apple TV. Simply say “Hey Siri” followed by your request.
Setting Up Multiple HomePods
Creating a stereo pair with two HomePod or HomePod Mini speakers enhances your audio experience with true stereo sound. To set up a stereo pair:
- Place both HomePods in the same room
- Open the Home app on your iPhone or iPad
- Press and hold one of your HomePods
- Tap the Settings icon
- Select “Create Stereo Pair” and follow the on-screen instructions
For whole-home audio, you can set up multiple HomePods in different rooms. This allows you to play the same music throughout your home or different music in each room.
AirPlay 2 lets you control which HomePods play audio. You can ask Siri to “Play jazz in the kitchen” or “Play the same song everywhere.” This multi-room audio feature works with both the original HomePod and HomePod Mini.
Personalizing Your HomePod Experience
Your HomePod can be customized to fit your personal needs and preferences. With a few simple adjustments, you can make your smart speaker work exactly the way you want it to.
Managing HomePod Settings
To access your HomePod settings, open the Home app on your iPhone or iPad. Tap on your HomePod device, then tap the Settings button (gear icon) to see all available options.
You can rename your HomePod to something that makes sense for its location, like “Kitchen HomePod” or “Bedroom Speaker.” This helps when you have multiple HomePods in your home.
Sound settings let you adjust bass levels and enable or disable Sound Check, which balances the volume across different songs.
For Siri interactions, you can:
- Choose the voice and accent
- Turn on or off the sound when Siri is activated
- Control whether Siri listens for “Hey Siri” commands
The Home app also lets you assign the HomePod to a specific room, which helps with smart home automation and multi-room audio setup.
Enabling Personal Requests
Personal Requests allow your HomePod to access your personal information through Siri. This feature makes your HomePod much more useful for day-to-day tasks.
With Personal Requests enabled, you can ask Siri to:
- Send and read messages
- Make phone calls
- Create reminders
- Add items to your shopping list
- Check your calendar
To turn on Personal Requests, go to the Home app, tap the Home icon, then Home Settings. Select your name under “People,” and toggle on Personal Requests.
For privacy, you can choose when Personal Requests work: any time, only when you’re home, or only when your device is connected to the same Wi-Fi network. This prevents others from accessing your personal information when you’re away.
Configuring iCloud Keychain and Privacy
Your HomePod connects to your iCloud account to provide personalized services. Setting up proper security measures is important to protect your personal data.
iCloud Keychain securely stores your passwords and personal information. When properly configured, it helps your HomePod access services that require authentication while keeping your data safe.
Privacy settings can be managed in the Home app. Tap the Home icon, then Home Settings, and look for Privacy & Security options. Here you can:
- Control whether Siri recordings are stored
- Manage analytics sharing
- Delete your Siri history
Apple designs HomePod with privacy in mind. Your requests are encrypted and anonymous, and personal data is processed on-device when possible rather than in the cloud.
You can reset Siri data anytime by going to Settings > Siri & Search > Siri & Dictation History on your iPhone, then tapping “Delete Siri & Dictation History.”
Using Siri on HomePod
Siri transforms your HomePod into a hands-free assistant that responds to voice commands for music playback, smart home control, and everyday questions. Your interactions with Siri can be customized to fit your preferences and privacy needs.
Voice Commands and Interactions
To activate Siri on your HomePod, simply say Hey Siri followed by your request. Your voice activates Siri even when the HomePod is across the room.
Common voice commands include:
- Music control: “Hey Siri, play some jazz” or “Hey Siri, skip this song”
- Volume adjustment: “Hey Siri, turn it up” or “Hey Siri, volume at 50%”
- Information queries: “Hey Siri, what’s the weather today?”
- Smart home control: “Hey Siri, turn off the living room lights”
Siri can recognize different voices in your household, providing personalized responses based on who’s speaking. This is especially useful for checking calendars or sending messages.
If Siri doesn’t respond, make sure your HomePod is connected to Wi-Fi and that Siri is enabled in your settings.
Customizing Siri Preferences
You can adjust how Siri works on your HomePod through the Home app on your iPhone or iPad. Open the app, select your HomePod, and go to Accessory Settings to find Siri options.
Key Siri settings include:
- Listen for “Hey Siri” – Toggle this on or off
- Language – Choose your preferred language
- Siri History – Control whether your Listening History is saved
- Allow Explicit Content – Restrict or allow explicit language in music
For privacy, you can delete your Siri history at any time through the Home app. The light on top of HomePod glows when Siri is listening, providing a visual indicator of activation.
Parents can restrict Siri from playing songs with explicit lyrics by adjusting the Explicit Content settings in the Home app.
Streaming and Playing Content
Your HomePod lets you enjoy music and audio from various sources with excellent sound quality. You can stream from your devices or connect directly to popular services for hands-free listening.
Utilizing AirPlay for Audio
AirPlay makes it simple to send audio from Apple devices to your HomePod. To use this feature, swipe down from the top-right corner on newer iPhones to open Control Center.
Tap the AirPlay icon in the music or audio card, then select your HomePod from the list of available devices. Your audio will now play through the HomePod.
You can also AirPlay from apps like YouTube, Netflix, and other video services. This turns your HomePod into a high-quality speaker for videos and games.
For Apple TV users, HomePod can serve as your TV speakers through HDMI ARC or eARC. This setup provides rich sound for movies and shows without extra cables.
Accessing Music and Podcasts
Apple Music subscribers can ask Siri to play songs, albums, or playlists directly. Simply say “Hey Siri, play my Favorites playlist” or “Hey Siri, play relaxing music.”
For podcast fans, the command “Hey Siri, play the Daily podcast” will start your favorite shows. HomePod remembers where you left off, making it easy to continue listening.
iTunes Match subscribers can access their entire music library through HomePod. Your uploaded songs become available through simple voice commands.
Users without subscriptions can still enjoy Apple Music’s radio stations like Apple Music 1, Apple Music Hits, and genre-based stations at no cost.
Connecting to Streaming Services
While HomePod works seamlessly with Apple services, it also supports other popular platforms. Spotify and other streaming services can be played through AirPlay from your device.
Some third-party music apps now offer direct HomePod integration. This allows you to set them as your default music service, enabling voice commands like “Hey Siri, play my Discover Weekly playlist.”
Developers can integrate their media apps with HomePod to provide a better user experience. This means more streaming options become available as app makers add support.
To change your default music service, go to the Home app, tap your HomePod, and adjust the settings. This ensures Siri uses your preferred service when asked to play music.
Advanced HomePod Features
Your HomePod can do much more than play music. These powerful features transform how you interact with your device and control your entire home environment.
Using Handoff with HomePod
Handoff lets you seamlessly transfer audio between your iPhone and HomePod. When you’re listening to music or a podcast on your iPhone, simply bring it close to your HomePod. A notification will appear on your phone, and the audio will switch to your speaker.
To enable this feature, make sure Handoff is turned on in your settings. Go to Settings > General > AirPlay & Handoff and toggle on “Transfer to HomePod.” Both devices must be on the same Wi-Fi network and signed into the same Apple ID.
You can also transfer audio in the opposite direction. When music is playing on HomePod, hold your iPhone near the top of the speaker. The audio playback will move to your phone, perfect for when you need to leave the room.
The Control Center offers another way to manage audio. Tap the AirPlay icon in the top-right corner of the music player and select your HomePod from the list of available devices.
Managing a Smart Home with HomeKit
HomePod works as a home hub for all your HomeKit-compatible devices. This means you can control lights, locks, thermostats, and other smart home gadgets with simple voice commands.
To set up your smart home:
- Open the Home app on your iPhone
- Tap the “+” button to add accessories
- Follow the on-screen instructions to connect devices
Create scenes to control multiple devices at once. For example, say “Hey Siri, good morning” to turn on lights, adjust the thermostat, and start your coffee maker.
HomePod can also act as a central part of a larger smart home system. It connects to door sensors and motion detectors to alert you of activity. Set up automations in the Home app to trigger actions based on time of day or when you arrive home.
Using two HomePods together creates an even more powerful setup. Place them in the same room to form a stereo pair, giving you richer sound while maintaining full smart home control capabilities.
Troubleshooting Common Issues
Setting up your HomePod can sometimes come with challenges that might leave you frustrated. Here are practical solutions to get your device working properly again.
Connectivity and Wi-Fi Problems
If your HomePod displays a setup failed message or Wi-Fi incompatible alert, check that your iPhone is connected to the same Wi-Fi network you want to use for your HomePod. Your router should be using 2.4GHz or 5GHz bands, as older networks may not work.
Make sure your iPhone has Bluetooth turned on. This is essential for the initial setup process.
Try moving your HomePod closer to your router. Poor signal strength is often the cause of connectivity issues.
If problems persist:
- Restart your Wi-Fi router
- Update your iOS device to the latest version
- Disable any VPN services during setup
- Check if your Wi-Fi password has special characters that might cause issues
Audio and Sound Issues
When your HomePod isn’t playing audio properly, first check if the volume is turned up. This sounds simple, but it’s often overlooked.
Try playing audio from different apps to see if the problem is app-specific. If Siri responds but music won’t play, your Apple Music subscription may need verification.
For distorted sound:
- Check if your HomePod is placed on a stable surface
- Move it away from walls or corners that might affect acoustics
- Make sure it’s not near other electronic devices causing interference
If stereo pair HomePods sound unbalanced, unpair them in the Home app and set them up again as a stereo pair.
Resetting and Restoring HomePod
When other fixes fail, restarting your HomePod often helps. Open the Home app, tap on your HomePod, then tap the Settings button and select “Reset HomePod.”
For a manual reset, unplug your HomePod, wait 5 seconds, then plug it back in. For HomePod mini, press and hold the top until you hear three beeps to force a restart.
If your HomePod is stuck in configuring mode, try these steps:
- Unplug the HomePod from power
- Wait 10 seconds
- Plug it back in
- Press and hold the top until you hear confirmation beeps
- Set it up again from scratch
As a last resort, contact Apple Support if these solutions don’t resolve your issues.
Frequently Asked Questions
Setting up your Apple HomePod requires a few simple steps. Here are answers to common questions that can help you get your smart speaker working quickly and smoothly.
What are the steps to configure a new Apple HomePod mini?
To set up a HomePod mini, start by holding your unlocked iPhone or iPad within a few inches of the HomePod mini. A setup screen will appear automatically on your device.
Tap “Set Up” when it appears on your screen. Follow the on-screen instructions to complete the configuration process, which includes selecting the room where you’ll place the HomePod and agreeing to transfer settings.
The process takes just a few minutes to complete. Your HomePod mini will be ready to use once setup is finished.
How can I connect my HomePod to my Wi-Fi network?
The HomePod automatically connects to the same Wi-Fi network as your iPhone during the setup process. There’s no need to enter Wi-Fi passwords manually.
If you change your Wi-Fi network later, simply reset your HomePod and set it up again with your iPhone connected to the new network. This ensures your HomePod always stays connected.
Make sure your Wi-Fi router is turned on and working properly before starting the setup.
What is the process to pair an Apple HomePod with an iPhone?
Pairing a HomePod with an iPhone is straightforward. First, make sure your iPhone is unlocked and has Bluetooth turned on.
Hold your iPhone close to the HomePod. A setup card will appear on your iPhone screen automatically. Tap “Set Up” to begin the pairing process.
Follow the on-screen instructions to complete pairing. Your iPhone will transfer account information, settings, and Wi-Fi credentials to your HomePod.
How do I perform a factory reset on my HomePod or HomePod mini?
For HomePod mini, press and hold the top surface until the white light turns red. Continue holding until you hear three beeps, which confirms the reset has started.
For full-size HomePod, unplug the device, wait 5 seconds, then plug it back in. Quickly press and hold the top until the white light turns red and you hear three beeps.
After resetting, your HomePod will be restored to factory settings. You’ll need to set it up again as if it were new.
Can you guide me through setting up a second-generation Apple HomePod?
Setting up a second-generation HomePod follows the same basic process as other models. Begin by plugging in your HomePod and waiting for the startup sound.
Hold your iPhone or iPad close to the HomePod. When the setup screen appears on your device, tap “Set Up” and follow the on-screen instructions.
The setup will guide you through room selection, Siri setup, and personal requests configuration. The second-generation HomePod also supports handoff features with other Apple devices.
What are the instructions to make my HomePod discoverable for setup?
Your HomePod automatically enters discovery mode when it’s plugged in for the first time. You’ll hear a startup sound and see a pulsing white light on top of the device.
If your HomePod isn’t being discovered, try moving your iPhone closer—within a few inches of the HomePod. Make sure Bluetooth is enabled on your iPhone.
Sometimes restarting both devices can help. Unplug the HomePod, wait 10 seconds, then plug it back in. Restart your iPhone as well if needed before trying again.