Traveling has become much easier with digital tools that let you keep important documents on your phone. If you’re flying soon, you might wonder how to skip printing your boarding pass. Adding your boarding pass to Apple Wallet takes just a few taps and keeps your travel information handy whenever you need it.
The process is simple whether you get your boarding pass from an airline app or email. When you see your boarding pass, look for the Add to Apple Wallet button. After tapping it, your pass will be saved and ready to use at security checkpoints and boarding gates. Your phone screen will show all the same details as a paper ticket, including your name, flight number, seat, and the all-important QR code.
Using digital boarding passes not only saves paper but also makes travel smoother. No more digging through bags or worrying about lost tickets. When it’s time to board, just pull out your phone, open Apple Wallet, and tap your boarding pass to display it.
Steps To Add a Boarding Pass to Apple Wallet
Adding a boarding pass to your Apple Wallet is a quick and easy way to keep your travel documents handy. Here’s a step-by-step guide to help you do it:
1. Check-in with the Airline
- Start by checking in for your flight.
- You can do this via:
- The airline’s mobile app
- The airline’s website (on Safari, for easier Wallet integration)
- A check-in email sent by the airline.
2. Look for the “Add to Apple Wallet” Option
- After completing check-in, you should see an “Add to Apple Wallet” button on the confirmation screen, boarding pass, or email.
- It usually appears as:
- A Wallet icon
- A button that says “Add to Wallet” or “Save to Apple Wallet.”
3. Tap the Button
- Tap “Add to Apple Wallet.”
- You’ll be shown a preview of the boarding pass.
- Make sure the flight details are correct (date, time, gate, etc.).
4. Confirm and Add
- Tap “Add” in the top right corner of the screen.
- The boarding pass is now saved to your Apple Wallet.
5. Access the Boarding Pass
- Open the Wallet app on your iPhone.
- You’ll see the boarding pass listed there, often with the airline’s logo and flight information.
- On the day of your flight, the boarding pass might appear automatically on your lock screen based on time and location.
6. Use Your Boarding Pass at the Airport
- At security checkpoints and the gate, open the Wallet app.
- Scan the QR code or barcode on your boarding pass.
- Some airports allow you to use Apple Watch to display your boarding pass as well.
Tips:
✅ Make sure your iPhone is updated to the latest iOS version.
✅ Turn on notifications and location services for timely reminders.
✅ Save your boarding pass in advance, in case you lose internet access at the airport.
Key Takeaways
- Boarding passes can be added to Apple Wallet from airline apps, emails, or messages by tapping the “Add to Apple Wallet” button.
- Digital passes in Apple Wallet display all needed travel information including flight details, gate numbers, and scannable QR codes.
- Using digital boarding passes saves time at the airport and eliminates the worry of misplacing paper tickets.
Understanding Apple Wallet
Apple Wallet serves as a digital organizer for your important documents and cards, making travel and events more convenient. It keeps everything in one place on your iPhone, ready whenever you need it.
What Is Apple Wallet?
Apple Wallet is a built-in app on iPhones that stores digital versions of cards and documents. It’s like a digital pocket for your boarding passes, tickets, and other passes.
The app comes pre-installed on all iPhones and works with your Apple Watch too. When you add items to your iPhone’s Wallet, they also appear on your paired Apple Watch automatically.
Apple Wallet holds many types of items:
- Boarding passes
- Event tickets
- Store loyalty cards
- Student ID cards
- Credit and debit cards
- Transit cards
You can easily access your passes with just a few taps. No more digging through emails or printing paper documents before a trip or event.
Benefits of Using Apple Wallet for Boarding Passes
Storing boarding passes in Apple Wallet offers several advantages for travelers. The biggest benefit is convenience – your boarding information is always available on your phone.
You don’t need an internet connection to view passes once they’re added. This helps when you’re in areas with poor reception, like some parts of an airport.
The Wallet app automatically displays your boarding pass on your lock screen as your flight time approaches. This timely reminder ensures you won’t forget your gate or departure time.
Updates happen automatically. If your gate changes or your flight is delayed, the boarding pass in your Wallet updates with the new information.
Multiple passes can be stored at once, making it perfect for travelers with connecting flights or families traveling together.
Adding Your Boarding Pass to Apple Wallet
Apple Wallet provides a simple way to store and access your boarding pass right on your iPhone. Adding your pass to the Wallet app saves time at the airport and gives you quick access when you need it most.
Before You Begin: Prerequisites
Before adding a boarding pass to Apple Wallet, make sure you have:
- An iPhone with iOS 9 or later
- The airline’s mobile app installed on your device
- Completed check-in for your flight
- Active internet connection
You’ll also need to have your flight reservation details handy. Most major airlines support Apple Wallet integration, including American Airlines, Delta, United, Southwest, and many international carriers.
The Wallet app comes pre-installed on iPhones, so you don’t need to download anything extra. Just look for the Wallet icon on your home screen – it looks like a stylized card holder.
Step-by-Step Guide to Add a Boarding Pass
There are several ways to add your boarding pass to Apple Wallet:
From the airline app:
- Open your airline’s mobile app
- Find your reservation and complete the check-in process
- Look for the “Add to Apple Wallet” button or icon
- Tap this button and follow any on-screen instructions
- Confirm by tapping “Add” in the top right corner
From an email confirmation:
- Open the email with your boarding pass
- Scroll down to find the boarding pass attachment
- Tap the “Add to Apple Wallet” button
- Review the pass information
- Tap “Add” to confirm
Your boarding pass will now appear in the Wallet app. You can access it anytime by opening the app, even without internet connection.
Troubleshooting Common Issues During Addition
If you’re having trouble adding your boarding pass, try these solutions:
No “Add to Apple Wallet” option:
Contact the airline directly as they may not support Apple Wallet. You can also check if you’re within the right timeframe – most airlines only allow adding passes after check-in and before departure.
Error message when adding:
- Check your internet connection
- Close and reopen the airline app
- Ensure your iOS is updated to the latest version
- Try adding the pass from the airline’s website instead
Pass not showing in Wallet:
- Restart your iPhone
- Make sure you completed the addition process by tapping “Add”
- Check if the pass might be in an archived section of the Wallet app
If all else fails, you can always take a screenshot of your boarding pass or use the paper version provided at airport check-in counters.
Navigating the Apple Wallet Interface
The Apple Wallet app offers a straightforward way to access and manage your boarding passes. Understanding how to navigate this digital tool can save you time and stress at the airport.
Accessing Your Boarding Pass
Once you’ve added your boarding pass to Apple Wallet, finding it later is simple. To open the Wallet app, look for the black and white card-style icon on your iPhone home screen. Tap it to launch the app.
When you open Wallet, your passes appear in a stack. Boarding passes typically show up at the top when your travel date is near. This automatic feature helps you find what you need when you need it.
You can also access your boarding pass from your lock screen. When you’re near the airport on your travel day, a notification will appear. Simply tap this notification to bring up your pass without even unlocking your phone.
For quick access, double-click the side button on newer iPhones. This shortcut opens your Wallet app with your most relevant passes ready to use.
Understanding the Wallet Layout
The Wallet app uses a card-based design that’s easy to navigate. Each boarding pass appears as a digital card showing key flight details:
- Flight number and airline
- Departure and arrival times
- Gate information
- Seat assignment
- QR or barcode for scanning
To view full details of your boarding pass, tap on it. The card will expand to show more information. Swipe up to see additional details that might not fit on the main screen.
Multiple boarding passes for connecting flights are often grouped together. Look for small dots at the bottom of the card that indicate how many passes are in the stack. Swipe left or right to move between them.
The Wallet keeps expired boarding passes for a limited time. They move to the bottom of your passes list and appear dimmed to help you focus on current passes.
Important Information Displayed on Your Mobile Boarding Pass
When you add a boarding pass to Apple Wallet, your pass contains key details needed for your journey. These digital passes show essential flight information and security elements that help you move through the airport efficiently.
Flight Details and Boarding Information
Your mobile boarding pass displays your flight number prominently at the top, making it easy to confirm you’re at the right gate. The pass also shows your destination and departure city with corresponding airport codes.
Departure time and gate information appear clearly on the screen, often updating automatically if changes occur. Many airlines’ passes in Apple Wallet will even send you notifications about 10 hours before departure.
Your seat assignment is displayed, along with your boarding group or zone. This helps you know exactly when to line up for boarding.
The pass also shows your name as it appears on your ID, which must match exactly for security purposes. Some passes include additional info like your frequent flyer number or ticket class.
Security Considerations
The QR code or barcode on your mobile boarding pass contains all your travel details in encrypted form. Airport scanners read this code at security checkpoints and boarding gates.
Never share images of your boarding pass on social media. The barcode can be scanned by others, potentially revealing personal information or allowing ticket fraud.
Your pass may display a TSA PreCheck indicator if you’re enrolled, directing you to expedited screening lanes. Most passes also show your boarding pass type (domestic or international).
If your phone battery dies, you might lose access to your pass. Consider saving your pass well before your flight and taking a screenshot as backup.
Always ensure your mobile pass is fully visible and bright enough to scan correctly at checkpoints. Most security personnel are familiar with digital boarding passes displayed through Apple Wallet.
Using Your Boarding Pass at the Airport
Apple Wallet makes airport travel smoother by keeping your boarding pass easily accessible on your iPhone. You can quickly show your digital pass at security checkpoints and boarding gates without fumbling through papers or emails.
Check-In Procedures with Mobile Boarding Pass
When you arrive at the airport, proceed directly to the security checkpoint if you’ve already checked in using the airline app and added your boarding pass to Apple Wallet. No need to wait in line for a paper boarding pass.
At security, open Apple Wallet by double-clicking the side button on newer iPhones or accessing it from your home screen. Your boarding passes will appear at the top of the wallet.
Show your digital boarding pass to the TSA agent, who will scan the QR code directly from your screen. Some airports have self-service scanners where you can scan your phone yourself.
Make sure your phone is charged before heading to the airport. A low battery could cause stress if your boarding pass isn’t accessible when needed.
Boarding the Flight with Apple Wallet
When it’s time to board, your Apple Wallet boarding pass will automatically appear on your lock screen as you approach the gate. This happens thanks to time and location awareness features.
Tap on the notification to quickly access your boarding pass. If it doesn’t appear, simply open Apple Wallet and select the correct pass.
When the gate agent calls your group, present your phone with the QR code visible for scanning. Hold your phone steady with good screen brightness to ensure a successful scan.
Many airlines now accept mobile boarding passes for international flights too. However, it’s wise to check your airline’s policy beforehand, as some countries may still require paper documentation.
Frequently Asked Questions
Adding boarding passes to Apple Wallet is simple yet sometimes confusing. Here are answers to common questions about how to use this helpful feature on your iPhone and Apple Watch.
How can I manually add a boarding pass to my iPhone’s Apple Wallet?
To manually add a boarding pass to Apple Wallet, first open the airline app on your iPhone. After checking in for your flight, look for the “Add to Apple Wallet” button.
Tap this button and follow the on-screen instructions. When you see the “Add” button in the upper-right corner, tap it to complete the process.
If you’re using the airline’s website instead of an app, find your digital boarding pass and look for the same “Add to Apple Wallet” option.
What are the steps to add a boarding pass to Apple Wallet from an email?
When an airline sends your boarding pass by email, adding it to Apple Wallet takes just a few taps. Open the email containing your boarding pass.
Look for an attachment or button labeled “Add to Apple Wallet” and tap it. The pass will preview on your screen.
Tap the “Add” button in the top right corner to save it to your Wallet. Your boarding pass will now be accessible in the Wallet app.
Why is the “Add to Apple Wallet” option not working for my boarding pass?
If the “Add to Apple Wallet” option isn’t working, first check your internet connection. A stable connection is needed to download the pass.
Some airlines only allow adding boarding passes after check-in is complete, which is typically 24 hours before your flight. Make sure you’ve completed the check-in process.
If problems continue, try updating your iOS or the airline’s app. Sometimes clearing the browser cache or restarting your iPhone can fix the issue.
How do I add a travel pass or ticket to my Apple Wallet from Ticketmaster?
When you buy tickets through Ticketmaster, look for the “Add to Apple Wallet” button on your ticket confirmation page or in the confirmation email.
Tap this button to see a preview of your ticket. Then tap “Add” in the top right corner to save it to your Wallet app.
Your tickets will join other passes, loyalty cards, and boarding passes in the Wallet app for easy access when you arrive at the event.
Is it possible to transfer my boarding pass from Apple Wallet to an Android device?
Transferring a boarding pass directly from Apple Wallet to an Android device isn’t possible. The formats are different between iOS and Android systems.
Instead, both users should download the airline’s app on their respective devices. The person with the Android phone should check in separately.
Another option is to forward the original check-in email to the Android user, who can then add it to Google Pay if the airline supports it.
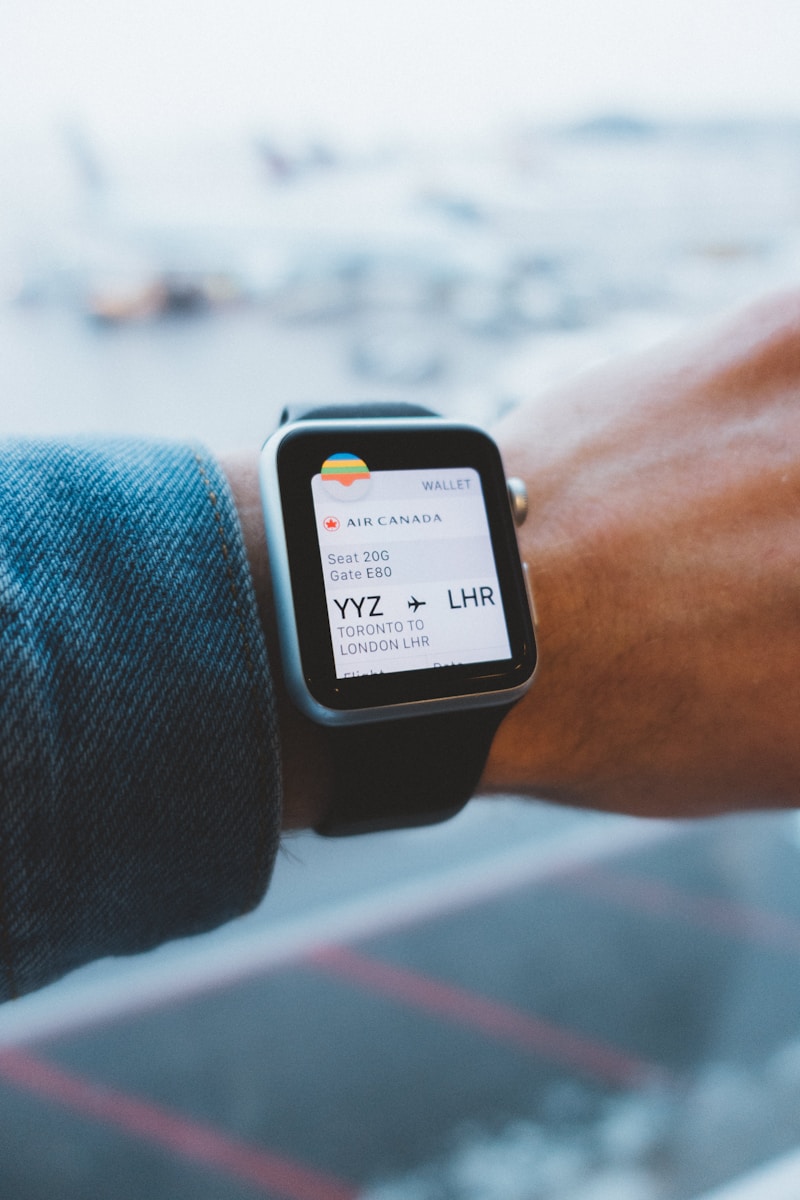
How do I add a boarding pass to my Wallet on my Apple Watch?
Boarding passes added to your iPhone’s Apple Wallet automatically appear on your paired Apple Watch. No extra steps needed!
To view your boarding pass on your Watch, open the Wallet app by double-clicking the side button. Scroll to find your boarding pass.
For the best experience, make sure both your iPhone and Apple Watch are updated to the latest operating system versions. Your boarding pass will stay on your Watch even in Airplane Mode.