Is your iPhone 11 feeling slow and running out of battery quickly? It might be time for a new battery. Replacing the battery will give your phone a new lease on life. It’s easier than you think! Our guide will take you through the process step by step, from opening your iPhone to fitting a new battery. Before you start, make sure to back up your data and have the right tools ready.
Safety is important when working with batteries, so follow the guide carefully. A battery replacement can bring back your iPhone 11’s speed and battery life. This involves opening the phone, taking out the old battery, and putting in a new one. Many repair guides and tools are available to help you through the process.
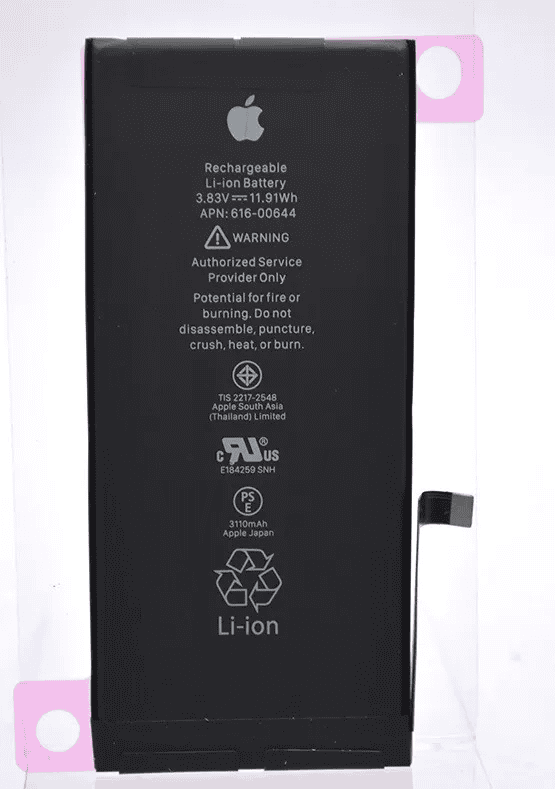
Replacing Your iPhone 11 Battery: A DIY Guide
The iPhone 11, although a few years old, remains a powerful device. But like any smartphone, its battery degrades over time. When your battery health dips significantly, you’ll notice shorter battery life and unexpected shutdowns. Luckily, replacing the battery is a relatively straightforward process that can be done at home. Here’s a comprehensive guide to help you through it.
Tools and Preparation
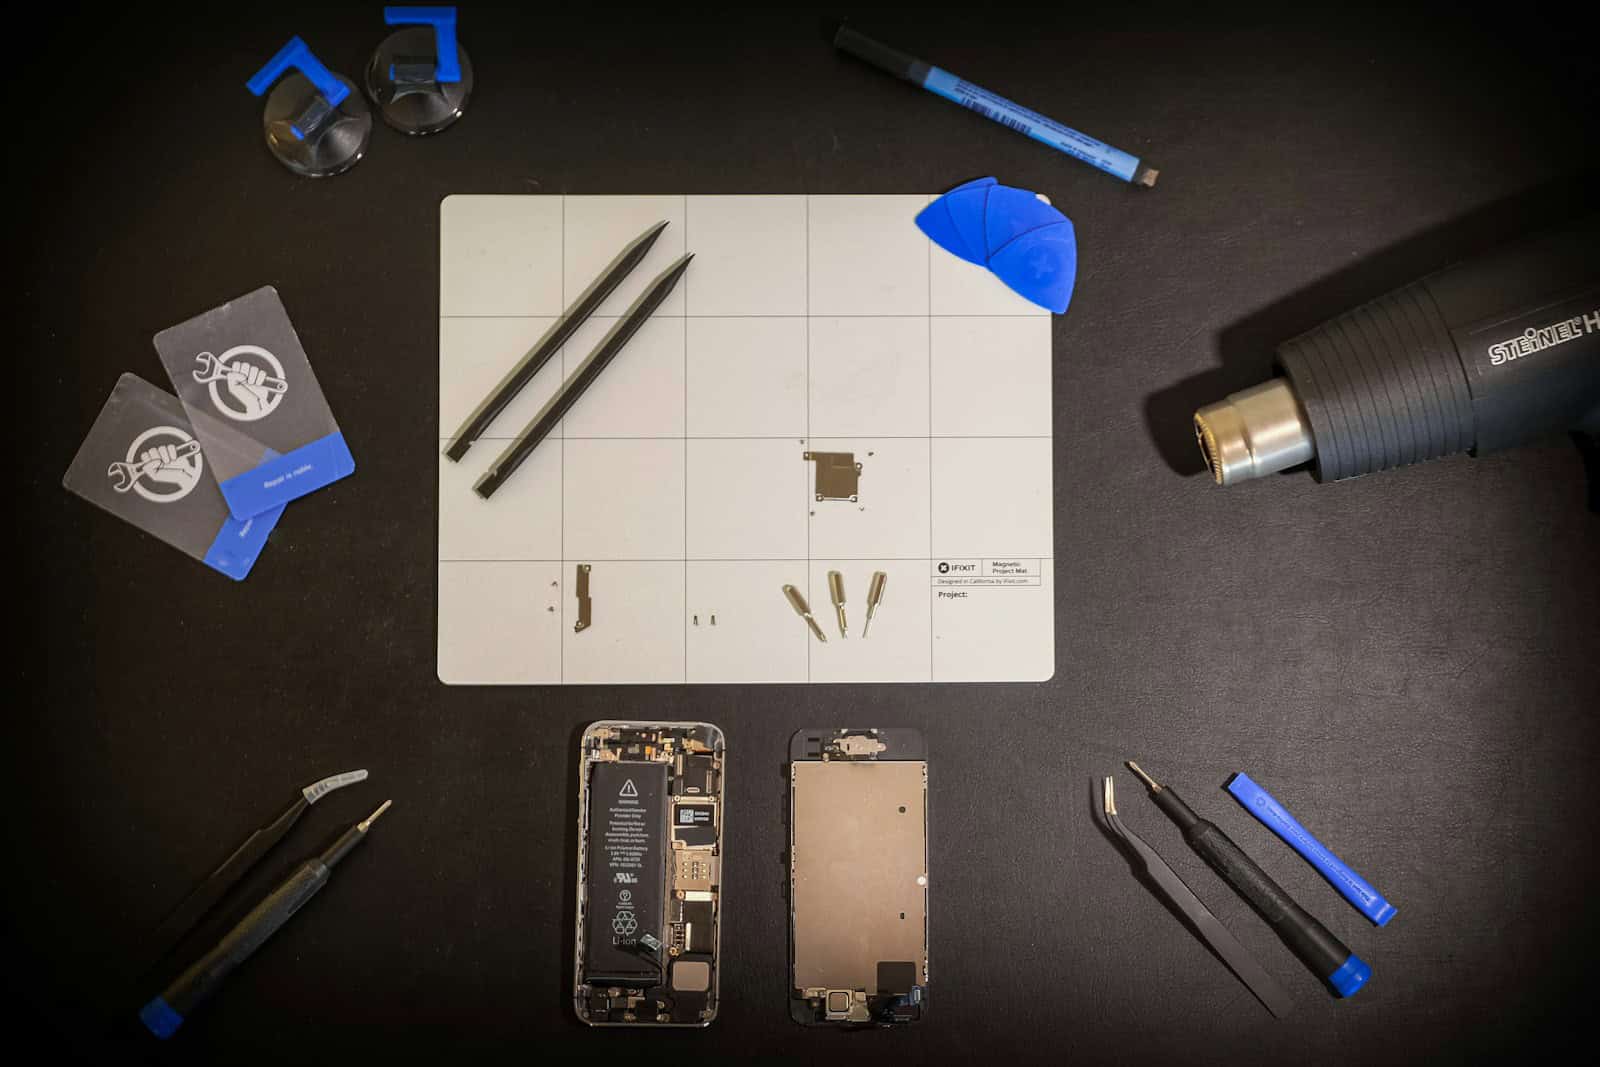
Before diving in, ensure you have the following tools and materials ready:
| Tool/Material | Purpose |
|---|---|
| Pentalobe screwdriver (0.8mm) | To remove the two screws at the bottom of the iPhone |
| Phillips screwdriver (000) | To remove the screws securing the battery and display connectors |
| Spudger or plastic opening tool | To pry open the iPhone and disconnect components |
| Suction cup | To help lift the display after loosening the adhesive |
| Tweezers | To handle small screws and components |
| New iPhone 11 battery | Ensure it’s compatible and from a reputable source |
| Adhesive strips for the battery | To secure the new battery in place |
| Isopropyl alcohol | To clean surfaces and remove old adhesive residue |
Safety First:
- Work on a clean, well-lit surface.
- Turn off your iPhone before starting.
- Be gentle when prying and disconnecting components to avoid damage.
- Handle the battery with care; avoid puncturing or bending it.
Step-by-Step Replacement Process
1. Open the iPhone:
- Remove the two pentalobe screws at the bottom of the iPhone.
- Apply the suction cup to the bottom of the display, near the home button.
- Gently pull the suction cup upwards while using the spudger to pry open a small gap between the display and the frame.
- Slide the spudger around the edges to loosen the adhesive.
- Carefully lift the display and prop it open at a 90-degree angle.
2. Disconnect the Battery:
- Remove the four Phillips screws securing the battery connector bracket.
- Lift the bracket and gently disconnect the battery connector using the spudger.
3. Disconnect the Display and Digitizer:
- Remove the three Phillips screws securing the display connector bracket.
- Lift the bracket and disconnect the three display connectors using the spudger.
- Remove the two Phillips screws securing the digitizer connector bracket.
- Lift the bracket and disconnect the digitizer connector.
- Carefully remove the display assembly.
4. Remove the Old Battery:
- Locate the adhesive pull tabs at the bottom of the battery.
- Slowly and steadily pull each tab at a shallow angle until the adhesive strips come out.
- If the adhesive strips break, use the spudger to gently pry the battery up.
- Once the adhesive is removed, lift the old battery out.
5. Install the New Battery:
- Clean the battery compartment with isopropyl alcohol to remove any adhesive residue.
- Peel off the backing from the new adhesive strips and apply them to the back of the new battery.
- Carefully align and place the new battery in the compartment.
- Press down firmly to ensure the adhesive adheres properly.
6. Reassemble the iPhone:
- Reconnect the digitizer connector and secure its bracket with the two Phillips screws.
- Reconnect the three display connectors and secure their bracket with the three Phillips screws.
- Reconnect the battery connector and secure its bracket with the four Phillips screws.
- Carefully align and lower the display assembly onto the frame.
- Press down firmly around the edges to ensure the adhesive seals properly.
- Reinstall the two pentalobe screws at the bottom of the iPhone.
Post-Replacement Tips
- Charge your iPhone fully after the battery replacement.
- Monitor your battery health in Settings to ensure it’s functioning correctly.
- If you encounter any issues, consider seeking professional assistance.
Remember, while replacing your iPhone 11 battery is achievable at home, it requires patience and precision. If you’re unsure about any step, it’s always better to consult a professional repair service.
Key Takeaways
- Battery replacement can fix slow performance and short battery life
- Proper tools and safety precautions are essential for the repair
- Following a detailed guide helps ensure a successful battery swap
Preparing for Battery Replacement
Replacing an iPhone 11 battery requires careful preparation and the right tools. Safety is key when handling lithium-ion batteries.
Safety and Tool Acquisition
Safety glasses are a must when working on smartphones. They protect your eyes from small parts that may fly loose. You’ll need special tools for this job. A pentalobe screwdriver opens the iPhone 11’s case. Get a suction cup and plastic opening picks to lift the screen. A spudger helps disconnect small parts inside.
For removing the old battery, you’ll need adhesive remover. This can be a heat source like a hair dryer or specialized tools like an iOpener. Adhesive strips help secure the new battery in place.
Initial Disassembly Steps
Start by powering off your iPhone 11. Remove the two pentalobe screws at the bottom edge. They’re tiny, so keep them safe. Use the suction cup to lift the screen slightly. Slide an opening pick around the edges to separate the screen from the body.
Be gentle to avoid damaging the cables connecting the screen to the main board. Once the screen is loose, open it like a book cover. Don’t try to remove it completely yet.
Removing the Battery
Disconnect the battery connector from the logic board. Use the spudger for this step. Now you can safely work on removing the battery. Apply heat to soften the adhesive holding the battery in place. A hair dryer on low heat works well.
Carefully pry up the battery using plastic tools. Never use metal tools – they can puncture the battery. Work slowly and evenly to avoid bending the battery. If it resists, apply more heat and try again. Once loose, lift the battery out of the phone.
Reassembling and Testing the iPhone
After replacing the battery, it’s crucial to put the iPhone 11 back together properly and test its functions. This ensures the device works as intended and remains water-resistant.
Installing the New Battery
Place the new battery in the iPhone 11 carefully. Make sure it sits flat in the battery compartment. Connect the battery cable to the logic board. Press down gently on the connector to secure it.
Apply new adhesive strips to hold the battery in place. Remove the backing from the adhesive strips. Stick them to the bottom of the battery. Press down firmly for 30 seconds to ensure a strong bond.
Reattach any cables or components that were moved during the battery removal. Double-check that all connections are secure before moving on.
Final Steps for Assembly
Carefully lower the display back onto the iPhone body. Line up the top edge first, then lower the bottom. Press along the edges to snap the display into place.
Reattach the display cables to the logic board. These are delicate, so take care not to bend or damage them. Press down on the connectors to secure them.
Replace the metal shield over the display connectors. Tighten the screws to hold it in place. Put the waterproof seals back if they were removed.
Close up the iPhone by replacing the back cover. Make sure it’s aligned properly. Press firmly around the edges to seal it.
Functionality Testing
Turn on the iPhone to check if the new battery works. The Apple logo should appear on the screen. If it doesn’t, check the battery connection.
Test basic functions like the touchscreen, buttons, and cameras. Make sure Face ID still works if your iPhone 11 has it. Open the Settings app and go to Battery. Check that the new battery is recognized.
Try making a call and connecting to Wi-Fi and LTE. Test the speakers and microphone. If any features don’t work, open the iPhone again and check the connections.
Charge the new battery fully before regular use. This helps calibrate it for better performance. Monitor the battery life over the next few days to ensure it’s working correctly.
Frequently Asked Questions
iPhone 11 battery replacement involves several key considerations. Users often have questions about the process, costs, and best practices.
How can I determine if my iPhone 11 battery needs replacement?
Check your battery health in Settings. Look for slow performance and quick draining. If your phone shuts off unexpectedly, it may need a new battery. Apple suggests replacement when battery health drops below 80%.
What is the estimated cost for iPhone 11 battery replacement?
Apple charges $69 for out-of-warranty iPhone 11 battery replacement. Third-party repair shops may offer lower prices. Costs can vary based on location and service provider.
Where can I find a professional service for iPhone 11 battery replacement?
Apple Stores and Authorized Service Providers offer official replacements. Many local repair shops also provide this service. Online directories can help find nearby options.
Is it possible to replace an iPhone 11 battery on my own, and what are the risks?
DIY replacement is possible but risky. It requires special tools and skills. Risks include damaging the phone or voiding the warranty. Incorrect installation can lead to safety issues.
How does the battery health percentage affect the performance of iPhone 11?
Lower battery health can cause slower performance and shorter battery life. The phone may throttle speed to prevent unexpected shutdowns. A healthy battery ensures optimal performance.
What should I look for to ensure I get a genuine iPhone 11 battery replacement?
Use Apple or authorized providers for genuine parts. Check for certification if using third-party services. Genuine batteries have specific markings and come with a warranty. Avoid suspiciously cheap offers, as they may use low-quality batteries.

