Medical ID on an iPhone is a feature provided by Apple that allows users to store important health information which can be accessed in an emergency. This information can include health conditions, allergies, medications, and emergency contacts. The Health app on the iPhone houses Medical ID, making it possible to set up and edit the user’s vital data.
The utility of Medical ID comes into play during situations where the user might not be able to communicate effectively with first responders or healthcare professionals. With safety at the forefront, Medical ID can share critical data from the iPhone or Apple Watch, potentially saving lives. Setting up the feature is straightforward, and it provides peace of mind, knowing that one’s essential health information can be accessed quickly when it matters the most.
Using the Medical ID feature, first responders can view a person’s medical information even from a locked iPhone screen. By enabling ‘Show When Locked,’ users ensure that emergency personnel do not need a passcode to see their Medical ID. The feature can also share information automatically during emergency calls in supported regions.
Your Digital Health Snapshot: A Guide to Setting Up Your Medical ID on iPhone
Why is Medical ID Important?
Your Medical ID is a crucial tool in emergencies. It provides vital health information like allergies, medical conditions, and emergency contacts, even if your iPhone is locked. This can be lifesaving for first responders or Good Samaritans who want to help you.
Step-by-Step Guide to Setting Up Your Medical ID
- Open the Health App: Tap the Health app icon on your iPhone’s home screen.
- Tap Your Profile: Look for your profile picture in the upper-right corner of the Health app and tap it.
- Access Medical ID: Under your profile picture, tap “Medical ID.”
- Get Started or Edit: If you haven’t set up your Medical ID before, tap “Get Started.” If you’re updating existing information, tap “Edit.”
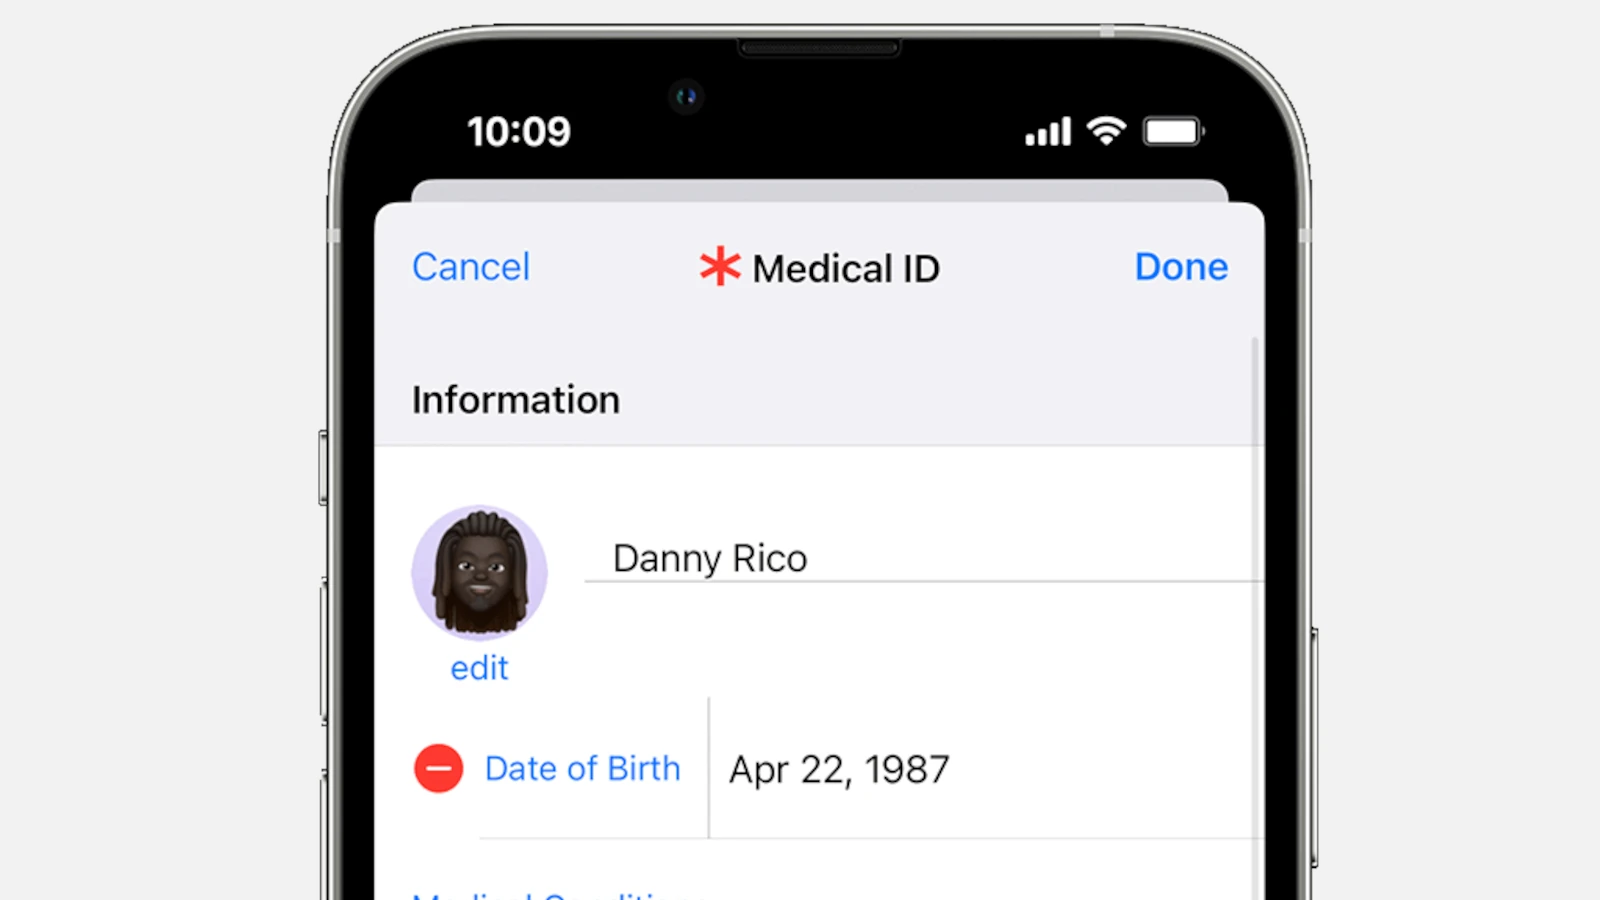
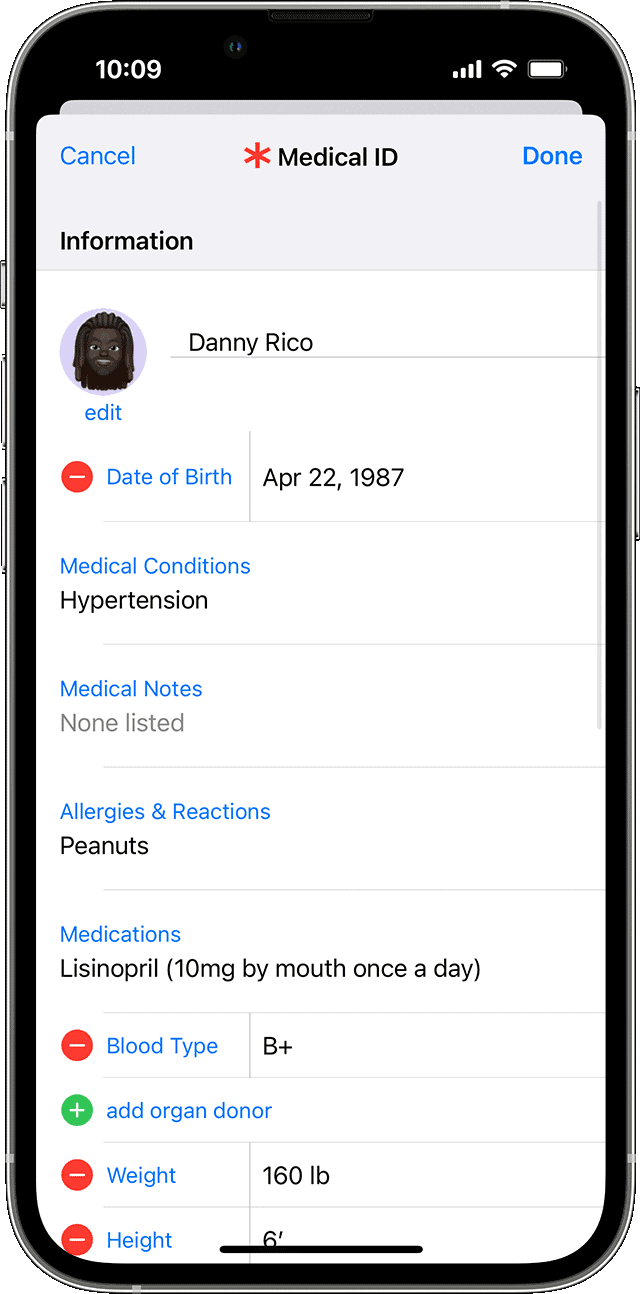
- Enter Your Information: Fill in important details like your name, date of birth, blood type, allergies, medications, medical conditions, emergency contacts, and organ donor status.
- Emergency Contacts: Tap “add emergency contact” and choose contacts from your phonebook. You can also specify their relationship to you (e.g., spouse, parent, friend).
- Show When Locked and Share During Emergency Call: Toggle these options on. This allows your Medical ID to be seen on your lock screen and shared automatically with emergency services when you call or text 911.
- Review and Save: Double-check all your information for accuracy and then tap “Done.”
Important Tips and Considerations
- Keep It Updated: Make sure to review and update your Medical ID regularly, especially if your health information or emergency contacts change.
- Share with Loved Ones: Let your family and close friends know that you have a Medical ID set up on your iPhone.
- Lock Screen Access: Even if your iPhone is locked, anyone can access your Medical ID by tapping the Emergency button on the lock screen, then tapping “Medical ID.”
Your Medical ID: Peace of Mind in an Emergency
Taking a few minutes to set up your Medical ID could make a significant difference in an emergency. It’s a simple yet powerful way to ensure that your critical health information is accessible when it matters most.
Key Takeaways
- Medical ID stores vital health information.
- It’s accessible from the iPhone’s Health app.
- First responders can view Medical ID without a passcode.
Setting Up Medical ID on iPhone
The Medical ID feature on the iPhone ensures quick access to vital health information during an emergency. It allows individuals to store medical details that can be critical for first responders.
Accessing the Health App
To begin setting up a Medical ID, one must find the Health app on their iPhone. It usually has a white icon with a pink heart. Once the app is open, the Summary tab appears at the bottom of the screen. Users should tap their profile icon at the top right to proceed with setting up their Medical ID.
Creating Your Medical ID
Creating a Medical ID involves tapping the Medical ID menu which is visible under the profile options. If it’s the first time, users will see a ‘Get Started’ prompt. By choosing ‘Edit’, they can fill in health information such as medical conditions, allergies, medications, and blood type. The option to set oneself as an organ donor is also available. People can add emergency contacts which ensures the iPhone can alert them after an Emergency SOS call has been made.
Enhancing Accessibility and Security
To make a Medical ID more useful, it’s recommended to enable ‘Show When Locked’. This feature ensures the Medical ID can be accessed from the lock screen without needing a passcode, thus providing crucial information in emergencies. The ‘Edit’ option also allows users to set up a PIN for extra security, determining who gets access to the Medical ID. Additionally, enabling ‘Share During Emergency Call’ will automatically send the Medical ID information to emergency services when an Emergency SOS is activated.
Using Medical ID in Emergencies
The Medical ID on your iPhone offers critical information during emergencies. This feature provides first responders with your medical details and emergency contacts even when your iPhone is locked.
Making an Emergency Call
To make an emergency call, press and hold the power button along with the volume down button. Alternatively, pressing the power button five times rapidly activates the Emergency SOS feature. This will notify your emergency contacts after the call is made.
Medical ID for First Responders
When the iPhone is locked, first responders can view your Medical ID by tapping Emergency on your screen and then Medical ID. This gives them access to essential medical information and emergency contacts that you have set up.
Privacy and Management
You can manage your Medical ID in the Health app. Tap Edit to update your information or to remove certain details. To ensure privacy, you have control over what is included in your Medical ID and what remains hidden from the lock screen.