Pairing your AirPods Pro with different devices unlocks a convenient and high-quality listening experience. To connect to iPhones, Android devices, and other Bluetooth-capable electronics, you’ll need to put your AirPods Pro in pairing mode. Putting them in pairing mode is easy and is the first step to enjoying their wireless convenience. Whether it’s your first time or you need a refresher, this guide will walk you through the simple process of connecting your AirPods Pro to your favorite devices.
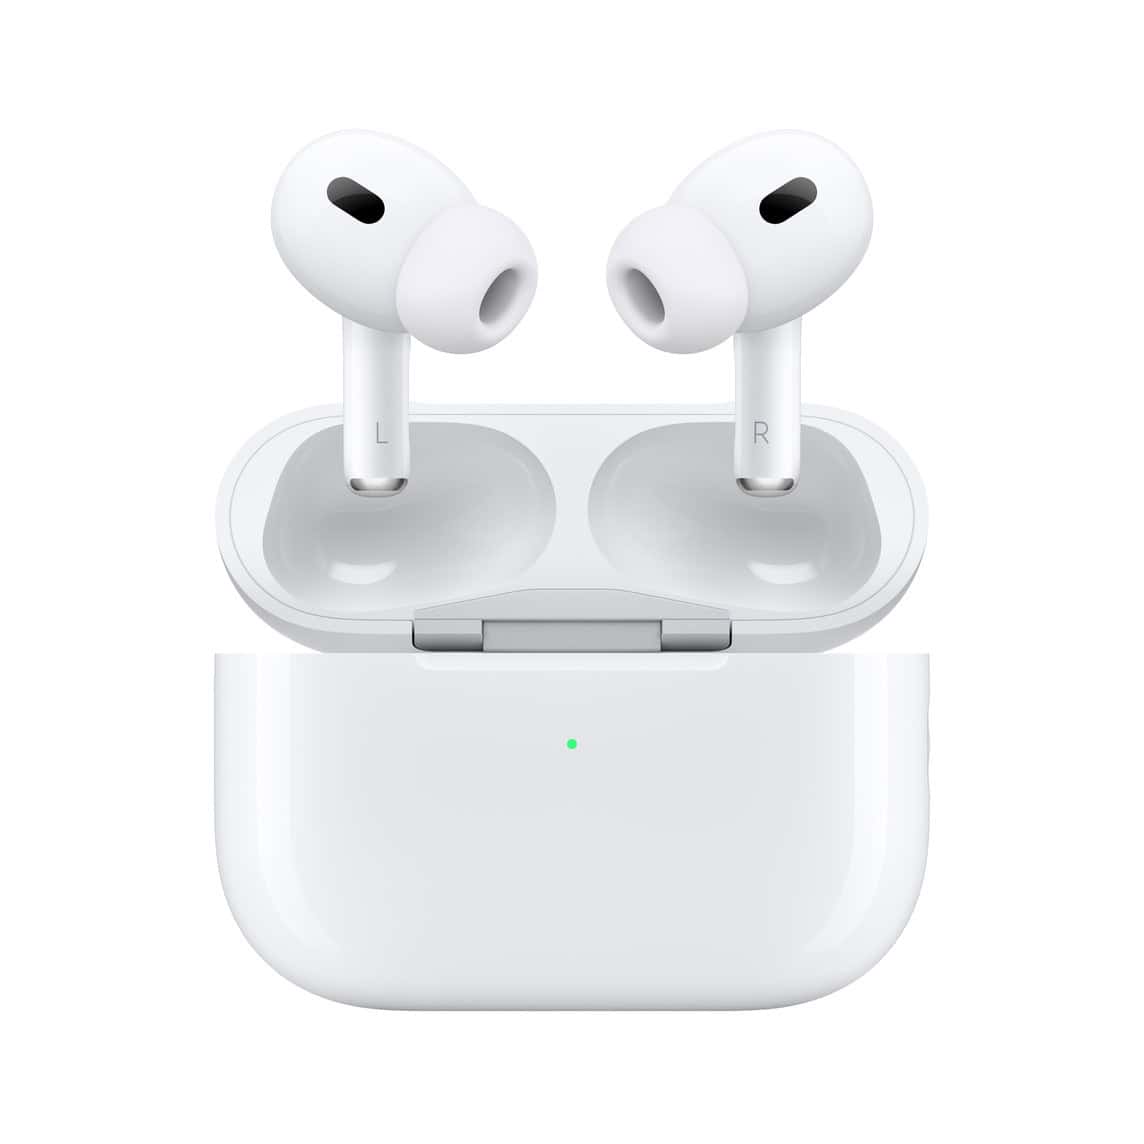
To get started, make sure your AirPods Pro are ready for pairing. With the AirPods in their charging case, open the lid to initiate the setup. This action will prompt the device to enter pairing mode, indicated by a white flashing light. Once in this state, they are discoverable by other devices where Bluetooth settings can be accessed. Open the Bluetooth menu on your chosen device and select the AirPods Pro from the list of available options. Pairing these earbuds quickly enables users to experience seamless audio across their devices. The procedure is designed to be efficient, getting you back to your music or calls with minimal interruption.

Pairing Your AirPods Pro: A Simple Guide
The Setup Button: Your Key to Pairing
Locate the setup button on the back of your AirPods Pro case. It’s a small, circular button that might be flush with the case.
Press and Hold: Activate Pairing Mode
Open the lid of your AirPods Pro case and press and hold the setup button. The status light inside the case will start flashing white. This indicates that your AirPods Pro are now in pairing mode and ready to connect to your device.
Connect to Your Device
On your device, go to the Bluetooth settings and look for “AirPods Pro” in the list of available devices. Select them to initiate the pairing process. Once connected, you should hear a chime in your AirPods Pro, confirming a successful pairing.
Troubleshooting Tips
If your AirPods Pro don’t appear in the list of available devices, try resetting them by pressing and holding the setup button for about 15 seconds until the status light flashes amber, then white. You can also try restarting your device’s Bluetooth or forgetting the AirPods Pro from the list of paired devices before trying to pair again.
Pairing with Multiple Devices
AirPods Pro can remember multiple devices. To switch between devices, simply select “AirPods Pro” from the Bluetooth menu of the device you want to connect to.
Additional Notes
- If you’re pairing your AirPods Pro with an Apple device, you might see a pop-up animation on your device’s screen during the pairing process.
- Once paired, your AirPods Pro should automatically connect to your device whenever they are in range and the case is open.
Key Takeaways
- AirPods Pro can connect to various devices for a flexible listening experience.
- Prepare for pairing by placing them in the charging case and opening the lid.
- Select AirPods Pro from the device’s Bluetooth menu to connect.
Preparing Your AirPods Pro for Pairing
When setting up AirPods Pro for the first time, ensuring they are charged and ready for pairing is crucial. Following these steps will prepare the earbuds to connect with your devices seamlessly.
Checking Battery and Status Light
Before starting the pairing process, check your AirPods Pro battery level to avoid interruptions. Place the AirPods inside the charging case. The status light on the front of the case indicates the battery level with different colors. A green light means the AirPods are fully charged, while an amber light shows less than one full charge remains. If the AirPods are low on battery, charge them before proceeding.
Activating Pairing Mode
To activate pairing mode, first ensure the AirPods Pro are in the charging case. Keep the lid open. Then, locate the setup button on the back of the case. Press and hold this button until the status light flashes white. This signals that your AirPods Pro are ready to pair with your device. Now, you can follow your device-specific instructions to complete the pairing process.
Connecting AirPods Pro to Devices
AirPods Pro can easily connect to various devices using Bluetooth. Each device has a simple set of steps to ensure a quick pairing process.
Pairing with iPhone, iPad, or iPod Touch
- Open the Settings app on your iOS device.
- Select Bluetooth and toggle it on.
- With the AirPods Pro in their charging case, open the lid.
- Hold the case next to your device. Your device will display a setup animation.
- Tap Connect to pair your AirPods Pro.
Linking to Mac or Apple Watch
- On your Mac, open the Apple menu and select System Preferences.
- Click Bluetooth and confirm it is on.
- Put the AirPods Pro in the case and open the lid.
- Press and hold the pairing button on the case until the light flashes white.
- On your Mac, click Connect next to your AirPods listed under devices.
To connect to an Apple Watch:
- Ensure the AirPods Pro are paired with an iPhone linked to the Apple Watch.
- Swipe up on the watch face to open the Control Center.
- Tap the AirPlay icon.
- Choose AirPods Pro as the output device.
Connecting to Non-Apple Devices
- Open the settings on your non-Apple device and enable Bluetooth.
- With the AirPods in their charging case, open the lid.
- Press and hold the pairing button on the case until the light flashes white.
- Select
AirPods Profrom the list of available devices on your non-Apple device.
Using with Other Bluetooth-Enabled Devices
- Make sure the device has Bluetooth turned on.
- Open the AirPods Pro case, holding the pairing button until the light flashes.
- Find the AirPods Pro in your device’s Bluetooth settings and select them to connect.
For devices like TVs or gaming consoles, refer to their user manual for specific Bluetooth pairing instructions. Remember that AirPods Pro work best with other Apple products and may not support all features on non-Apple devices.

