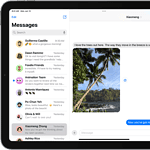
Sharing your screen during a FaceTime call can be a game changer when you need to show something on your iPhone or iPad to family, friends, or coworkers. This feature makes it easy to guide someone through an app, share photos, or help troubleshoot tech problems without being in the same room. To share your screen in FaceTime, simply start a call, tap the screen to show controls, tap the Share Content button, and select “Share My Screen.”
This helpful tool, introduced in iOS 15.1 and iPadOS 15.1, lets you share your iPhone screen or display your iPad screen while still seeing and talking to the other person. It’s perfect for teaching grandparents how to use a new app, showing off vacation photos, or getting tech support from a friend when something isn’t working right.
How to Share Your Screen in FaceTime on iPhone or iPad
Screen sharing during a FaceTime call can be incredibly useful, whether you’re helping a friend troubleshoot an app, showing off a photo album, or collaborating on a document in real-time. Apple made this feature smooth and intuitive, especially if you’re running iOS 15 or later. Here’s how you can get started.
Step-by-Step: Share Your Screen on FaceTime
- Start a FaceTime Call
Begin by launching the FaceTime app and calling the person you want to share your screen with. You can also use the Contacts app to initiate a FaceTime call directly. - Open the Control Panel
Once the call has connected, look for the FaceTime controls. Tap the screen to bring up the options if they’re hidden. - Tap the Share Content Button
You’ll see an icon that looks like a rectangle with a person in front—this is the SharePlay or Screen Sharing button. Tap it. - Select “Share My Screen”
A prompt will appear confirming you want to share your screen. Tap “Share My Screen” to begin. After a short countdown (usually 3 seconds), your screen will be visible to everyone on the call. - Navigate Freely
Once the screen is shared, you can move between apps, scroll web pages, or launch games. Anything you do on the screen will be visible to the other participant(s)—with a purple screen share icon showing in the status bar to remind you.
Things You Can Share (and What You Can’t)
| ✅ Shareable Content | 🚫 Restricted Content |
|---|---|
| Apps & App Screens | Apple Pay / Payment Screens |
| Photos & Videos | DRM-protected streaming (e.g. Netflix) |
| Web Browsing | Certain content in Safari (copy-protected) |
| Files and Documents | System Settings (limited visibility) |
| Notes or Whiteboards | FaceTime App UI itself |
Apple prioritizes privacy—so some sensitive content, especially anything that uses DRM or contains financial info, is intentionally hidden.
Pro Tips for a Smoother Experience
- Turn On Do Not Disturb:
You don’t want notifications or texts popping up while sharing your screen. Activate Focus Mode or Do Not Disturb before you begin. - Use Split View (iPad only):
If you’re on an iPad, you can use Split View to show two apps at once during a screen share. Great for multitasking! - Portrait Mode Still Works:
Your camera feed still stays active while you’re screen sharing, unless you manually turn it off. - Tap the Purple Icon to Stop:
You’ll always see a purple pill or icon at the top of your screen while sharing. Tap it to instantly stop screen sharing without ending the call.
Compatible Devices & iOS Versions
Not every iPhone or iPad supports screen sharing in FaceTime. Here’s a quick compatibility reference:
| Device Type | Minimum Model | Minimum iOS/iPadOS Version |
|---|---|---|
| iPhone | iPhone XR or newer | iOS 15 |
| iPad | iPad 6th Gen or newer | iPadOS 15 |
| iPad Pro | All models | iPadOS 15 |
If you’re not seeing the option to share your screen, make sure your device is up-to-date. You can check in Settings > General > Software Update.
What About Group FaceTime?
Yes, screen sharing works in group calls too! When you start sharing, everyone in the call can see your screen. Only one person can share at a time, so if someone else wants to take over, they’ll need to wait until you stop.
Tip: In group calls, a small window shows who’s currently sharing their screen. Tap on it to expand it to full view.
FaceTime Screen Sharing vs SharePlay
They’re related—but not the same. Screen sharing lets others view everything on your device. SharePlay, on the other hand, is focused on sharing specific content like:
- Apple TV movies and shows
- Apple Music tracks
- Third-party SharePlay-compatible apps like TikTok, Twitch, or Disney+
If you want to watch a movie together during a call, SharePlay is the better choice. If you want to guide someone through settings or show how an app works, go with screen sharing.
FaceTime screen sharing is a handy tool, whether you’re helping your grandparents fix their settings or collaborating with coworkers remotely. It’s Apple simplicity at its best—just tap, share, and go.
Key Takeaways
- Screen sharing works on any iPhone or iPad running iOS/iPadOS 15.1 or newer.
- Tap the Share Content button during a FaceTime call to start showing your screen.
- You can continue talking while sharing your screen, making it perfect for demonstrations and tech support.
Understanding Screen Sharing in FaceTime
FaceTime screen sharing lets you show your iPhone or iPad screen to others during calls, making it easy to browse together, share photos, or get tech help.
The Basics of Screen Sharing
Screen sharing in FaceTime became available in iOS 15.1 and iPadOS 15.1. To start sharing your screen, you first need to be in an active FaceTime call.
During your call, tap the screen to display the FaceTime controls if they aren’t visible. Then tap the Share Content button, which looks like a rectangle with a person icon.
You’ll see two options:
- Share My Screen: Shows everything on your device
- Share Play: Shares specific content like videos or music
After tapping “Share My Screen,” the app will count down from 3 before it begins sharing. Everyone on the call will then be able to see what’s on your screen.
To stop sharing, tap the screen to bring up the controls and select the SharePlay icon again.
FaceTime Screen Share vs. Screen Mirroring
Screen sharing in FaceTime differs from screen mirroring in important ways. When you share your screen on FaceTime, you’re showing your display only to the people in your call.
Screen mirroring, by contrast, casts your entire screen to another device like an Apple TV or smart TV. It’s meant for displaying content on a larger screen rather than for collaboration.
Key differences include:
- Audience: FaceTime sharing is for people in your call; mirroring is for displaying on a TV
- Control: Others can request to take over screen sharing during FaceTime
- Purpose: FaceTime sharing is for collaboration and help; mirroring is for presentations or viewing
Screen sharing works on most Apple devices running recent operating systems, making it versatile for different situations.
Setting Up Your Devices for FaceTime Screen Sharing
Screen sharing on FaceTime lets you show others what’s on your device during calls. This feature requires specific software versions and follows simple steps to activate through your device settings.
Requirements for FaceTime Screen Sharing
To use screen sharing on FaceTime, you need an iPhone or iPad running iOS 15.1 or iPadOS 15.1 or later. All participants in the call must also have compatible devices with these software versions.
Make sure your device has:
- Updated to the latest iOS/iPadOS
- Active internet connection
- FaceTime app installed
- Apple ID signed in
Screen sharing works on:
- iPhone (iOS 15.1+)
- iPad (iPadOS 15.1+)
- Mac computers with latest macOS
Not all older Apple devices support this feature, even with updated software. Check if your model is compatible before trying to use screen sharing.
Using Control Center for Screen Sharing
During a FaceTime call, you can start sharing your screen with a few taps. First, tap the screen to show FaceTime controls if they aren’t visible.
To share your screen:
- Tap the Share Content button (rectangle with person icon)
- Select Share My Screen
- A countdown will appear (3…2…1)
- Your screen is now shared with call participants
While sharing, a purple indicator appears at the top of your screen. To stop sharing, tap the Share Content button again and select Stop Sharing.
You can also use Control Center during screen sharing to access other apps without interrupting the share. Just swipe down from the top-right corner to open Control Center while keeping your screen visible to others.
How to Share iPhone and iPad Screen During a FaceTime Call
Sharing your screen during FaceTime calls lets you show photos, help someone with tech issues, or browse websites together. This feature works on iPhones and iPads running iOS 15.1 or iPadOS 15.1 and later.
Starting Screen Share on FaceTime
To begin sharing your screen on an iPhone, first open the FaceTime app and start a call with one or more people. Once connected, tap the screen to make the controls appear if they’re hidden.
Look for the Share Content button (a rectangle with a person in front of it) in the controls. Tap this button, then select Share My Screen option. A countdown will appear: “Screen sharing will begin in 3…2…1.”
Your entire screen is now visible to everyone on the call. A red outline or indicator appears around your screen to remind you that sharing is active.
For iPad users, the process is nearly identical. During your FaceTime call on iPad, tap to reveal controls and press the Share Content button.
Managing Participants During Screen Sharing
While sharing your screen, you can still see and hear other participants. Their video thumbnails appear in a small floating window that you can move around your screen as needed.
To stop sharing at any time, tap the screen to bring up the FaceTime controls and tap the Share Content button again. Then select Stop Sharing.
For privacy during screen sharing, remember these tips:
- Close sensitive apps before sharing
- Turn off notifications temporarily (use Focus mode)
- Be aware that participants can see everything on your screen
If you need to switch to sharing specific content rather than your whole screen, tap the Share Content button and choose SharePlay options instead of screen sharing. This lets you share specific media like music or videos more efficiently.
Common Scenarios for Sharing Content on FaceTime
FaceTime screen sharing opens up many ways to connect with friends and family or work with colleagues no matter where you are. This feature lets you share exactly what’s on your screen during a call.
Screen Share Netflix on FaceTime
Watching shows together is one of the most popular uses for screen sharing on FaceTime. To share Netflix, first open the app on your device before or during your FaceTime call.
During your call, tap the screen to show controls, then tap the Share Content button (looks like a rectangle with a person in front). Select “Share My Screen” and everyone in the call will see what’s on your display.
Netflix isn’t the only streaming service you can share. Disney+ and Hulu work just as well with this feature.
Remember that while sharing your screen, all notifications and app switches will be visible to others. Put your phone in Do Not Disturb mode for uninterrupted viewing.
Sometimes viewers might see a black screen instead of your content. This usually happens with copyright-protected content or when switching between apps too quickly.
Collaborative Work and Presentations
FaceTime screen sharing makes teamwork much easier, especially for remote collaboration. You can share documents, presentations, or websites with colleagues during virtual meetings.
When working together on a project, you can show spreadsheets, documents, or designs in real-time. This helps everyone stay on the same page.
To make presentations more effective:
- Prepare your materials before starting the call
- Close unnecessary apps to avoid distractions
- Increase brightness for better visibility
- Speak clearly while explaining what’s on screen
The feature works well for troubleshooting too. If someone needs help with their iPhone or iPad settings, you can show them exactly what to tap on your own device.
Teachers and tutors find this tool valuable for explaining concepts or walking through homework problems with students.
Troubleshooting FaceTime Screen Sharing Issues
When screen sharing stops working on FaceTime, it can be frustrating, but most problems have simple solutions. The issues typically stem from software glitches, outdated iOS versions, or network connectivity problems.
Fixing a Non-Working FaceTime Screen Share
If your FaceTime screen share button appears grayed out or unclickable, you’re not alone. Many users reported this issue after updating to iOS 16.3. The first step is to restart your device – simply press and hold the wake button until the Apple logo appears.
Make sure your iOS is up to date. Outdated software often causes screen sharing features to malfunction.
Check your contact names for emojis. Surprisingly, having emoji characters in contact names can prevent screen sharing from working properly.
Quick fixes to try:
- Force close the FaceTime app and reopen it
- Check if SharePlay is enabled in Settings
- Ensure both parties have compatible devices
- Reset network settings if other solutions fail
Addressing Connectivity Problems
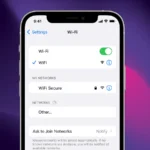
Poor internet connection is often the culprit behind screen sharing issues. For optimal performance, connect to a strong Wi-Fi network rather than using cellular data.
During a call, tap the screen to reveal the FaceTime controls if they’re not visible. Then locate the Share Content button to begin sharing.
If screen sharing starts but appears glitchy, check your bandwidth. Screen sharing requires significant data, so close background apps that might be using internet resources.
Network troubleshooting steps:
- Toggle Airplane Mode on and off
- Restart your Wi-Fi router
- Move closer to your router for stronger signal
- Try connecting to a different network if possible
On newer iOS versions like iOS 18, users might encounter display issues such as rounded corners or border problems when sharing their screen.
Alternative Methods for Sharing Screens Across Devices
While FaceTime screen sharing works great between Apple devices, several other methods offer flexibility when sharing screens across different platforms. These alternatives support a wider range of devices and provide unique features for specific use cases.
Using AirPlay for Wireless Streaming
AirPlay offers a simple way to share your iPhone or iPad screen to larger displays. To use it, swipe down from the top-right corner of your screen to open Control Center, then tap the Screen Mirroring button.
Your device will search for available AirPlay receivers like Apple TV or smart TVs with AirPlay support. Once connected, everything on your screen appears on the larger display.
This works great for presentations, showing photos, or watching videos together. The connection is wireless and typically very stable over a good Wi-Fi network.
For the best experience, make sure both your iOS device and the receiving device are on the same Wi-Fi network. AirPlay doesn’t just work with Apple TV – many smart TVs now have built-in AirPlay support.
Third-Party Screen Mirroring Apps
Several apps extend screen sharing capabilities beyond Apple’s ecosystem. Apps like AnyViewer allow sharing between iOS and Windows PCs, while others support Android devices or smart TVs.
These apps often provide features FaceTime doesn’t, such as:
- Remote control of the shared screen
- Cross-platform support (iOS to Android)
- Recording options for screen sessions
- Multiple viewer support for team presentations
Some popular options include:
- LetsView (free, works with many devices)
- ApowerMirror (supports iOS to Android)
- Reflector (turns computers into AirPlay receivers)
Most third-party apps require installation on both devices. Some offer free versions with basic features, while premium versions remove ads and add extra capabilities.
QuickTime for Mac Screen Sharing
QuickTime Player offers a simple built-in option for sharing your iPhone or iPad screen to a Mac. Connect your iOS device to your Mac with a Lightning cable, open QuickTime, and select “New Movie Recording.”
Click the dropdown arrow next to the record button and select your iOS device as the camera source. Your device screen appears on your Mac instantly.
This method provides excellent quality with no lag since it uses a wired connection. It’s perfect for demonstrations, tutorials, or recording iOS content.
QuickTime also lets you record the shared screen, making it useful for creating tutorials. The connection is plug-and-play – no additional software needed beyond what comes with your Mac.
This method works well when you need to share your phone screen during video calls on your computer or when creating content.
Advanced FaceTime Screen Sharing
FaceTime screen sharing offers powerful features beyond basic screen viewing. These tools let users collaborate effectively through visual annotations and even remote screen control options.
Live Screen Drawing and Annotation
When sharing your screen on FaceTime, you can use drawing tools to highlight important information. To access these features, start a FaceTime call and share your screen by tapping the Share Content button in the FaceTime controls.
Once sharing begins, tap the annotation tool in the corner of your screen. This opens a palette with pens, highlighters, and colors. You can circle important details, underline text, or draw arrows to point things out.
These tools work great for:
- Explaining complex ideas visually
- Helping someone navigate settings
- Marking up photos or documents
- Teaching someone how to use an app
The annotations disappear when you stop sharing screen, so take screenshots of important markups if needed.
Controlling Another User’s Screen
FaceTime on macOS Monterey and newer versions allows for remote screen control. This powerful feature lets you temporarily take over another person’s device to help solve problems.
To use this feature:
- Start a FaceTime call
- Ask the other person to share their screen
- Tap “Request Control” in your FaceTime controls
- They must approve your request
Once granted control, your mouse and keyboard inputs will work on their device. This is incredibly helpful for:
- Fixing technical problems remotely
- Guiding less tech-savvy users through complex tasks
- Setting up new software without being physically present
Either person can end the control session at any time. Look for the “End Control” button in the FaceTime controls to stop the remote access while continuing the screen sharing.
Frequently Asked Questions
Screen sharing on FaceTime lets iPhone and iPad users show their screens during calls. This helps with tech support, showing photos, or walking someone through an app.
How can I enable screen sharing on FaceTime for my iPhone?
To share your screen on FaceTime, start a FaceTime call first. When the call connects, tap the screen to show the controls if they aren’t visible.
Look for the Share Content button (it looks like a rectangle with a person silhouette). Tap it and then select “Share My Screen” from the options that appear.
Your screen sharing will begin after a three-second countdown. The person on the other end must be using an Apple device with iOS 15.1 or later.
What steps are needed to share my iPhone screen to a TV?
To share your iPhone screen to a TV, you’ll need an Apple TV device or a smart TV with AirPlay support. Make sure both your iPhone and TV are connected to the same Wi-Fi network.
Open Control Center by swiping down from the top-right corner of your screen. Tap “Screen Mirroring” and select your Apple TV or compatible smart TV from the list.
If prompted, enter the AirPlay code that appears on your TV screen. Your iPhone screen will now display on the TV.
How do I resolve issues with screen sharing not working during a FaceTime call?
If screen sharing isn’t working on FaceTime, check that everyone in the call has a compatible device. Both parties need iOS or iPadOS 15.1 or later for this feature to work.
Restart the FaceTime app or reboot your device if problems persist. This often fixes temporary glitches with the app.
Check your internet connection. A weak Wi-Fi signal can cause screen sharing to fail or appear choppy. Try moving closer to your router or switching to a stronger network.
Is it possible to share my screen from an iPhone to another iPhone via FaceTime?
Yes, you can share your screen from one iPhone to another using FaceTime. Both iPhones must be running iOS 15.1 or later for this feature to work.
Start a FaceTime call with the other iPhone user. After connecting, tap the Share Content button and select “Share My Screen.”
The other person will receive a notification asking if they want to view your shared screen. Once they accept, they’ll be able to see everything on your iPhone display.
What should I do if I can’t share my screen on FaceTime on my Mac?
If screen sharing isn’t working on your Mac, make sure you’re running macOS Monterey 12.1 or later. This is the minimum requirement for FaceTime screen sharing.
Check that your Mac’s camera and microphone permissions are enabled for FaceTime. Go to System Preferences > Security & Privacy > Privacy > Camera/Microphone and ensure FaceTime is checked.
Restart your Mac if problems continue. Sometimes a simple reboot can fix connection issues that prevent screen sharing from working properly.
Can I share my screen from my iPhone to my iPad, and if so, how?
Yes, you can share your iPhone screen to an iPad through FaceTime. Start a FaceTime call from your iPhone to the iPad.
Once connected, tap the screen to show the FaceTime controls. Tap the Share Content button and select “Share My Screen” option.
Both devices need to be running iOS/iPadOS 15.1 or later. They should also be signed in with Apple ID accounts that can communicate with each other.