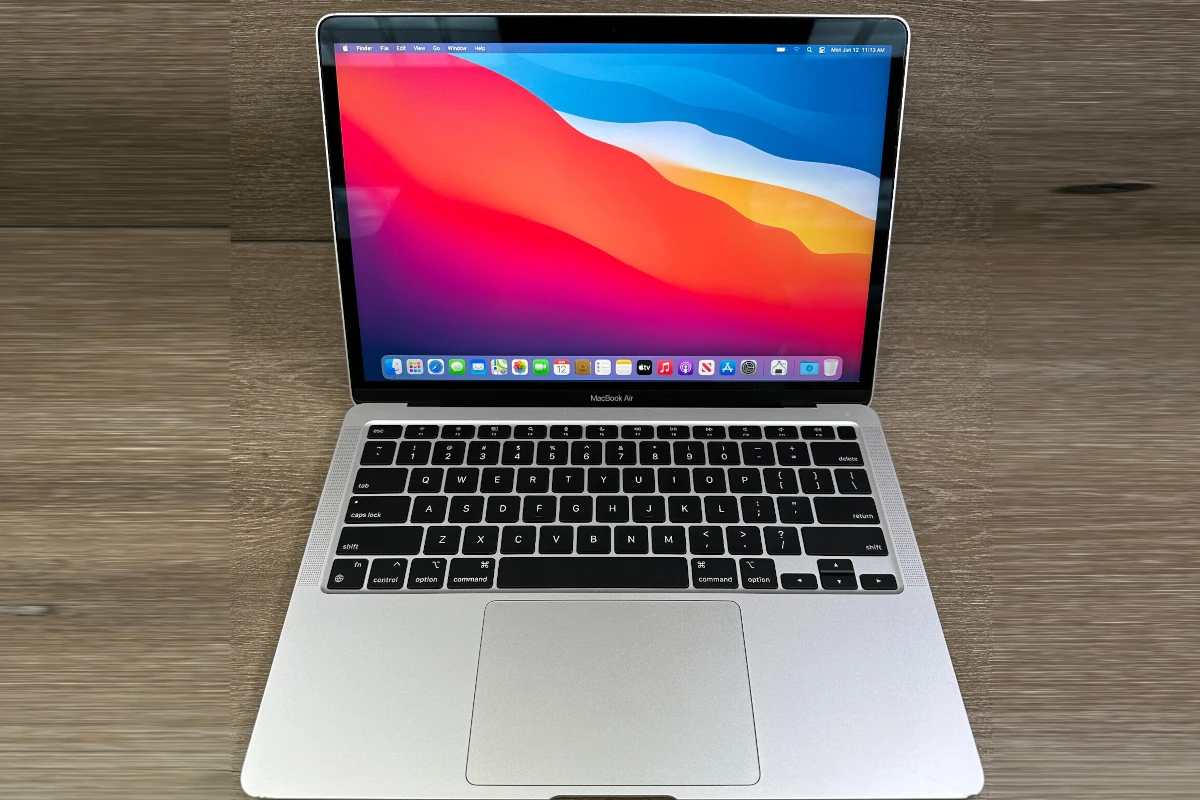
Target Disk Mode is a handy feature for Mac users who need to transfer files between computers quickly. You can use Target Disk Mode to turn one Mac into an external drive for another Mac, making data transfer and troubleshooting easier. This tool is built into macOS and works with most Mac models.
To use Target Disk Mode, you’ll need two Macs and a compatible cable. The process is simple: start up one Mac in Target Disk Mode, connect it to the other Mac, and transfer files as if you were using an external hard drive. This method is often faster than using cloud storage or other network-based file sharing options.
Target Disk Mode is useful for many tasks. You can transfer large files quickly, migrate data to a new Mac, or even boot from another Mac’s drive to troubleshoot issues. It’s a powerful tool that every Mac user should know how to use.
| Mac Model | Cable Type | Compatible With |
|---|---|---|
| Intel Mac | Thunderbolt or USB | Other Intel Macs |
| M1/M2 Mac | USB-C | Other M1/M2 Macs |
Target Disk Mode: Using Your Mac as an External Drive
Target Disk Mode is a special feature on Macs that allows you to use one Mac as an external hard drive for another Mac. This can be extremely useful for transferring large amounts of data quickly, troubleshooting a Mac that won’t start up, or accessing files on a Mac with a broken screen.
How to Use Target Disk Mode
1. Connect the Macs:
- Use a Thunderbolt cable (preferred), FireWire cable, or USB-C cable to connect the two Macs.
- Important: If either Mac has macOS Big Sur (11) or later, you must use a Thunderbolt cable.
2. Start the Mac in Target Disk Mode:
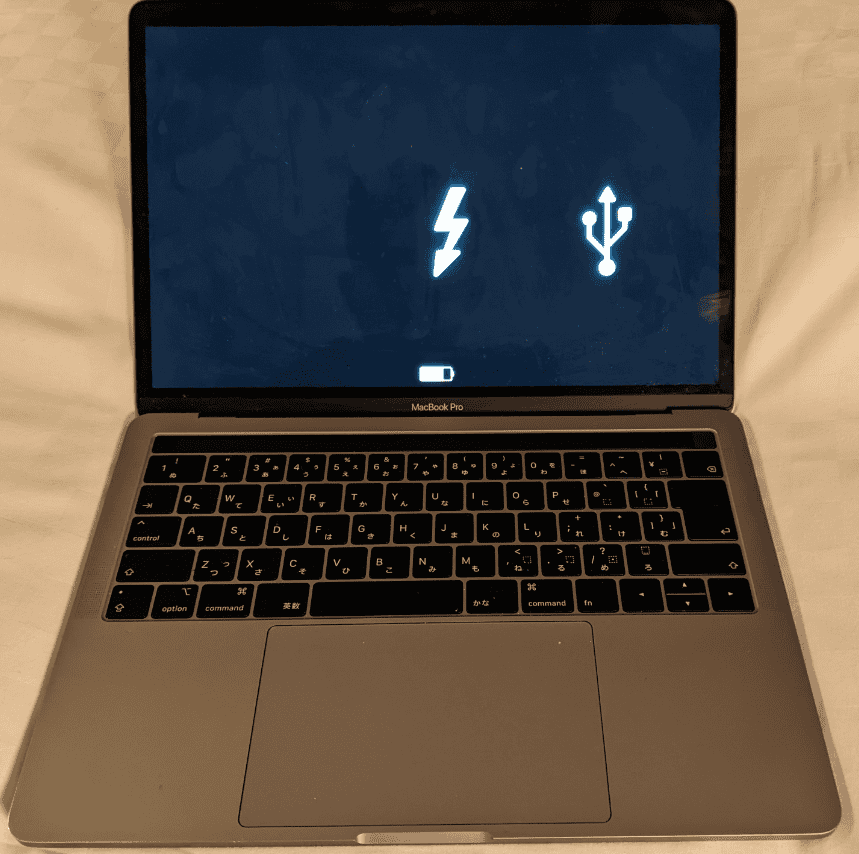
- If the Mac is off: Press the power button and immediately press and hold the T key until the Thunderbolt icon (or FireWire or USB icon) appears on the screen.
- If the Mac is on: Go to Apple menu > System Settings > General > Startup Disk, then click Restart in Target Disk Mode.
3. Access the Drive:
- The Mac in Target Disk Mode will appear as an external drive on the other Mac’s desktop. You can now access and transfer files between the two Macs.
When to Use Target Disk Mode
Here are some common scenarios where Target Disk Mode can be helpful:
- Transferring large files: Target Disk Mode offers a faster transfer speed compared to Wi-Fi or cloud storage.
- Troubleshooting a Mac: If your Mac won’t start up normally, you can use Target Disk Mode to access its hard drive and try to recover data or reinstall macOS.
- Accessing files on a Mac with a broken screen: If your Mac’s screen is damaged but the hard drive is still functional, you can use Target Disk Mode to retrieve your files.
- Migrating data to a new Mac: Target Disk Mode can be used with Apple’s Migration Assistant to easily transfer your files and settings to a new Mac.
Important Notes
- File system compatibility: Make sure both Macs have compatible file systems (e.g., APFS or HFS+).
- macOS versions: While Target Disk Mode generally works across different macOS versions, using a Thunderbolt cable is recommended for optimal compatibility, especially with newer macOS versions.
- Security: The Mac in Target Disk Mode is essentially an unlocked external drive. Be mindful of where you use this feature to protect your data.
Target Disk Mode vs. File Sharing
While both Target Disk Mode and file sharing allow you to access files on another Mac, they have key differences:
| Feature | Target Disk Mode | File Sharing |
|---|---|---|
| Connection | Direct cable connection | Network connection (Wi-Fi or Ethernet) |
| Speed | Very fast | Slower, depends on network speed |
| Access Level | Full access to the entire hard drive | Controlled access to shared folders |
| Security | Lower, drive is unlocked | Higher, requires authentication |
Target Disk Mode is ideal for situations where you need fast, direct access to the entire hard drive, while file sharing is better for ongoing access with controlled permissions and better security.
Understanding Target Disk Mode
Target Disk Mode lets you use one Mac as an external drive for another Mac. This feature simplifies file transfers and troubleshooting between Macs.
Concept and Usage
Target Disk Mode transforms a Mac into an external hard drive. This allows you to access its files from another Mac. You can use it to transfer large amounts of data or troubleshoot issues on a non-working Mac.
To use Target Disk Mode, connect two Macs with a compatible cable. The target Mac appears as an external drive on the host Mac. You can then drag and drop files between the two devices.
This mode is particularly useful for data migration or recovery. It provides direct access to files when a Mac won’t boot normally.
Requirements for Target Disk Mode
To use Target Disk Mode, you need:
- Two Mac computers
- A compatible cable (Thunderbolt or USB-C)
- MacOS installed on both devices
For Intel-based Macs, you can start Target Disk Mode by holding the T key during startup. Macs with Apple Silicon require a different method.
| Mac Type | Starting Target Disk Mode |
|---|---|
| Intel-based | Hold T key during startup |
| Apple Silicon | Use Startup Disk settings |
Ensure both Macs are powered on and running compatible MacOS versions for the best results.
Compatible Mac Models
Most Mac models support Target Disk Mode. This includes:
- MacBook Pro
- MacBook Air
- iMac
- Mac mini
- Mac Pro
Newer Macs with Apple Silicon (M1 chip or later) use a slightly different process. They require you to select Target Disk Mode from the Startup Disk settings.
Intel-based Macs from the past decade are generally compatible. Check your Mac’s specifications if you’re unsure about compatibility.
Remember, the connecting cable must match the ports on both Macs. Use Thunderbolt or USB-C cables as needed.
Setting Up Target Disk Mode
Target Disk Mode lets you access files on one Mac from another. This feature is useful for data transfer and troubleshooting. Here’s how to set it up and use it effectively.
Step-by-Step Process
Connect the two Macs using a Thunderbolt or USB-C cable.
On the Mac you want to use as a disk, restart or turn it on.
For Intel Macs: Hold the T key immediately after hearing the startup chime.
For Apple Silicon Macs: Press and hold the power button until you see startup options.On Apple Silicon Macs, select “Target Disk Mode” from the menu.
The target Mac’s screen will display a disk icon, indicating it’s in Target Disk Mode.
On the other Mac, the target Mac should appear as an external drive in Finder.
You can now access files on the target Mac as if it were an external hard drive.
Startup Options and Key Combinations
| Mac Type | Key Combination | Action |
|---|---|---|
| Intel | T key | Enter Target Disk Mode |
| Apple Silicon | Power button | Show startup options |
For Apple Silicon Macs, you can also set Target Disk Mode as the default startup option:
- Open System Settings.
- Click “General” then “Startup Disk”.
- Choose “Target Disk Mode” as the startup option.
FileVault may need to be disabled for full access in Target Disk Mode.
Troubleshooting Common Issues
If Target Disk Mode isn’t working:
Check your cable connection. Use a different cable if necessary.
Ensure both Macs are compatible with the same connection type.
Try a different port on both Macs.
Disable FileVault on the target Mac if you can’t access files.
Reset the System Management Controller (SMC) on Intel Macs.
If you have a firmware password set, you’ll need to enter it to use Target Disk Mode.
For persistent issues, try booting into Recovery Mode and using Disk Utility to check for drive problems.
Transferring Data Using Target Disk Mode
Target Disk Mode enables easy file transfer between Macs. This method allows you to access one Mac’s hard drive from another Mac, simplifying data migration and backup processes.
Using Finder for File Transfer
To use Finder for file transfer, first put one Mac in Target Disk Mode. Connect both Macs with a compatible cable. On the other Mac, open a Finder window. The Target Disk Mode Mac appears as an external drive.
Drag and drop files between the two Macs. This works well for transferring specific folders or files. For large transfers, consider using an external hard drive as an intermediate step.
Remember to eject the Target Disk Mode Mac when finished. Drag its icon to the Trash or use the eject button in Finder.
Leveraging Migration Assistant
Migration Assistant offers a more comprehensive data transfer solution. It moves your entire user account, including apps and settings.
To use Migration Assistant with Target Disk Mode:
- Boot the source Mac in Target Disk Mode
- Connect it to the destination Mac
- Open Migration Assistant on the destination Mac
- Choose “From a Mac, Time Machine backup, or startup disk”
- Select the Target Disk Mode Mac as the source
Migration Assistant transfers your data, apps, and settings. This process may take several hours depending on the amount of data.
Backup Strategies with Time Machine
Time Machine works well with Target Disk Mode for backups. Connect an external drive to your Mac and set it up as a Time Machine backup destination.
To restore from a Time Machine backup using Target Disk Mode:
- Boot the destination Mac in Target Disk Mode
- Connect it to another Mac with the Time Machine backup
- Use Migration Assistant to restore from the backup
This method allows you to restore your entire system or select specific files and folders.
| Transfer Method | Best For | Speed | Ease of Use |
|---|---|---|---|
| Finder | Specific files | Fast | Easy |
| Migration Assistant | Full system transfer | Slow | Medium |
| Time Machine | Full backups and restores | Medium | Easy |
Advanced Usage and Considerations
Target disk mode offers powerful capabilities beyond basic file transfers. It enables secure data access and performance optimization across different Mac models and external devices.
Security and Data Protection
When using target disk mode, protect your data carefully. Always eject the target disk properly before disconnecting. This prevents data corruption or loss.
For Intel-based Macs, set a firmware password to restrict unauthorized access. Apple Silicon Macs have built-in security features that prevent target disk mode without user authentication.
Consider encrypting sensitive files before transfer. FileVault full-disk encryption adds an extra layer of protection for your entire drive.
Performance Optimization
Choose the fastest available connection for optimal transfer speeds. Thunderbolt 3 offers the best performance on supported Macs, followed by USB 3.0 and FireWire.
Close unnecessary apps on both Macs to free up system resources. This can significantly boost transfer speeds.
For large transfers, connect your Macs to power to prevent unexpected shutdowns.
Alternative Data Transfer Methods
While target disk mode is versatile, other options may suit specific needs better:
- AirDrop: Fast wireless transfers for smaller files
- External drive: Simple option for offline transfers
- Cloud storage: Convenient for remote access and sharing
| Method | Pros | Cons |
|---|---|---|
| Target Disk Mode | Direct access, fast | Requires cable, limited to Macs |
| AirDrop | Wireless, easy setup | File size limits, range restricted |
| External Drive | Works with any computer | Extra hardware needed |
| Cloud Storage | Access anywhere | Internet required, potential security concerns |
For system migrations, Apple’s Migration Assistant offers a guided process that can be simpler than manual transfers via target disk mode.
Frequently Asked Questions
Target Disk Mode on Mac can be complex. Here are answers to common questions about using this feature effectively and safely.
How do I initiate Target Disk Mode on a Mac with Apple silicon?
To start Target Disk Mode on an Apple silicon Mac:
- Turn off the Mac.
- Connect it to another Mac with a USB-C or Thunderbolt cable.
- Press and hold the power button until you see startup options.
- Choose “Target Disk Mode” from the menu.
What steps are required to connect a Mac to a PC using Target Disk Mode?
Connecting a Mac to a PC in Target Disk Mode requires extra software:
- Install MacDrive on your PC.
- Boot your Mac in Target Disk Mode.
- Connect the Mac to your PC with a compatible cable.
- Use MacDrive to access Mac-formatted drives on your PC.
Why is my Mac not appearing as a disk when using Target Disk Mode?
If your Mac doesn’t show up in Target Disk Mode:
- Check cable connections.
- Try a different port or cable.
- Ensure both computers are compatible with Target Disk Mode.
- Restart both machines and try again.
How can I safely exit Target Disk Mode on my Mac?
To exit Target Disk Mode safely:
- Eject the Target Mac’s drive from the host computer.
- Press the power button on the Target Mac to shut it down.
- Disconnect the cable between the computers.
Can Target Disk Mode be used on a Mac that is not booting properly?
Yes, Target Disk Mode can help with non-booting Macs:
- Connect the non-booting Mac to a working Mac.
- Start the non-booting Mac in Target Disk Mode.
- Access files or run repair tools from the working Mac.
Are there any risks associated with using Target Disk Mode for data transfer?
Risks of Target Disk Mode include:
- Data loss if cables are disconnected during transfer.
- Potential for malware spread between connected machines.
- Accidental file deletion or overwriting.
Always back up important data before using Target Disk Mode.
| Aspect | Intel Mac | Apple Silicon Mac |
|---|---|---|
| Initiation | Hold ‘T’ during startup | Use startup menu |
| Cable | Thunderbolt or FireWire | USB-C or Thunderbolt |
| Compatibility | Works with most Macs | Limited to newer models |
| Boot Options | Can boot directly | Requires startup menu |

